Yes, you can replace your attic door pull string with a hook, and the whole swap takes about five minutes once the stairs are down. Lower the pull-down stairs first, cut the old cord out, and fit a 3 inch eye hook through the cord hole with a washer and nut on the inside. Then make a simple pull rod from a 3 foot dowel with a small hook screwed into the end, and keep the rod on a nail nearby. The result is a clean ceiling, no dangling cord, and a door you can still open easily whenever you need it.
If the cord is already broken and the door is latched shut, do not force it. You will need a long hook or a pole to snag the latch first, and only then can you start the swap. That one detail saves a lot of frustration, and it is the step most guides skip.
Why That Dangling String Bothers Everyone
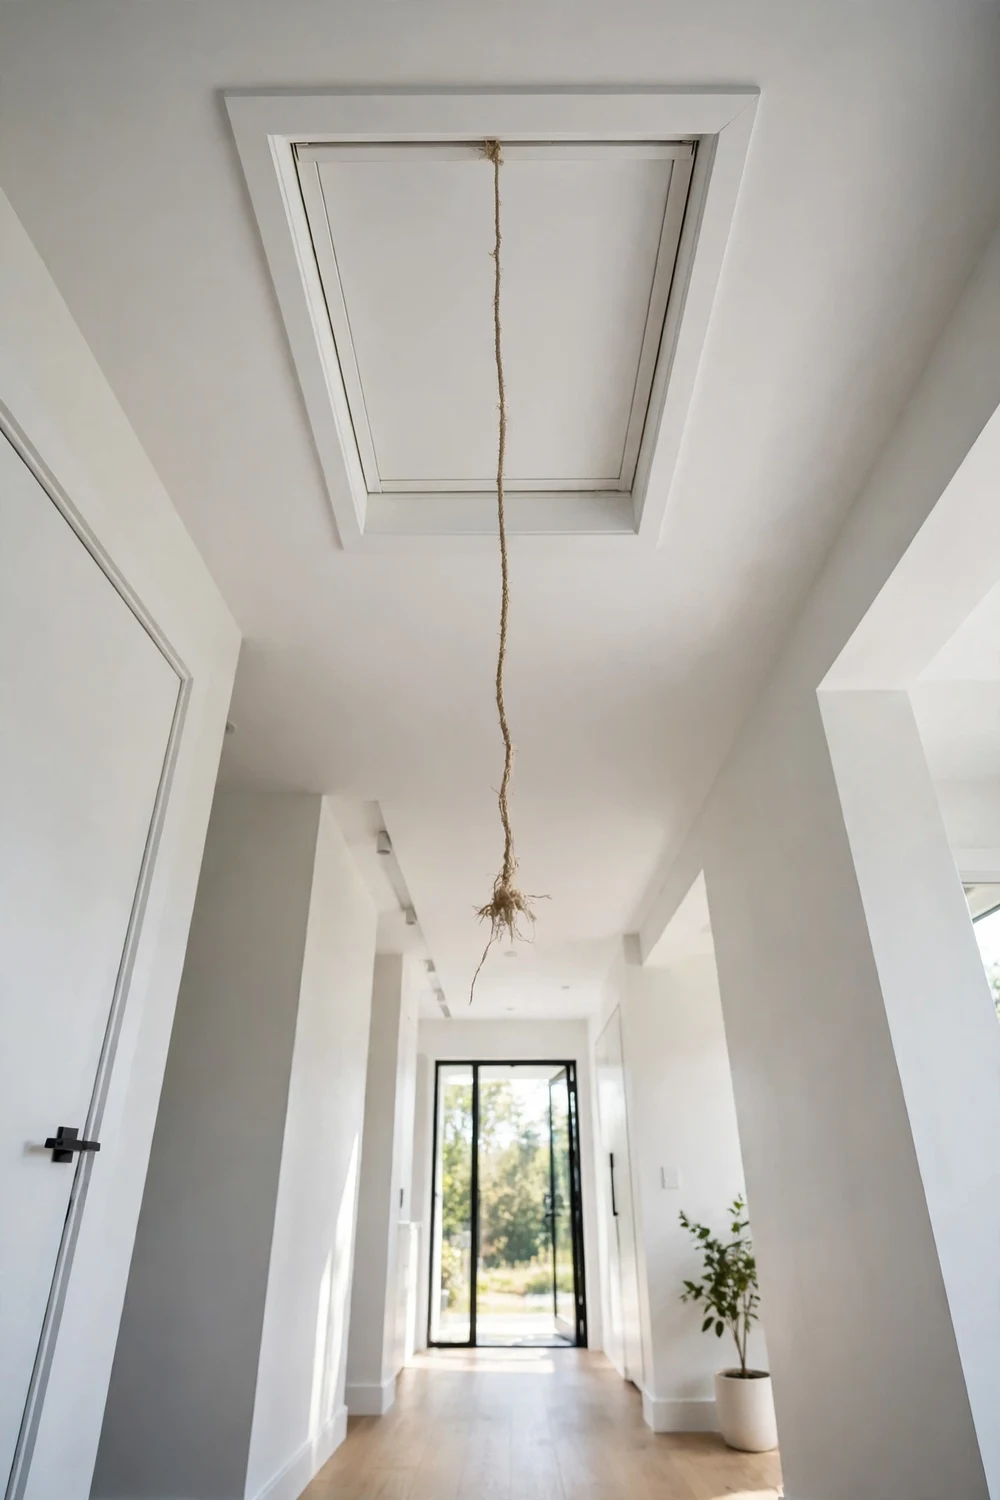
Walk into almost any hallway with a pull-down attic ladder and your eye goes straight to the same thing. A thin cord hangs from the ceiling, a little frayed at the end, swinging slightly every time someone walks past. It is not broken. It is not dangerous. It just looks unfinished, like a job someone meant to come back to and never did.
The cord is there for a reason, of course. It gives you something to grab so you can pull the attic door down. Without it, the door sits flush with the ceiling and there is nothing to hold. So most of us leave the cord alone for years, even though we notice it every single day. It catches the eye in a hallway that is otherwise tidy, and it can snag on a tall picture frame, a coat, or a ladder carried through the hall.
In my own home, I would pick the hook every time, and not only because it looks better. A hook turns a dangling loose end into a deliberate detail. The ceiling stays clean, the door still opens in seconds, and the pull rod lives quietly on a nail by the door frame instead of hanging in the middle of the room. It is one of those small fixes that makes a hallway feel finished, in the same way that upgrading crown molding and baseboards for a custom look makes a plain room feel considered.
What You Need: Tools and Parts With the Right Sizes
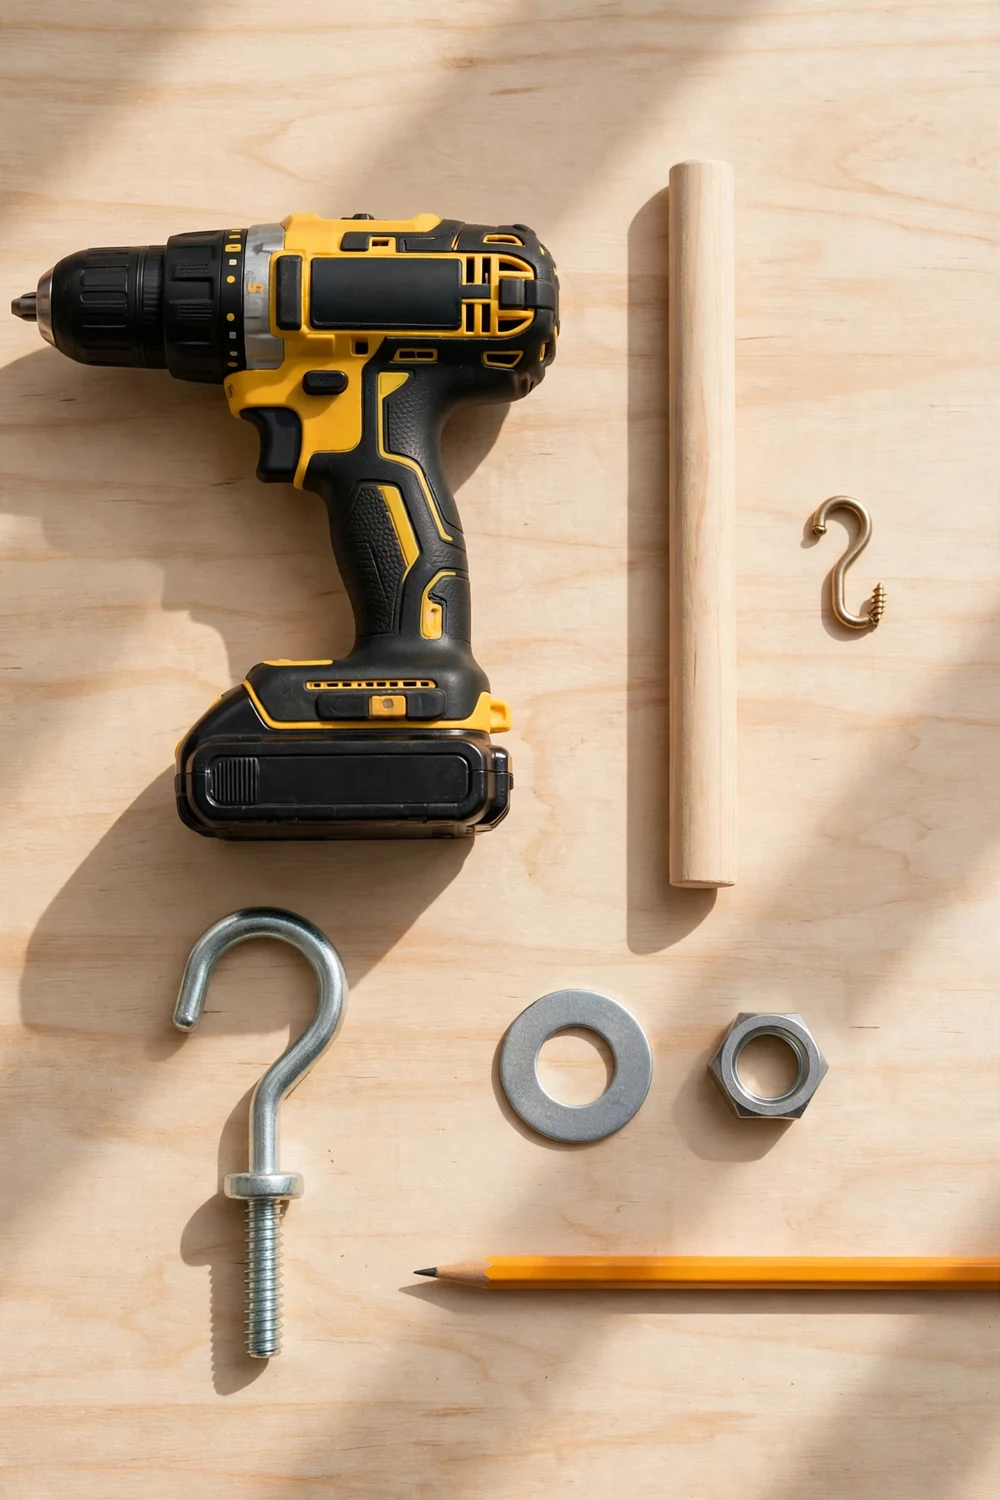
One of the best things about this job is how little it asks of you. There is no special tool to buy and no trip to a specialist supplier. Most of the parts are the kind of thing a hardware store keeps in a small drawer near the screws, and you may already have some of them in a toolbox at home.
Start with the eye hook itself. A 3 inch eye hook is the size that works best for most attic doors, because the loop is large enough to catch with a pull rod and small enough to sit neatly against the door panel. A much smaller hook can be fiddly to catch, especially in a dim hallway, while a much larger one starts to look clumsy and can stick down further than it needs to. If your door panel is unusually thick, check that the threaded shank is long enough to pass through the panel with room for a washer and nut on the inside.
On the tools side, gather a pair of scissors or a utility knife to cut the old cord, a drill with a bit for widening the hole if needed, a screwdriver or a small wrench for the nut, and a pencil. A step ladder helps you reach the ceiling comfortably, and a helper makes the whole job easier, particularly when you lower the stairs. Keep a small nail or a screw-in hook ready too, because that is what you will use to store the pull rod when you are done. If you are the kind of person who likes a tidy hallway, the same thinking that goes into mudroom lighting ideas to brighten your entryway applies here: give every useful object a proper home and the space looks cared for.
The Step by Step Swap: Five Minutes, In the Right Order
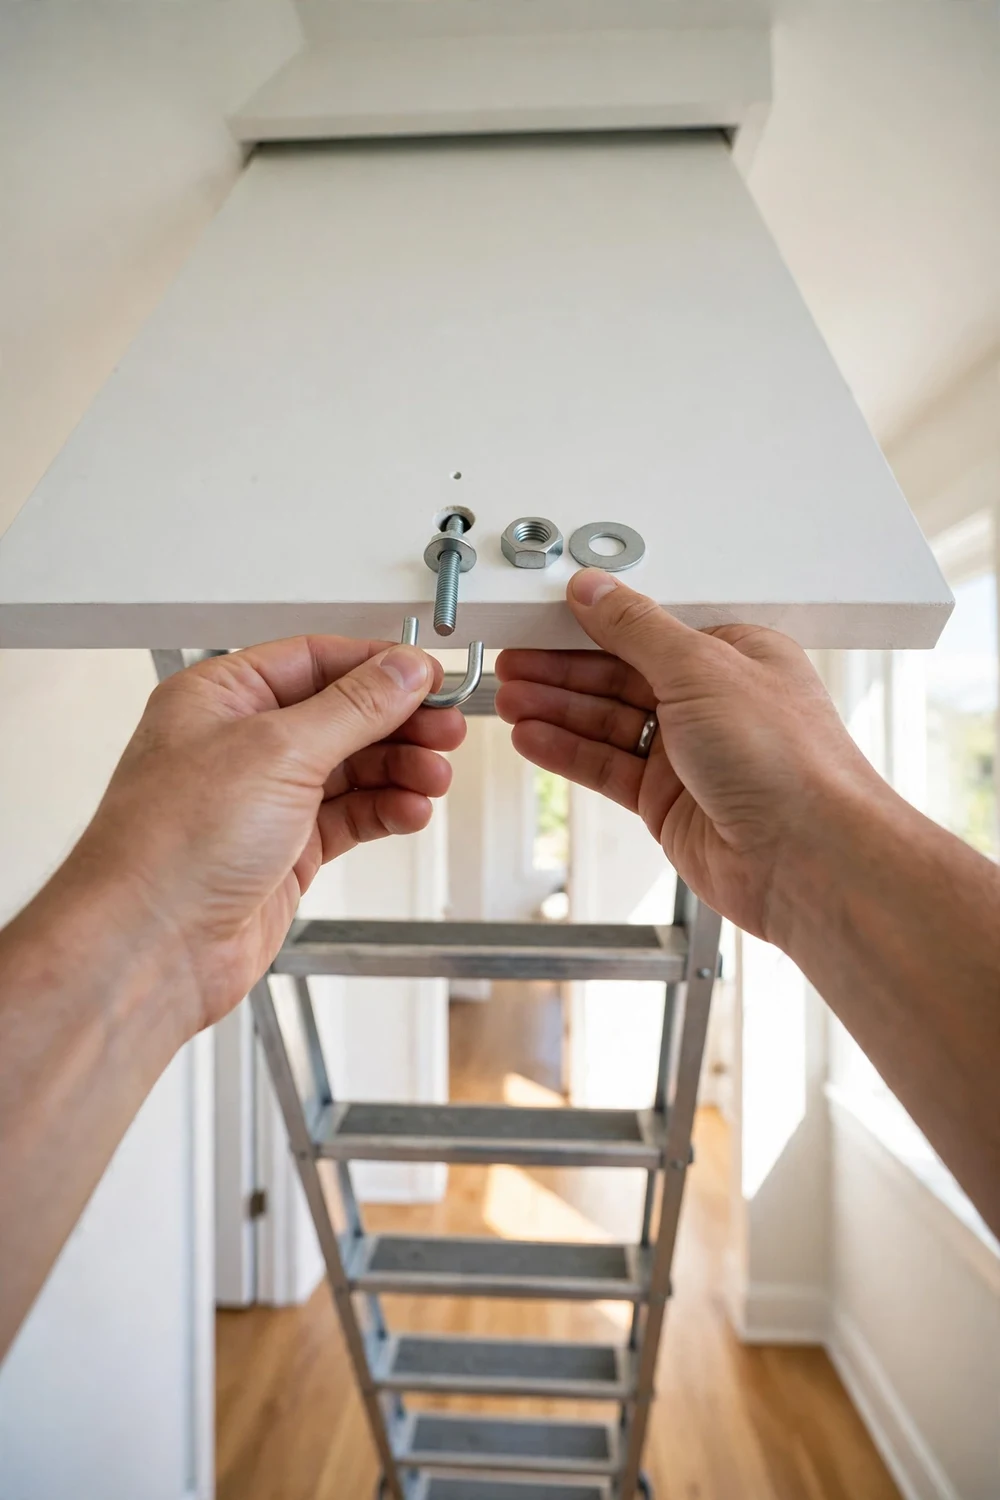
The order matters more than the speed here. Do the steps in the sequence below and the job stays simple. Skip the first step and you can end up with a latched door and no way to open it, which turns a five minute fix into a much longer afternoon.
First, lower the pull-down stairs. Pull the cord down in a smooth, straight motion until the door opens and the ladder unfolds, then set the ladder firmly on the floor. Working with the stairs down gives you safe access to both sides of the door panel, and it means you are never trying to fit hardware to a door that is shut above your head. If the cord is already broken and the door is latched shut, stop here. You need a long hook or a pole to reach up, snag the latch, and pull the door open before you cut or remove anything. A wire coat hanger bent into a hook can work in a pinch, but a proper long reach hook is easier and safer.
Next, cut the old cord out. With the stairs down and the door panel within easy reach, snip the cord close to the door and pull the rest of it through the hole. Keep the piece you remove, just for a moment, so you can compare its thickness with the new hook and see exactly where the hole sits. If the cord is knotted on the attic side, undo the knot or cut above it, and clear any frayed fibres from the hole so the hook sits cleanly.
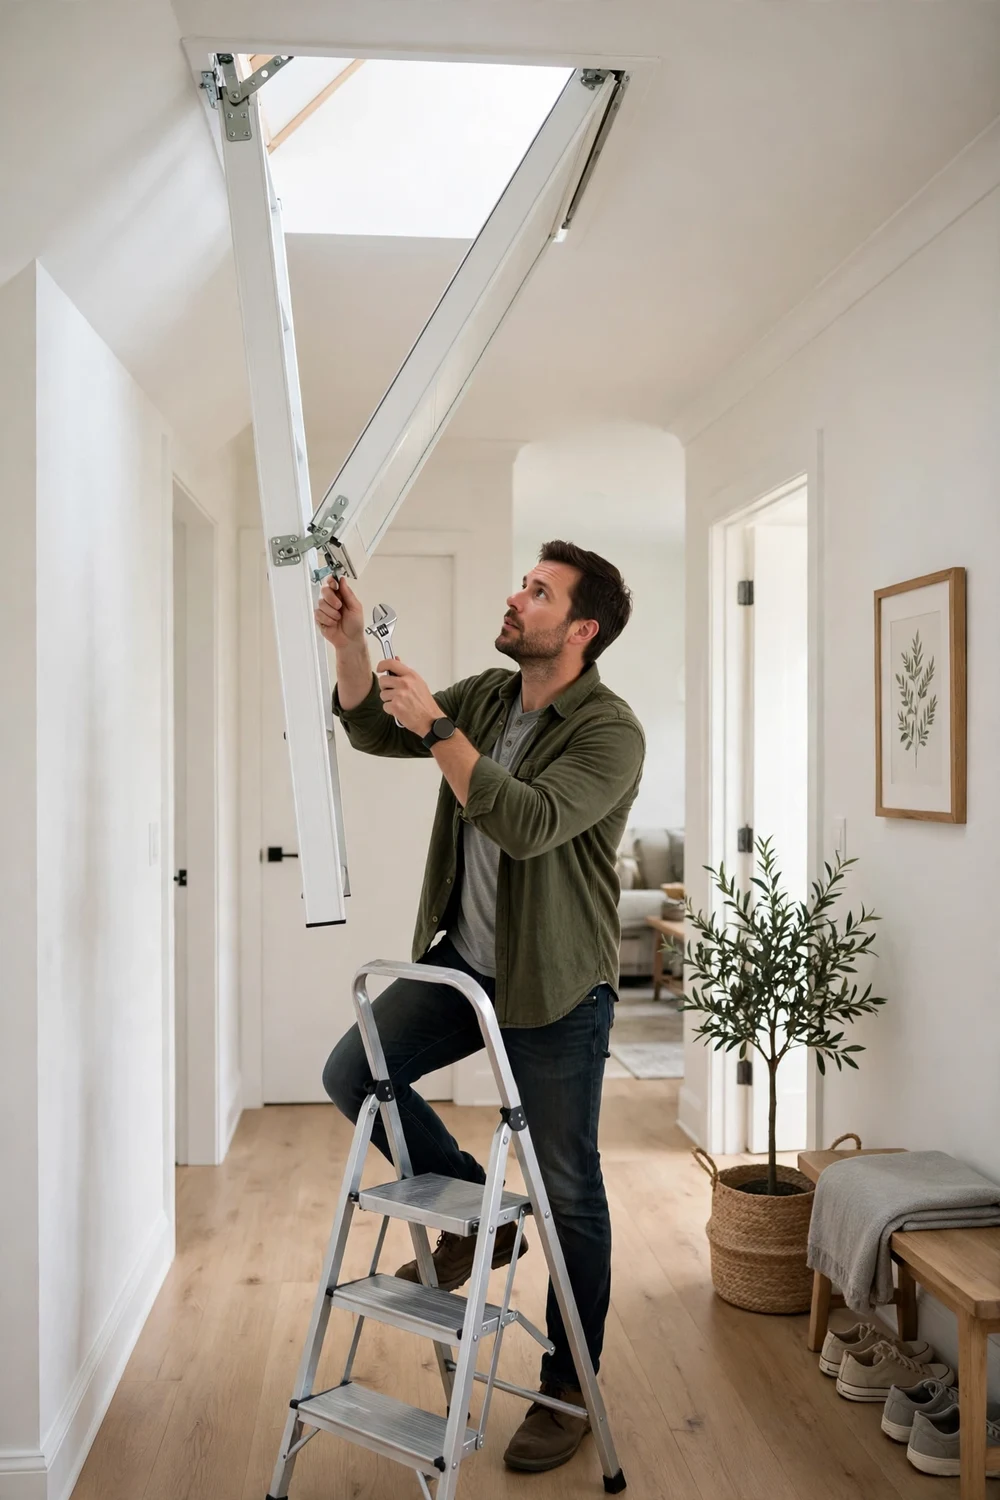
Now fit the eye hook. Push the threaded end of the 3 inch eye hook up through the cord hole from below, so the loop hangs down on the room side and the thread pokes through on the attic side. If the hole is too tight, widen it slightly with a drill, taking off only a little material at a time. A hole that is just snug is ideal. Too loose, and the hook will wobble; too tight, and you risk splitting a thin panel. On the attic side, slide the washer over the thread, then spin the nut on and tighten it firmly with a wrench. The washer should sit flat against the panel with no gap, and the hook should feel solid when you tug it gently from below.
Make a Pull Rod and Give It a Home
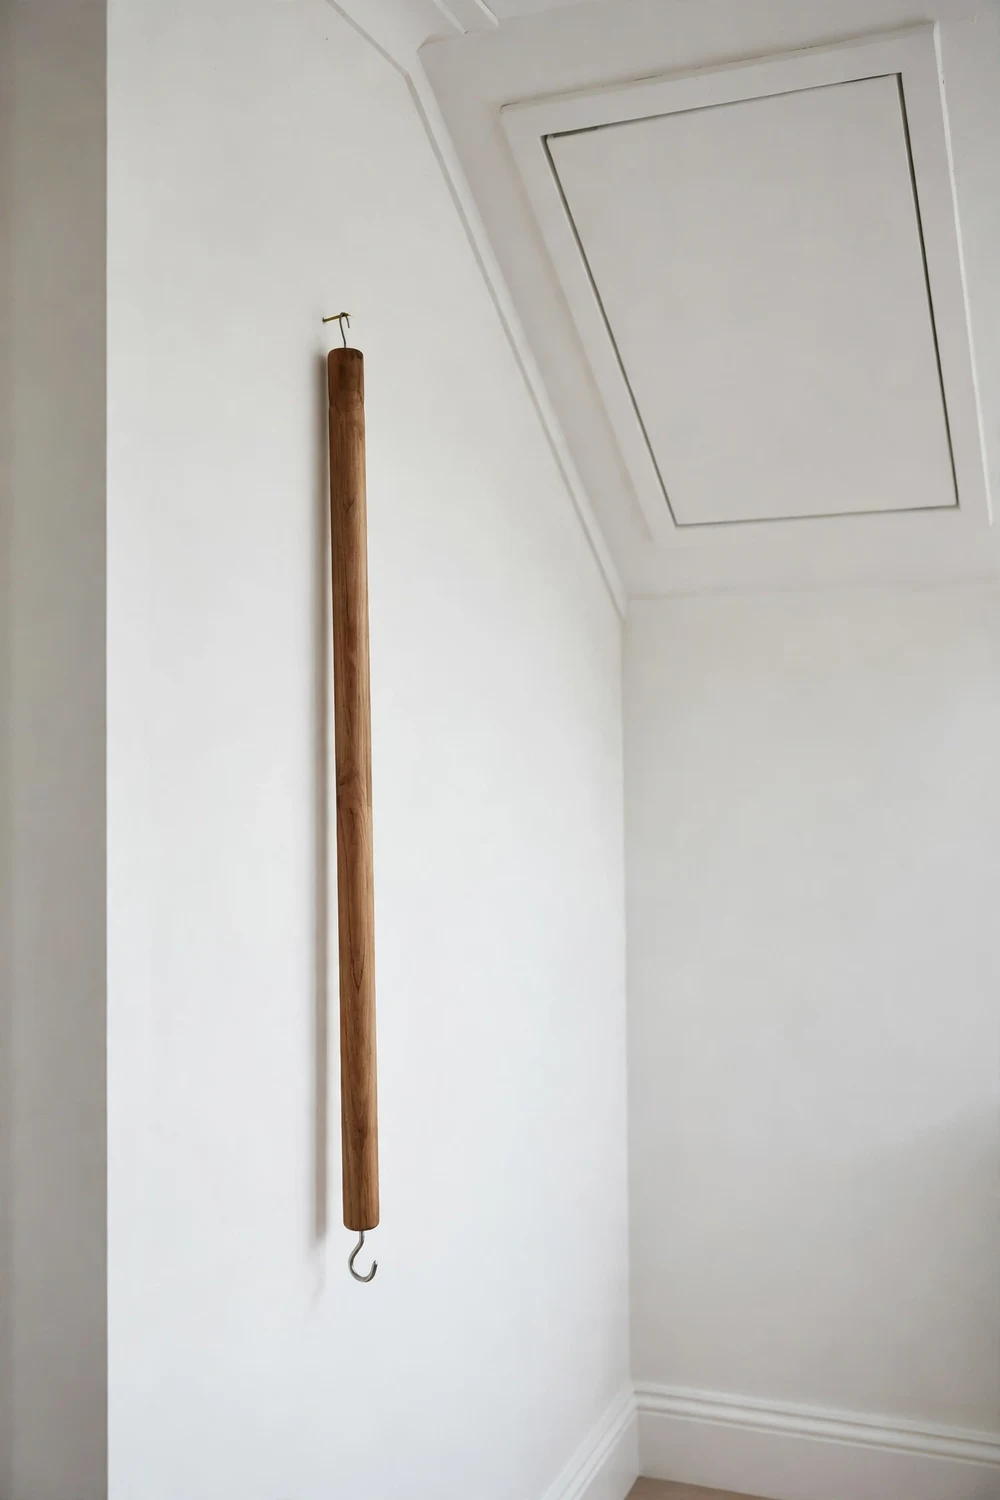
The hook is only half of the fix. Without a pull rod, you have a tidy ceiling and no easy way to open the door. The rod is the tool that makes the system work, and making one takes only a few minutes with parts you can hold in one hand.
Take your 3 foot dowel and screw a small hook into one end. Drill a tiny pilot hole first if the dowel is hardwood, because that stops the end from splitting when the hook goes in. Screw the hook in until the base sits snug against the end of the dowel, with the open curve facing up so it can catch the eye hook from below. Give it a tug to check it is secure. A hook that unscrews under load is no use at all, so make sure it is seated properly before you rely on it.
Now decide where the rod will live. A small nail or a screw-in hook on the wall near the attic door, or inside a nearby cupboard, works well. Hang the rod vertically so it is easy to grab and does not fall. The best spot is close enough that you reach for it naturally when you want the attic, but out of the main walkway so nobody knocks it down. In a hallway, the side of a door frame or a short stretch of wall beside a cupboard often works perfectly.
Using the rod is simple once you have done it once. Hook the end through the eye hook, pull straight down in a smooth motion, and let the door and ladder come down in a controlled way. Do not yank sideways, because a sideways pull puts strain on the hook and the door hinge. A straight, steady pull is easier on the hardware and on you. When you are done in the attic, fold the stairs away, close the door, and put the rod back on its nail. The system only stays tidy if the rod has a home, so treat that nail as part of the job, not an afterthought. It is the same small habit that keeps an entryway working well, and it is why entryway decoration looks for small spaces always start with giving things a place to live.
Two No-Remove Alternatives: A String Holder and a Wall Magnet
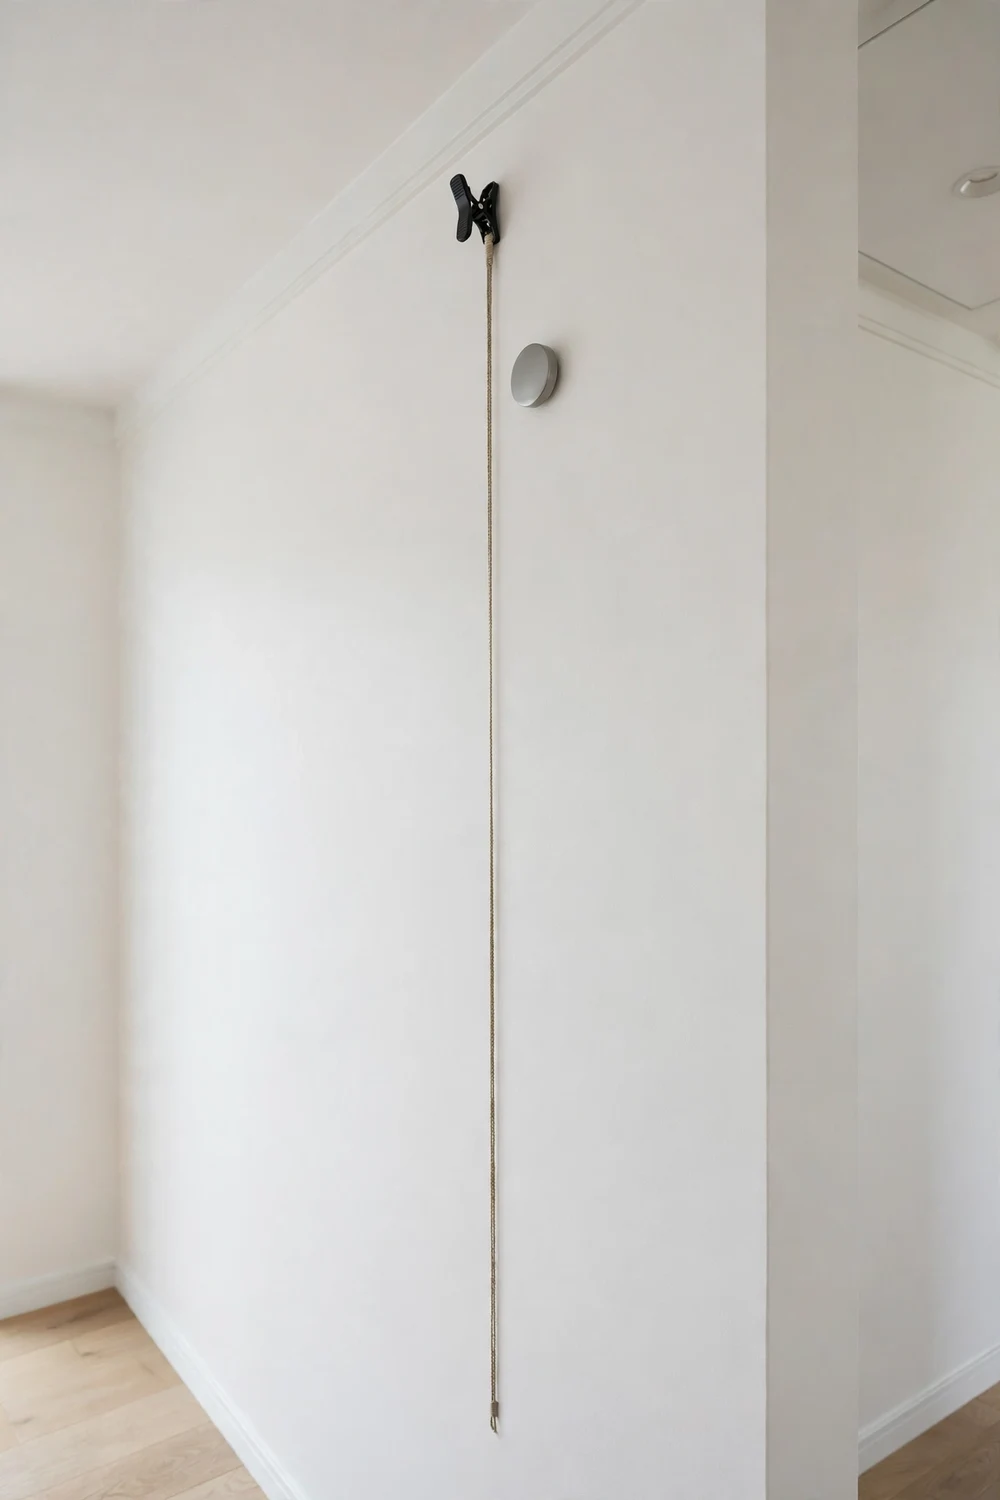
Not everyone wants to remove the cord, and that is fine. Some people rent, some people share a house where the attic is used by others who expect a cord, and some people simply prefer to keep the original setup and tidy it instead. If that sounds like you, there are two neat alternatives that keep the cord but stop it from dangling in the middle of the room.
The first option is a small string holder fixed high on the wall. These holders are simple clips or hooks designed to park a cord end out of the way. Fix one to the wall near the attic door, at a height you can reach comfortably, and tuck the end of the cord into it after you close the door. The cord then runs neatly up the wall instead of hanging down into the room. It is a good choice for rented homes, because a small holder usually needs only one screw or a strong adhesive pad, and it can be removed later with very little trace.
Choose the position carefully. The holder should be high enough that the cord does not droop, but low enough that you can reach it without a ladder. A spot just above head height on the wall beside the door often works, or the side of a tall cupboard if one sits nearby. Test the position by holding the cord up to the wall before you fix anything. If the cord pulls tight or hangs in a loop, move the holder until the line looks tidy and the cord is easy to lift out when you need it.
The second option is a wall magnet. A small, strong magnet fixed high on the wall can hold the cord end if the cord has a metal tip, or if you add a tiny metal crimp or a small washer to the end of the cord. It is a quiet, almost invisible solution, and it works well in a hallway where you do not want another visible fitting. The cord simply snaps to the magnet when you are done, and pulls away with a gentle tug when you need the attic.
Magnets suit light cords best. A heavy cord, or a cord with a thick knot, may slide down over time, so test it for a few days before you call it done. If it holds, you have a fix that costs very little and changes almost nothing about the door itself. If it slips, the string holder is the stronger choice. Either way, you have tidied the problem without removing anything, which can be the right call in a home you do not own or a hallway where several people need to find the cord quickly. Renters often look for this kind of low commitment change, and it sits naturally alongside renter friendly upgrades and decor ideas that improve a space without permanent work.
When to Replace the Cord Instead of Fitting a Hook

Sometimes the cord is the problem, not the idea of a cord. A worn cord that is fraying, stretching, or hard to grip can be replaced with a fresh one, and the new cord will feel and look much better than the old one. This is the right choice if you like the cord system, if other people in the house expect it, or if the door or the latch does not suit a hook for some reason.
Choose the right rope. A 1/4 to 3/8 inch polyester rope is a good match for most attic doors, because polyester is strong, it resists stretching, and it does not fray as readily as cotton. The thinner end of that range suits a light door, while the thicker end gives a better grip on a heavier door. Avoid a rope that is too thin, because it can cut into your hand when you pull, and avoid one that is too thick, because it may not pass through the existing hole without widening it.
Cut the rope to length with a little extra to spare, then seal the cut end with a lighter. Hold the flame near the end just long enough for the fibres to melt and fuse together, and let it cool before you touch it. This stops the end from fraying into a messy tuft, which is one of the reasons old cords look so untidy. Work in a clear space, keep the flame away from anything flammable, and never leave a lighter burning unattended.
Thread the rope through the hole from below, then anchor it on the attic side. A figure-eight knot is a solid choice, because it is bulky enough not to pull through the hole and it is easy to tie and check. A bowline around a fender washer is another good option, and the washer spreads the load across the panel in the same way it does for the eye hook. Whichever knot you choose, pull it tight and test it with a firm pull from below before you rely on it. A knot that slips is worse than a frayed cord, so take a moment to get it right.
Troubleshooting: Quick Fixes for Common Problems
Most swaps go smoothly, but a few small problems come up often enough that it helps to know them in advance. The table below covers the ones you are most likely to meet, with the likely cause and the fix that sorts it. Read it before you start, and you will not need to stop halfway through to work out what went wrong.
| Problem | Likely cause | Fix |
|---|---|---|
| The door is latched shut and the cord is broken | There is nothing to grab to release the latch | Use a long hook or pole to snag the latch, pull straight down, and only then start the swap |
| The eye hook spins in the hole | The hole is too wide or the nut is loose | Tighten the nut, add a wider fender washer, or use a slightly larger hook if the hole is badly worn |
| The hook wobbles when you pull | The washer is not sitting flat or the panel is thin | Reseat the washer flat against the panel and add a second washer to spread the load |
| The pull rod slips off the hook | The rod hook is too open or too small | Use a hook with a tighter curve, and pull straight down instead of at an angle |
| The door is hard to pull down | Stiff hinges, a tight seal, or a short rod | Check the hinges move freely, use a longer rod, and pull in a smooth straight motion |
| The cord replacement frays again quickly | The cut end was not sealed or the rope is cotton | Switch to polyester rope in the 1/4 to 3/8 inch range and seal the cut end with a lighter |
| The magnet will not hold the cord | The cord is too heavy or the magnet is too weak | Use a stronger magnet, add a small metal tip to the cord, or switch to a string holder |
Safety First: Springs, Ladders and Helpers
An attic ladder looks simple, but it has parts that store energy. The springs that help lift and lower the ladder hold tension even when the ladder is folded away, and that tension is what makes the door feel light when you open it. Respect that tension. Never adjust the springs unless you know exactly how they work, and never try to remove or re-tension them on a guess. If a spring looks damaged, stretched, or out of place, leave it alone and get advice from someone who works with attic ladders.
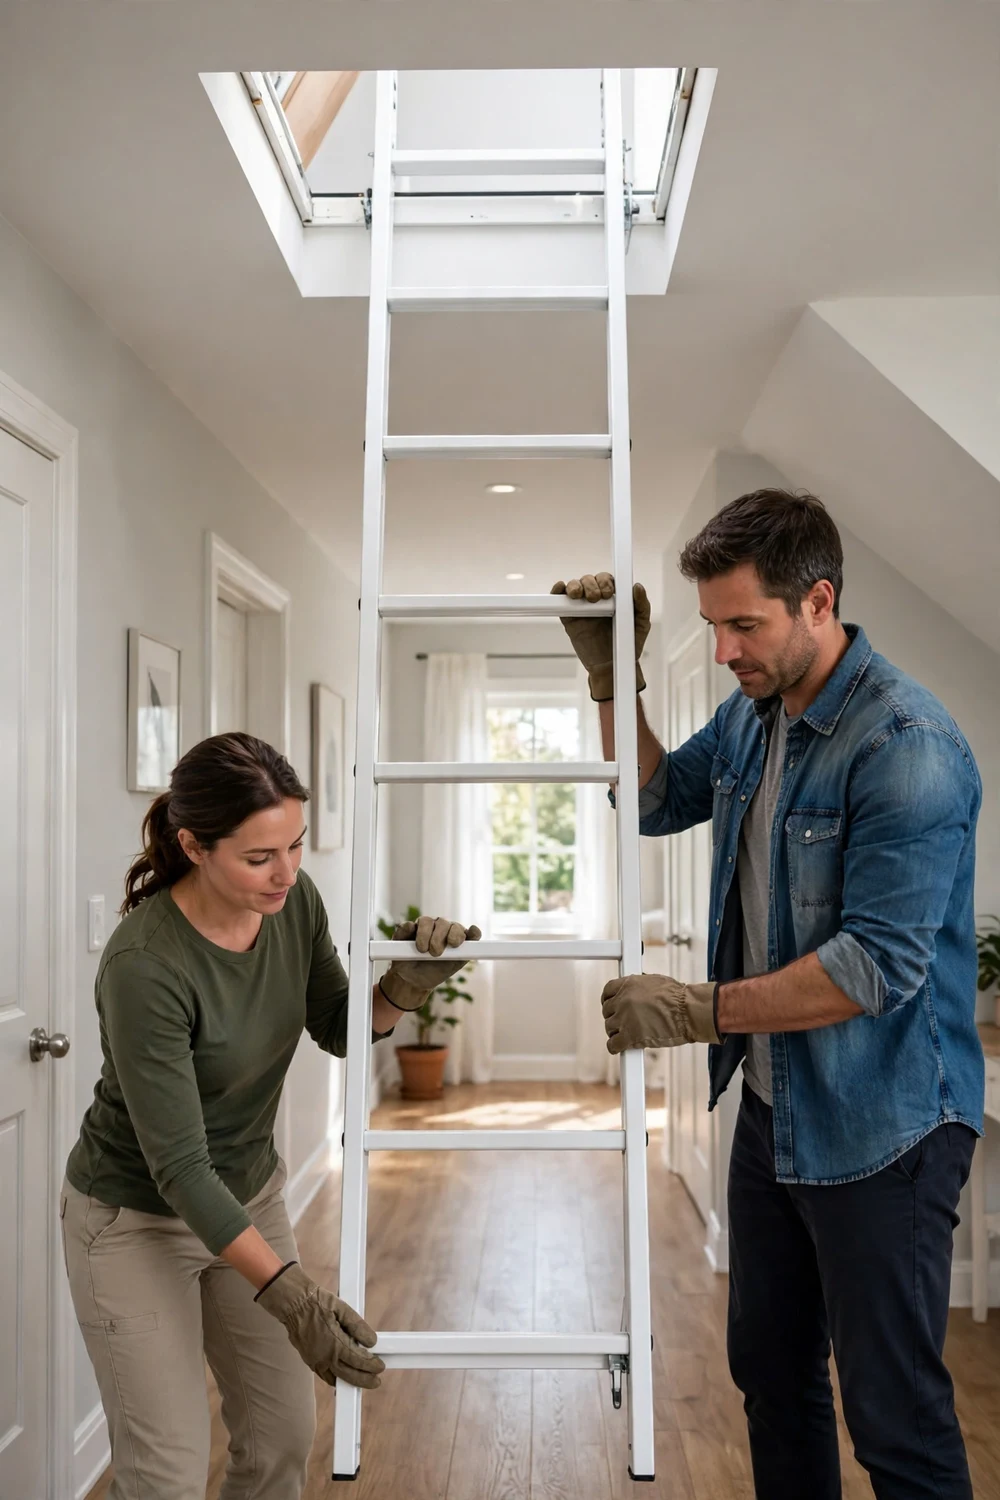
Always work with a helper when you lower the ladder for the first time in this job. One person can hold the ladder steady while the other guides it down, and that extra pair of hands makes a real difference if the ladder is heavy or the springs are strong. A helper can also hold the step ladder while you fit the hook, pass you the washer and nut, and check from the floor that the hook sits straight. Five minutes of work is no reason to rush, and a second person turns a slightly awkward overhead job into a comfortable one.
Use a stable step ladder, not a chair or a stack of boxes. Place it on a flat floor, open it fully, and make sure it sits steady before you climb. Keep your tools in a pocket or a small tray so you are not juggling a drill and a washer at head height. If you need to drill to widen the hole, hold the drill firmly, wear eye protection, and clear any dust from the hole before you fit the hook.
Finally, keep the area below the attic door clear while you work. Move any shoes, boxes, or small furniture out of the way so the ladder has room to unfold and you have room to stand. It is a small step, but it removes the most common cause of trips and bumps in a hallway job like this. The same habit of keeping a passage clear is part of what makes window treatment ideas for every room work so well in practice: a room is easier to live in when the useful parts of it are easy to reach and nothing is in the way.
Frequently Asked Questions
Can I replace an attic door pull string with a hook?
Yes. Lower the stairs first, cut the old cord out, and fit a 3 inch eye hook through the cord hole with a washer and nut on the attic side. Make a pull rod from a 3 foot dowel with a hook in the end, and store it nearby. The swap takes about five minutes once the stairs are down, and the ceiling stays clear afterwards.
What size eye hook should I use for an attic door?
A 3 inch eye hook suits most attic doors. The loop is large enough to catch easily with a pull rod, and the hook is small enough to look neat against the panel. Pair it with a washer and nut that match the thread, and choose a fender washer if you want the load spread more widely across the panel.
How do I open the attic door if the cord is already broken?
If the cord is broken and the door is latched shut, you need a long hook or a pole to snag the latch first. Reach up, catch the latch, and pull straight down in a smooth motion. Do not force the door or prise at the edges, because that can damage the seal and the frame. Once the door is open, you can fit the hook in the normal way.
What should I use as a pull rod for the hook?
A 3 foot wooden dowel with a small screw-in hook in one end works well for standard ceilings. Drill a small pilot hole first so the dowel does not split, screw the hook in firmly, and hang the rod on a nail or hook near the attic door. If your ceilings are higher than standard, measure and cut a longer dowel to suit.
Can I keep the cord and just tidy it instead?
Yes. A small string holder fixed high on the wall will park the cord end neatly, and a wall magnet can hold a cord with a metal tip. Both options keep the original system and stop the cord from dangling. They are good choices for rented homes or for households where several people expect to find a cord.
What rope should I use if I replace the cord instead?
Use 1/4 to 3/8 inch polyester rope. Seal the cut end with a lighter so it does not fray, and anchor it on the attic side with a figure-eight knot or a bowline around a fender washer. Polyester resists stretching and fraying better than cotton, and a sealed end keeps the cord looking tidy for much longer.
A Small Fix You Will Notice Every Day
This is not a big project. It will not change the value of your house, and it will not take a weekend. But it is the kind of fix you notice every time you walk down the hall, because the cord that used to catch your eye is gone and the ceiling looks finished. Small changes like that add up, especially in a hallway you pass through many times a day.
If you own your home and the cord has annoyed you for a while, fit the hook and make the rod. Give the rod a proper home on a nail by the door, and the system will take care of itself from then on. If you rent, or you want to keep the cord, try the string holder or the wall magnet first. Either route leaves you with a tidier hallway and an attic you can still open in seconds.
Do the job in the right order, lower the stairs first, tighten the nut properly, and pull straight down. Then step back, look at the clean ceiling, and enjoy one of the simplest improvements a hallway can have. For more small ideas that make an entry feel welcoming, the thinking behind mudroom wall decor ideas for a welcoming entryway follows the same principle: start with what you use every day, give it a proper place, and let the rest of the room follow.