Yes, a DIY hobnail vase can pass for vintage milk glass at a glance, and from across a room most guests will never guess it started life as a plain glass vase from the dollar store. The trick is not the paint. It is the dots. Real hobnail milk glass, the kind Fenton made popular in the mid-20th century, has smooth, even, raised bumps that catch the light in a regular pattern, and the method that copies that shape best wins. After testing all four popular dot methods on the same vase shape, half wooden balls came out looking the most like the real thing, pearl stickers were the fastest by a long way, and puffy paint was the cheapest. Pop dots sat in the middle on every score.
This post walks through each method the way I actually tested it, with honest notes on what survived a wash and what did not. You will also find which vase shapes suit the look, how many paint coats the dots really need, and how to style the finished vase so it reads as a collected vintage piece rather than a weekend craft. Pick one method, start with one vase, and you can finish the whole project in an afternoon.
What Hobnail Milk Glass Is, and Which Vases to Start With
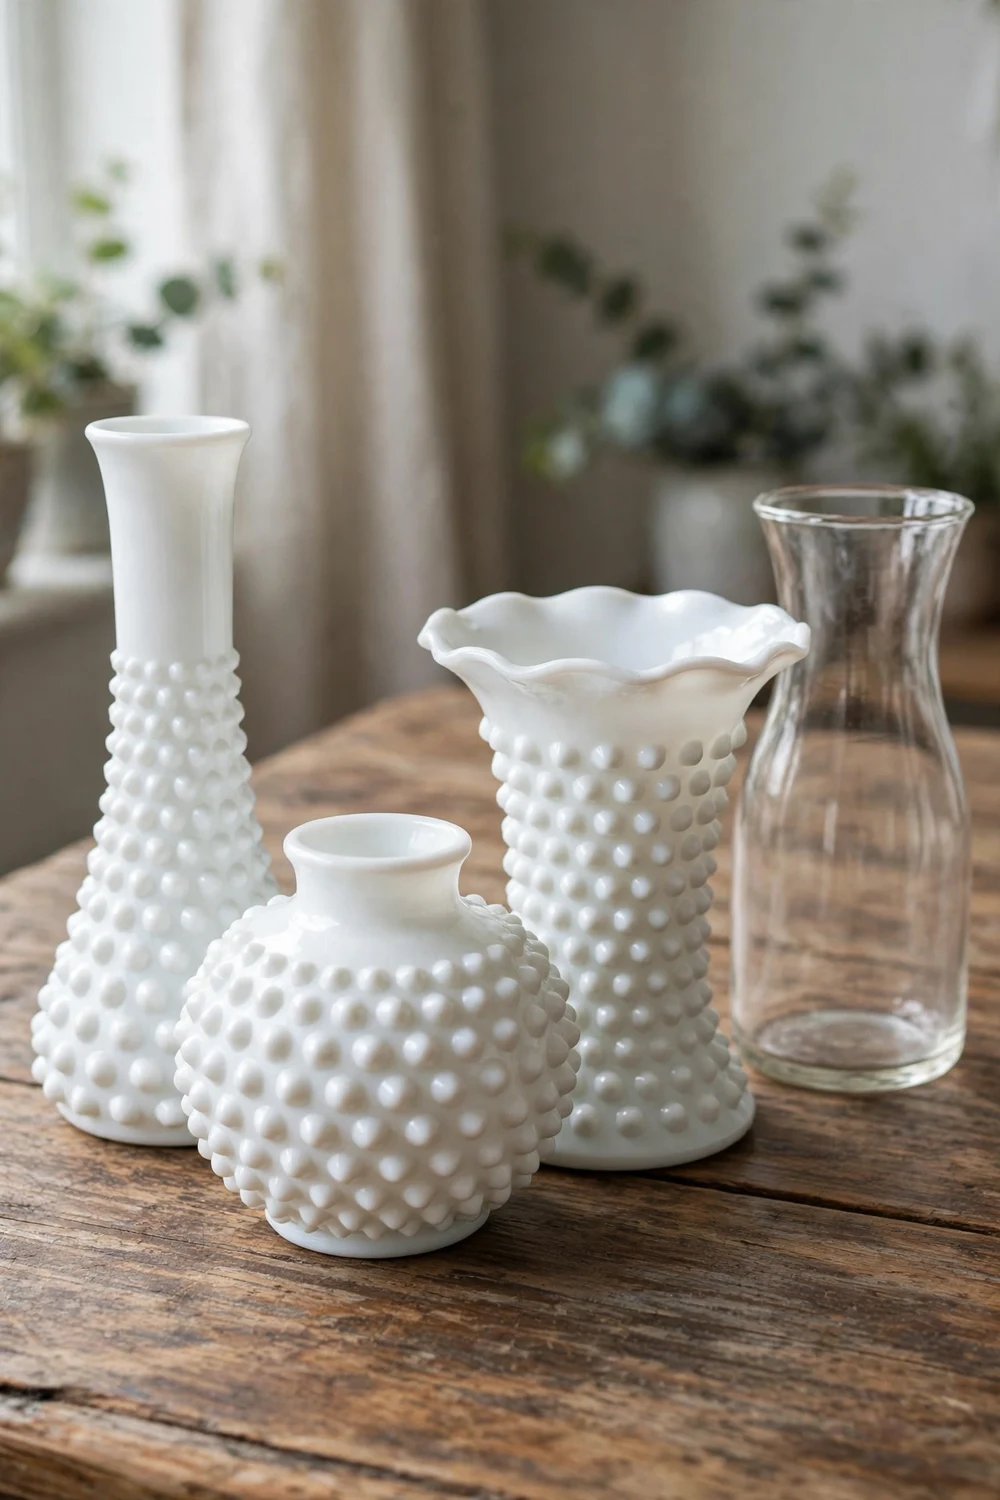
Milk glass is opaque white glass, and hobnail is the pattern of raised round bumps pressed into it while the glass is still hot. The combination feels soft and old fashioned at the same time, which is why it turns up in cottage kitchens, French country shelves and vintage wedding tables. Real Fenton milk glass hobnail dates to the mid-20th century, when the company made vases, bowls and lamps in this pattern for ordinary homes. That is the look we are copying here, not a museum piece, just the warm white glow and the neat rows of dots.
A good DIY hobnail vase starts with the right base, and the base matters more than most tutorials admit. The best shapes are the ones real milk glass came in: a short round vase with a small neck, a tall bud vase with a gentle flare, or a flared rim vase that opens wide at the top. These shapes show off the dots because the surface curves slowly and the rows stay readable. Keep the vase between 15 and 25 centimetres tall if you can, and decide first whether it will hold fresh flowers or dried stems, because that points you to the right method below. Smaller vases look sweet in a group, while very tall ones need so many dots that the project turns into a chore.
Thrifted glass and dollar store glass both work, and each has its own charm. A thrifted vase often has a heavier base and a nicer shape, and hunting for one is half the fun of a project like this. I always check the glass shelf first when I am out looking for thrifted finds for small DIY projects, because a good shape beats a perfect new one every time. A dollar store hobnail vase starts even cheaper, and the glass is usually thin and light, which is fine as long as it stands steady. Pick the vase up and set it down a few times. If it wobbles on a flat table, leave it there.
Avoid a few shapes. Very tall, narrow vases make the dots hard to place evenly near the neck. Glass with etched patterns or heavy texture fights with the dots instead of showing them off. Whatever you choose, wash the vase in warm soapy water, dry it fully, and wipe it with a cloth dampened with rubbing alcohol. Paint and glue both grip far better on a clean, grease free surface, and this one minute of prep saves most of the peeling problems people complain about later.
DIY Hobnail Vase Method 1: Half Wooden Balls, the Most Realistic Dots
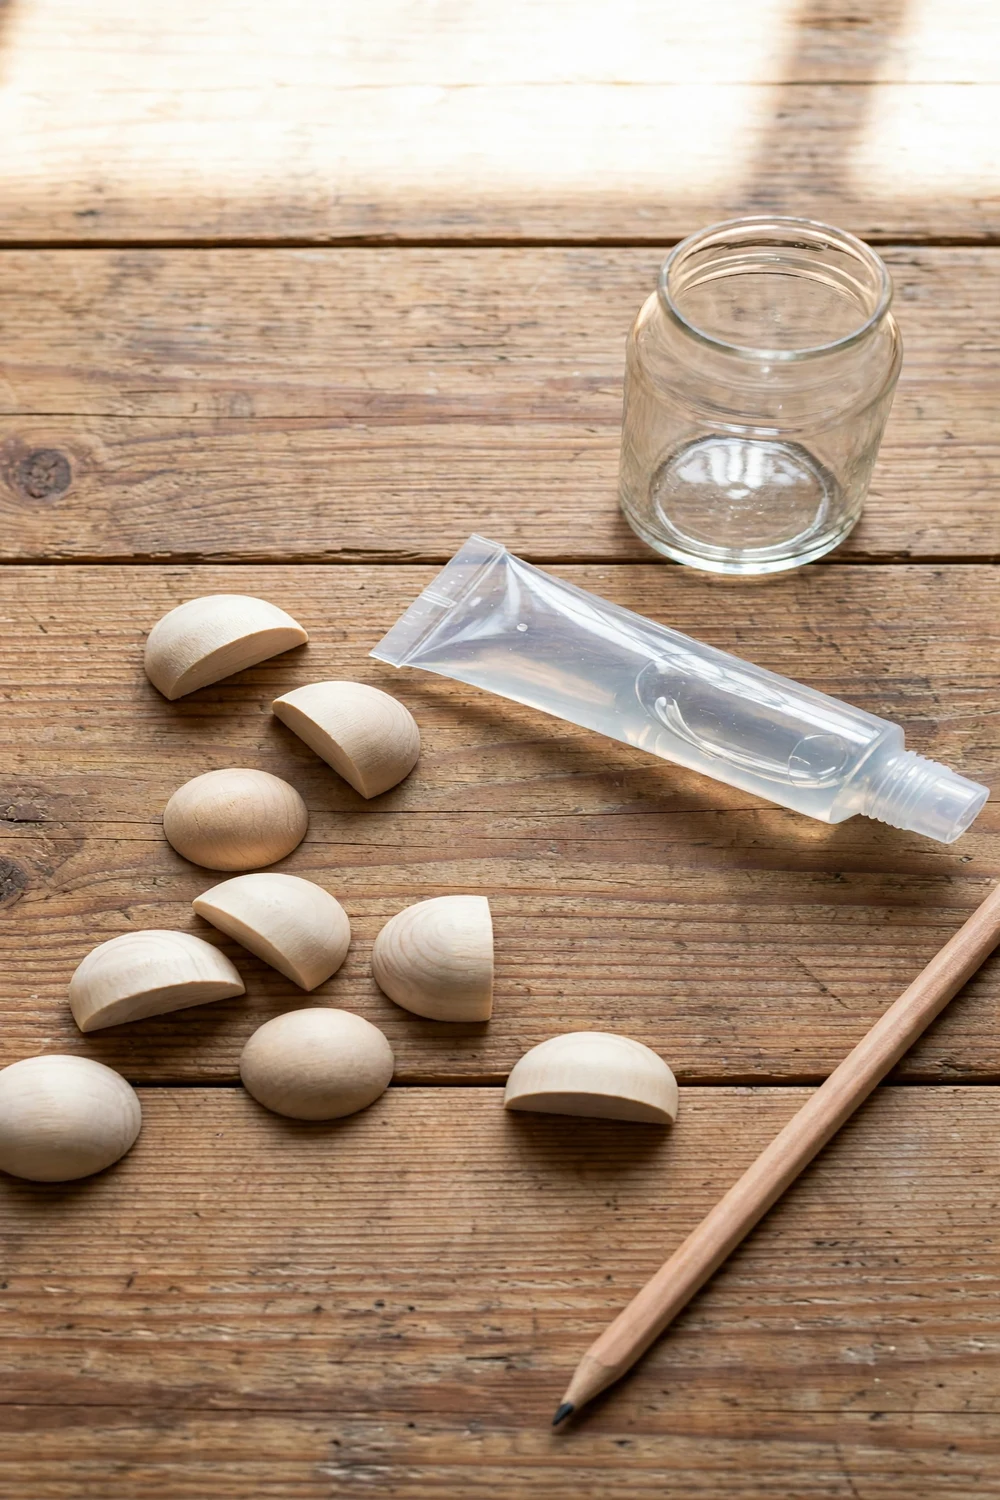
Half wooden balls are small wooden domes with one flat side, sold in bags at craft stores, and they are the closest thing to real pressed hobnail you can glue onto glass. In my side by side test this method won on realism by a clear margin. It is also the most durable of the four, because wood and glass glue form a firm bond that holds up to gentle hand washing. The trade off is time. This is the slowest method here, so save it for a vase you plan to keep and use, not for a quick party decoration.
Choose a dot size that suits your vase. For a small vase around 15 centimetres tall, halves about 10 millimetres across look right. For a larger vase, 12 to 15 millimetre halves keep the pattern in proportion. A medium vase can take 60 to 80 dots, and running out halfway through a row is the kind of small annoyance that stalls a project for a week.
Mark your rows before you glue anything. Wrap a rubber band around the vase as a straight guide for the first row, and mark light pencil dots where each ball will sit. Space the dots about one dot width apart, then stagger the next row so each ball sits in the gap between two balls below it, like bricks in a wall. Work in small sections of ten or twelve balls at a time. Put a small dab of clear craft glue on the flat side of each ball, press it on, and hold it for a few seconds.
Let the glue cure fully before you paint, and this is where patience pays. Most clear craft glues feel dry in an hour but need a full day to reach full strength, so leave the vase alone overnight. Then check every ball with a gentle wiggle. If one moves, add a drop of glue behind it and wait again. The whole job, including the overnight wait, takes an afternoon of hands on work spread over two days. It pairs well with other rescued pieces, and the same patient approach works for any thrifted makeover that deserves a slow, careful finish.
DIY Hobnail Vase Method 2: Pearl Stickers, the Fastest Dots
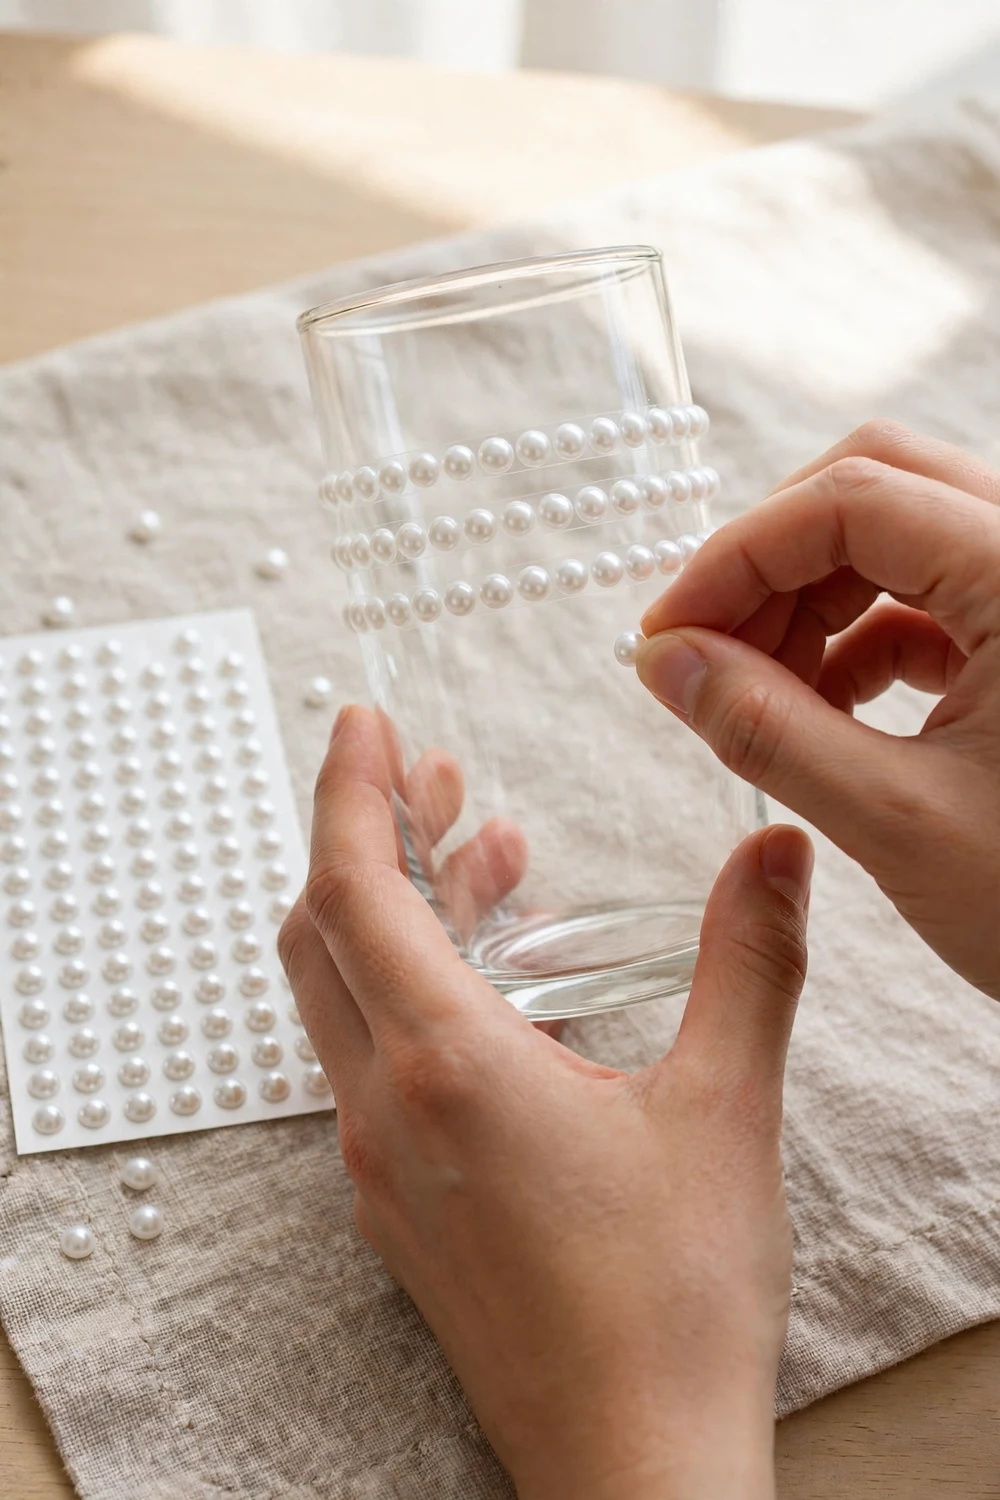
Pearl stickers are small self adhesive half pearls sold on sheets for card making and scrapbooking, and they are the fastest route to a faux milk glass vase DIY finish. You peel, you press, you move on. A small vase took me about twenty minutes from first sticker to last, which is less than a quarter of the time the wooden balls needed. If you need three matching vases for a table setting this weekend, this is the method to choose.
The look is lovely but slightly different from real hobnail. Pearls have a soft sheen that reads a little more like jewellery than glass, and up close the dots are very slightly flatter than wooden balls. The bigger difference is durability. The adhesive on a sticker sheet is made for paper, not glass, and it softens with water. In my wash test, a vase dotted with pearl stickers survived a gentle hand wash with the dots intact, but a few edges started to lift after the vase sat in a sink of warm water.
A few habits make this method work much better. First, clean the glass properly, because dust is the enemy of any sticker. Second, press each pearl down firmly for a couple of seconds rather than just touching it in place. Third, work in rings around the vase instead of columns down it, so you can see the spacing as you go. If a row starts to drift, peel the last few pearls off and reset them. Use the same size across the whole vase, and keep the rows evenly spaced. Mixed sizes look accidental rather than vintage, and the whole point of this project is a pattern that looks intentional.
Painting over pearl stickers needs a light touch. One or two thin coats of flat white spray paint are enough to turn the pearly sheen into a milk glass white, but a heavy coat can pool around the base of each pearl and blur the shape. Spray from a little further back than usual, about 25 to 30 centimetres, and let the first coat dry fully before the second. A clear topcoat sprayed lightly over the finished vase helps seal the sticker edges, and that extra step is worth it if the vase will ever hold fresh flowers.
Method 3: Pop Dots, the Sticky Foam Shortcut
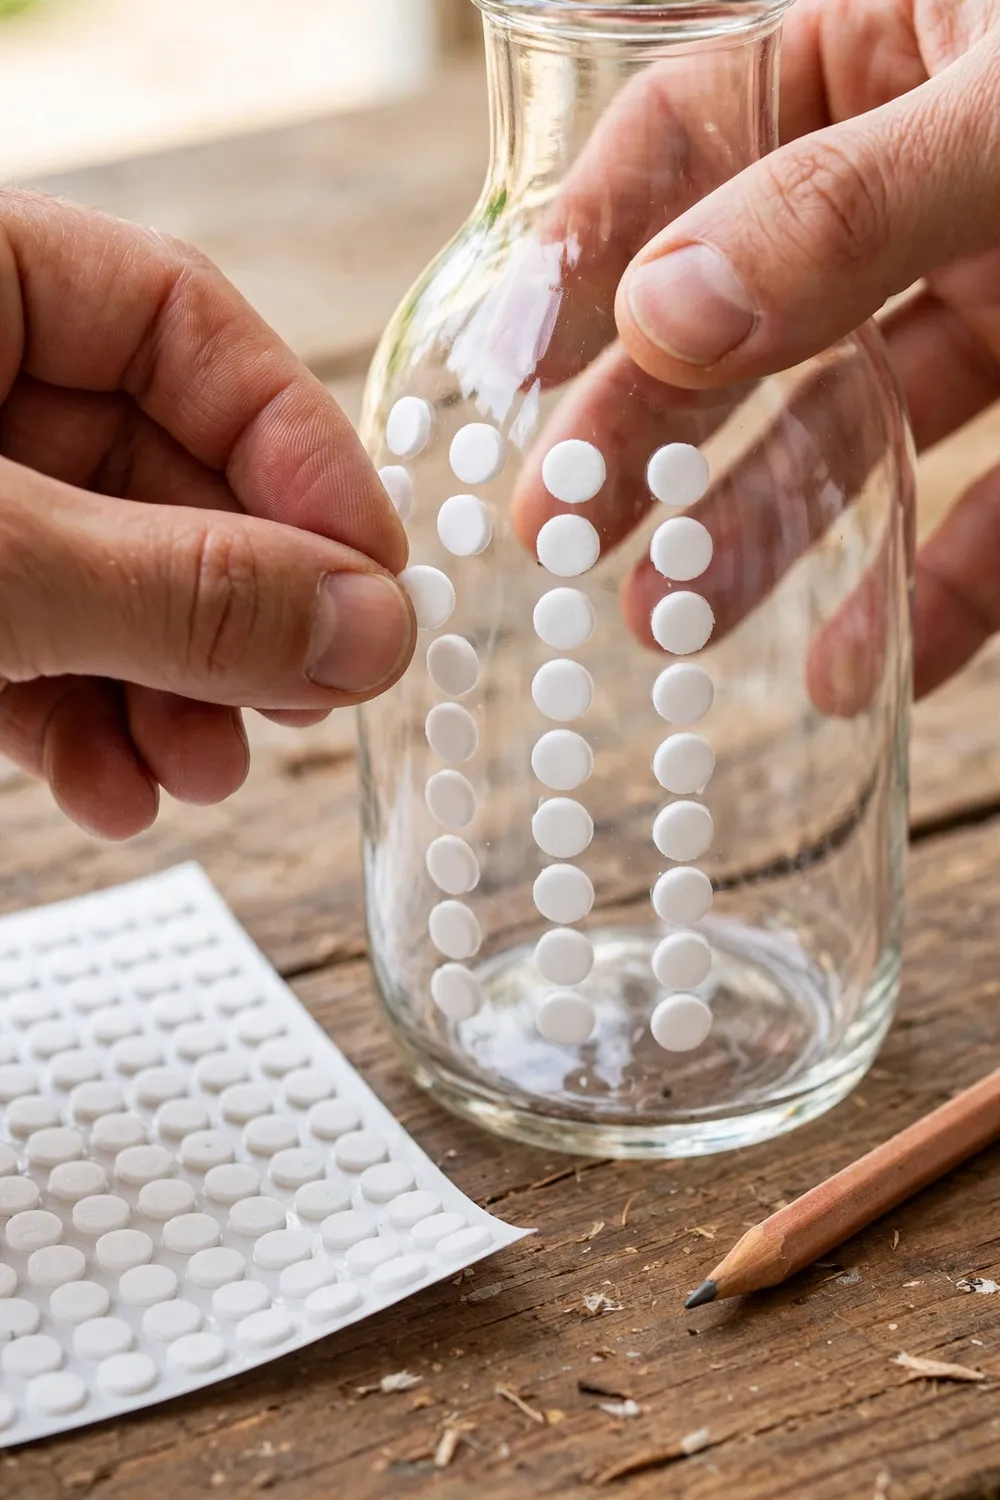
Pop dots are small double sided foam circles, sold in craft stores for mounting card layers, and they give a hobnail milk glass DIY project a chunkier, bolder dot than the other methods. The foam is about 2 millimetres thick, so each dot stands proud of the glass and casts a small shadow, which looks great on a larger vase where finer dots would get lost. They are also very quick to apply. Peel one side, press it to the glass, peel the other side, and press the next dot on. A medium vase took me around half an hour, which puts this method between pearl stickers and wooden balls for speed.
The foam shape is both the charm and the limit of this method. Real hobnail bumps are round domes, while pop dots are flat topped cylinders with straight sides, so up close the pattern reads more like studs than like vintage milk glass. Paint softens that look a little, because a few thin coats round off the sharp top edge, but it never fully hides the flat top. On a small bud vase, though, the dots can overwhelm the shape, so save this method for vases at least 20 centimetres tall.
Durability is the middle of the pack. The foam adhesive grips glass well when the surface is clean and dry, and my test vase survived a gentle hand wash without losing a dot. But foam soaks up water if it is left sitting in a sink, and a soaked dot swells, softens and eventually slides off. Never soak a pop dot vase. Wash it with a damp cloth and dry it at once. Paint coverage also needs care. The foam edge drinks in the first coat of paint, so the first pass can look patchy and grey. Two or three light coats fix that, and a final clear topcoat helps seal the foam.
This is the method I suggest when someone wants to test the idea before committing to a slower build. It is cheap, it is fast, and if you do not like the result you can peel the dots off and start again with a different method on the same vase. That low risk makes it a good first project for a teenager or for a craft afternoon with friends.
DIY Hobnail Vase Method 4: Puffy Paint Dots, the Cheapest Dots
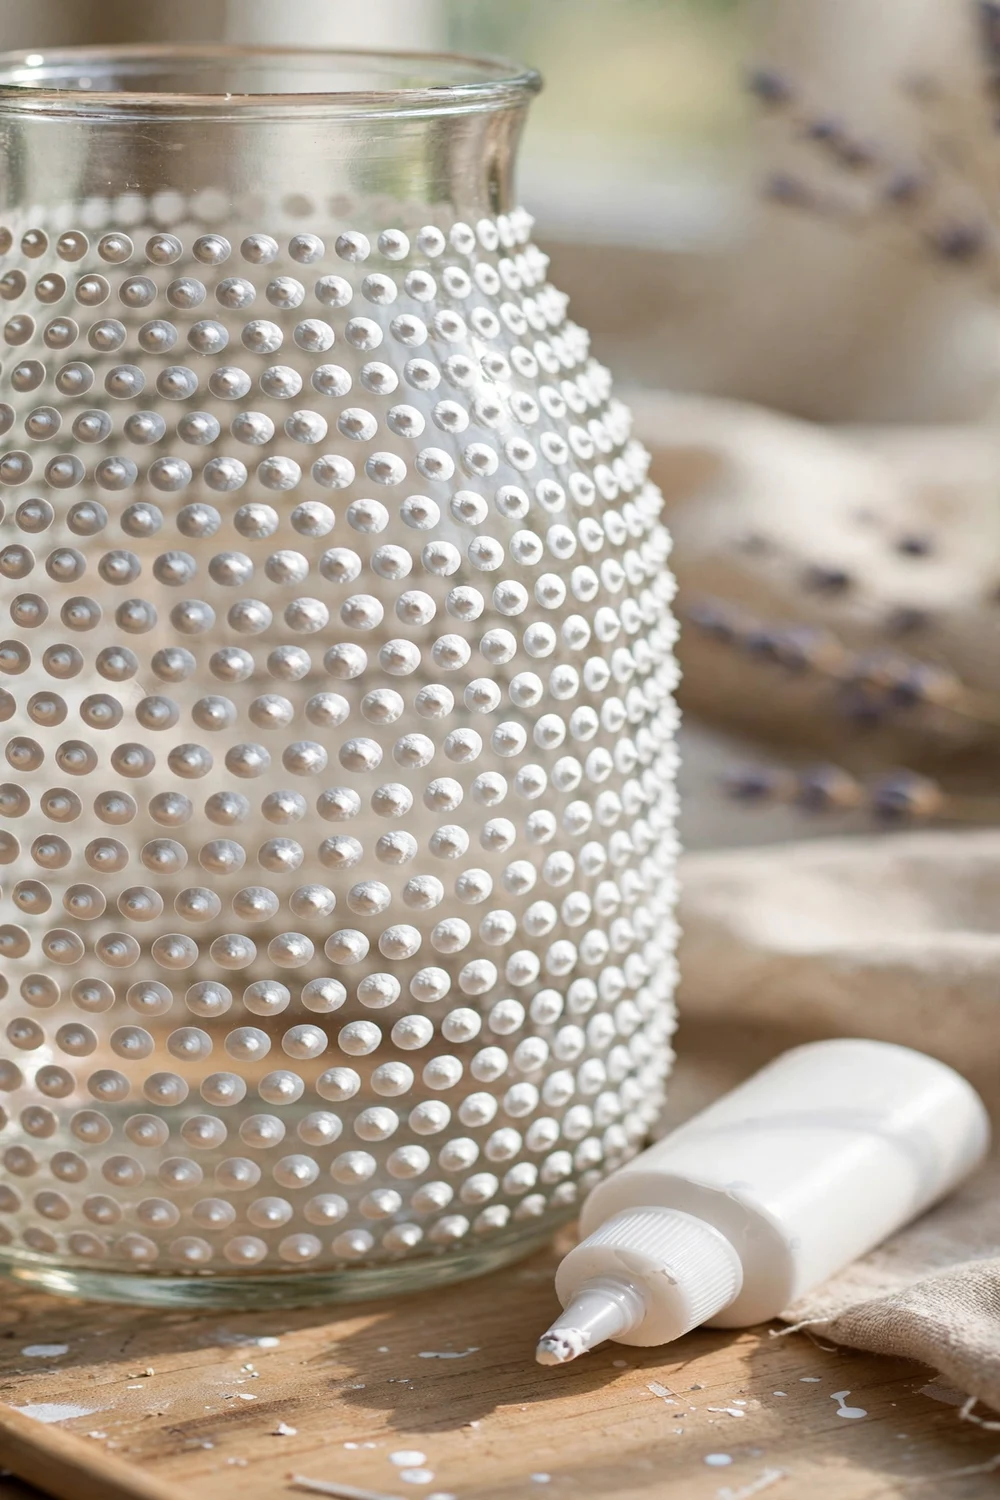
Puffy paint, also sold as dimensional fabric paint, is the cheapest way to make a hobnail pattern, because one small squeeze bottle is enough for several vases and you need nothing else. You squeeze a dot directly onto the glass, and the paint holds its shape as it dries into a soft raised bump. The cost is the lowest of the four methods, and there is no gluing, no peeling and no small parts to lose.
The look is handmade in the best sense and the worst sense. No two paint dots are exactly alike, so the pattern has a gentle wobble that some people love and others find untidy. In my test, the dots dried slightly flatter than wooden balls and a little less even than pearl stickers. From a distance the effect is still clearly hobnail, especially after a coat of white paint unifies the colour. Up close, a careful eye can see that the dots were squeezed rather than moulded.
Technique matters more here than with any other method. Practise on a sheet of paper first until your dots are a consistent size. Hold the bottle upright, squeeze gently, and lift straight up without dragging, which leaves a small peak on each dot. Space the dots about one dot width apart and stagger the rows, just as with the wooden balls. Work on one side of the vase at a time, and let each side dry for a few hours before you turn the vase, or the dots on the underside will flatten against the table. Full drying takes a full day, and the paint stays slightly soft even then, so handle the vase gently for the first few days.
Washability is the weak point of this method. Puffy paint is made for fabric, and while it sticks to clean glass, it is not as tough as glue or a sticker adhesive. My test vase survived a careful wipe with a damp cloth, but I would not put it under running water or leave it in a sink. Use it for dried stems, or slip a small glass or jar inside it to hold water for fresh flowers without wetting the painted dots.
The Four Methods at a Glance
| Method | Typical cost | Hands on time | Most like real hobnail | Washing |
|---|---|---|---|---|
| Half wooden balls | Highest of the four | About 2 hours, plus overnight drying | Best | Gentle hand wash |
| Pearl stickers | Low | About 20 minutes | Good | Hand wash only, dry at once |
| Pop dots | Low | About 30 minutes | Fair, dots are flat topped | Damp cloth only, never soak |
| Puffy paint | Lowest | About 30 minutes, plus a day to dry | Good from a distance | Damp cloth only |
If I had to pick one method for most people, I would pick half wooden balls for a vase you plan to keep and pearl stickers for a vase you need this weekend. That is the honest split. The wooden balls look the most convincing and survive the most handling, while the stickers give you a finished vase before lunch. If you are still deciding how to make hobnail milk glass at home, that split is the simplest place to start. There is no wrong answer here, only a trade between time, cost and how close you want to get to the vintage milk glass look.
Painting Your Vase: Light Coats, Flat or Gloss, Inside or Outside
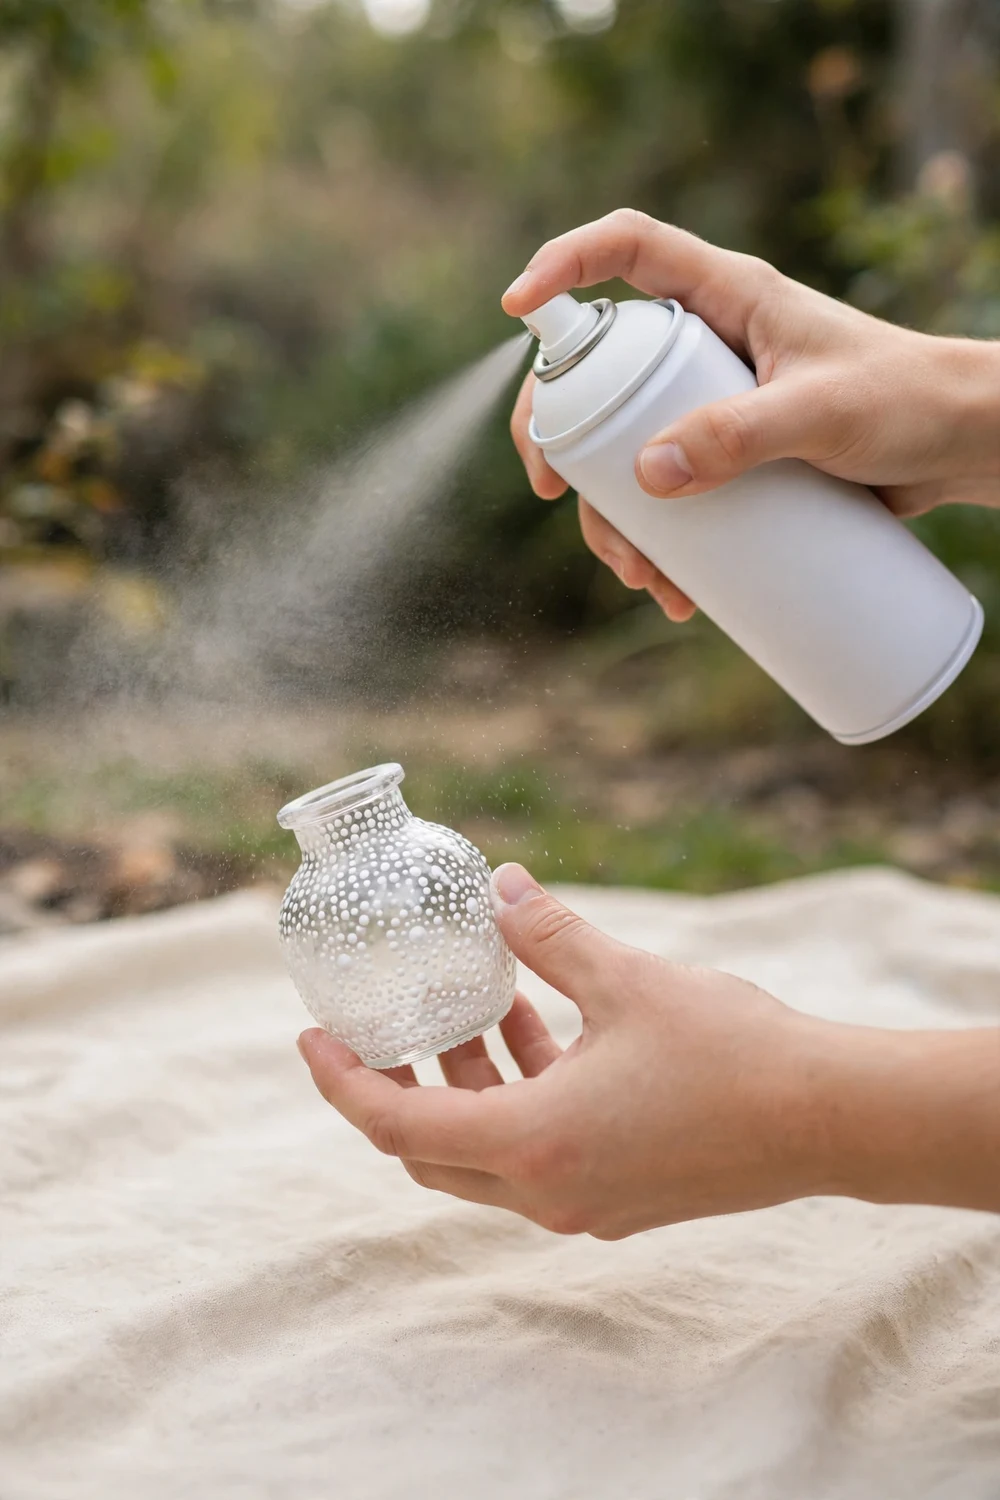
Paint is what turns a dotted glass vase into a milk glass lookalike, and the way you apply it matters more than the exact paint you buy. The rule is simple: several light coats beat one heavy coat every time. A heavy coat pools around the base of each dot, fills in the gaps and turns your crisp pattern into a lumpy white blob. Light coats keep the dots sharp. Two to three thin coats are usually enough, with ten to fifteen minutes between coats or whatever the can itself instructs.
Flat white spray paint gives the closest match to old milk glass. It has almost no shine, so it reads as soft and chalky, like glass that has been on a shelf for fifty years. Gloss white spray paint gives a shinier, cleaner finish that looks more like new ceramic. Both are pretty, and the choice is really about the room. Flat white suits cottage, farmhouse and vintage rooms, while gloss suits a brighter modern shelf. One more tip from my own trial: a flat white base coat with a single light gloss topcoat gives a soft glow that sits nicely between the two, and it adds a little protection for the dots.
Paint the outside only, never the inside, and this is the safety note to take seriously. Spray paint is not food safe, so do not paint the inside of any vase that will hold drinking water or food. The outside is where the colour belongs anyway, because the dots are on the outside and the paint is there to make them read as one piece. For fresh flowers, put the water in a small glass or jar that slips inside the vase, or use a narrow bottle as a liner. If you want the vase to hold water directly, leave the inside unpainted and accept that the rim will show a little clear glass. It looks fine, and it is the safe choice.
Preparation makes the paint stick. Wash the vase, dry it completely, and wipe it with rubbing alcohol before the first coat. Mask the rim with tape if you want a clean edge, or leave the rim clear so a little glass shows at the top, which can look quite elegant. The same light coat habit applies to other painted projects too, and if you enjoy this kind of surface change you will find plenty of ideas in these textured paint ideas for home decor.
Styling Your Finished Hobnail Vase So It Looks Collected, Not Crafty
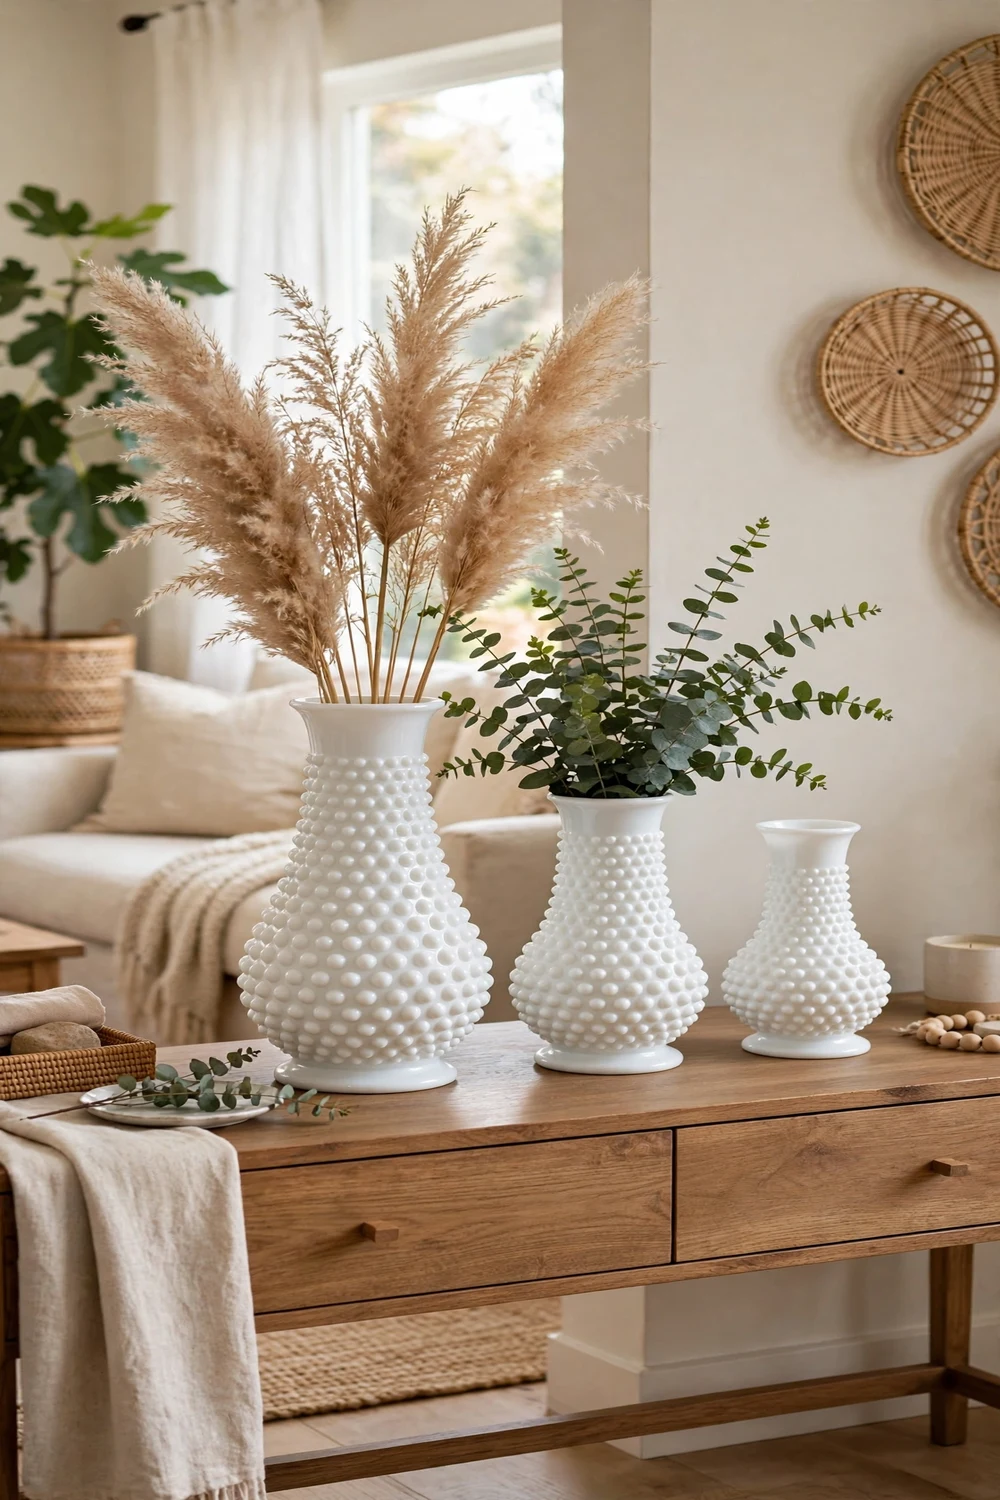
A finished DIY hobnail vase looks best when it is styled like a vintage find, not displayed like a craft project. The easiest way to do that is to group it with other things rather than letting it stand alone. Odd numbers work well, so try three vases in different heights on a console table, or one vase with a stack of books and a candle beside it. Mix the heights by at least a few centimetres so the group has a shape. A tall vase with pampas grass, a medium vase with eucalyptus and a small empty vase beside them make a calm little scene that suits a hallway or a living room shelf.
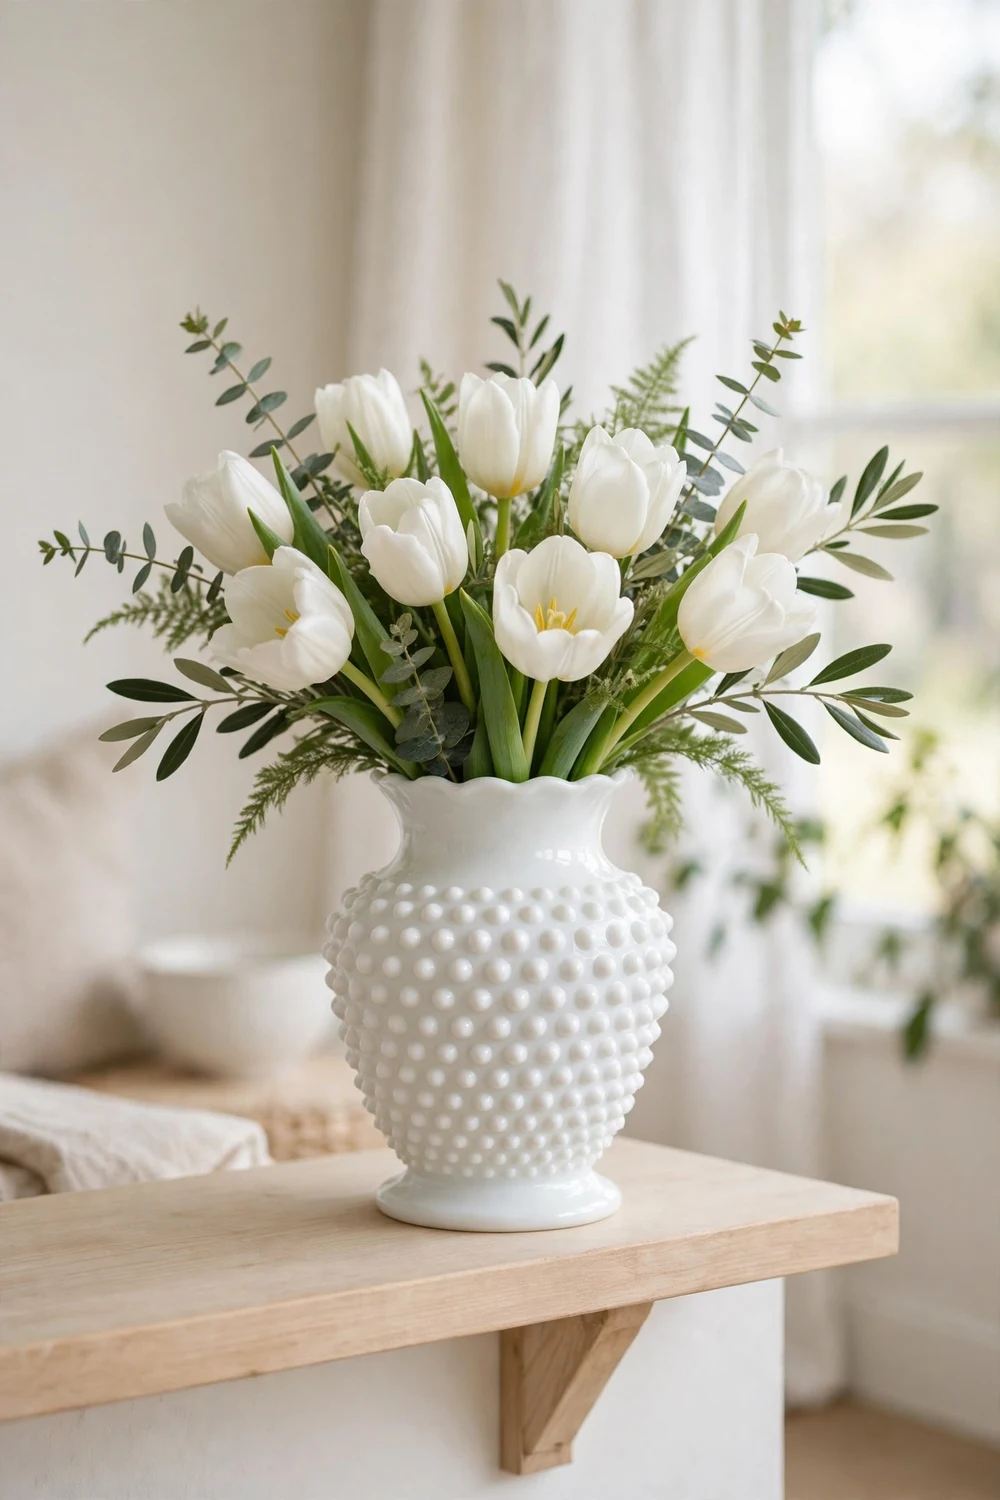
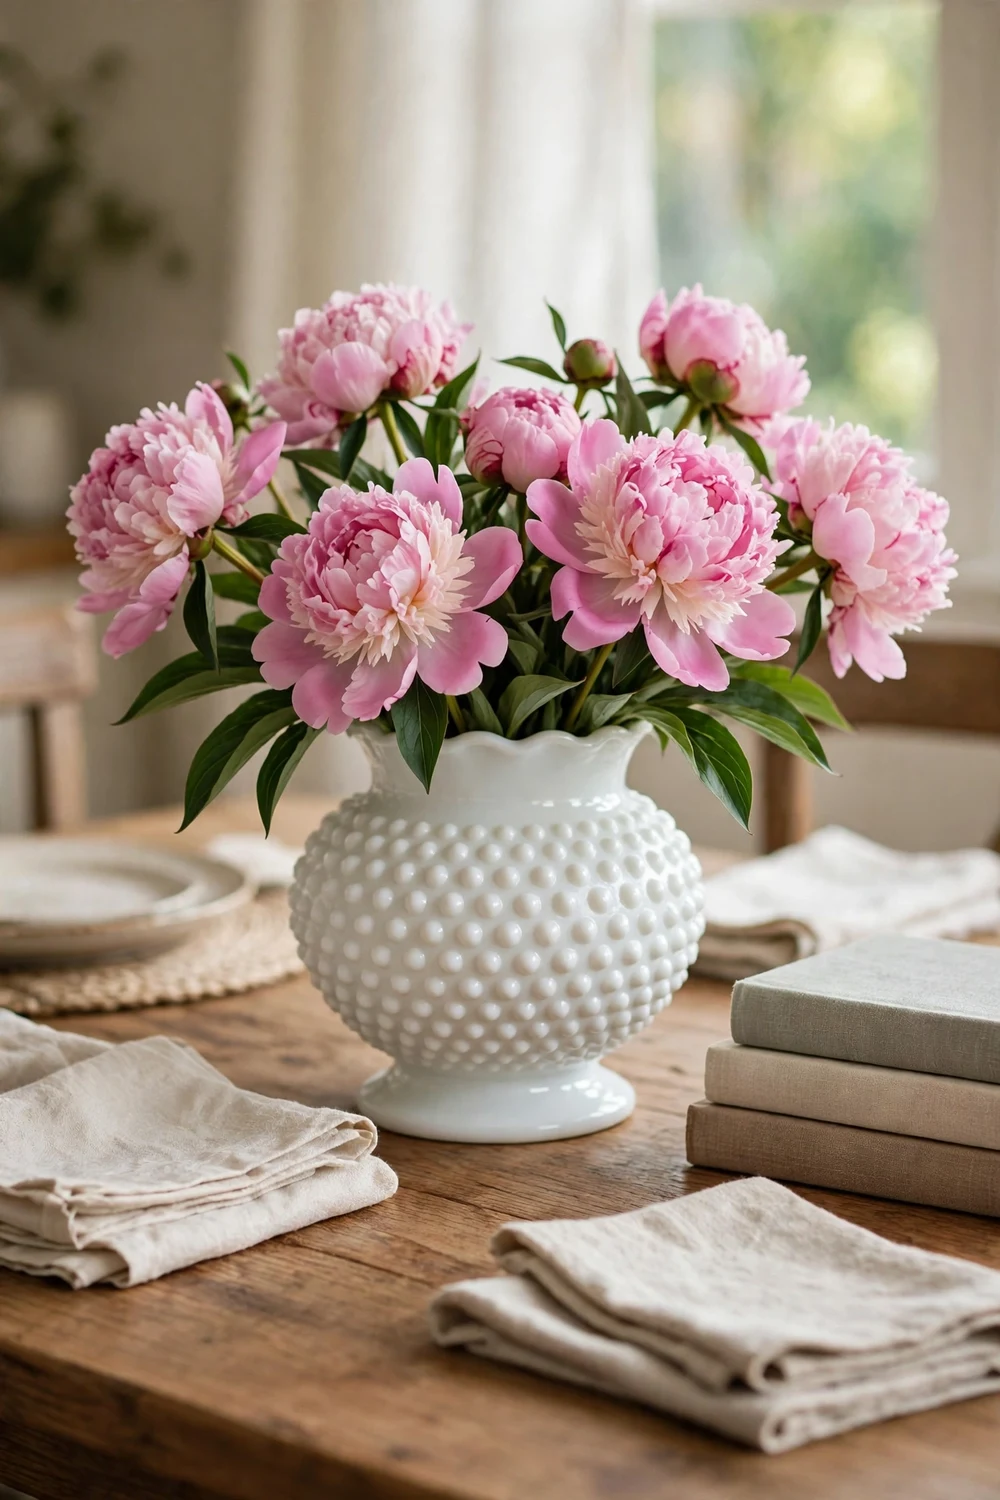
What goes in the vase matters as much as where it sits. Fresh white tulips are a natural match, because the white on white keeps the look soft and the green stems add just enough colour. Pink peonies give a prettier, more romantic feel, and they suit a dining table or a bedroom. Dried stems like pampas grass and eucalyptus last for months and suit a vase that you do not want to wash often, which makes them the practical choice for a puffy paint or pop dot vase. One kind of stem, cut to two or three heights, is usually enough.
Think about the surface and the season too. On a wooden console table, the white dots stand out beautifully against the warm grain. On a white shelf, the vase can disappear, so set it on a small stack of books or a woven tray to give it a base. At Christmas, a small sprig of pine and a few white berries turn the same vase into a festive piece without any extra work. That is the real value of a white vase. It changes with the season while the vase itself stays the same.
For the dining table, keep the vase low enough that people can see each other over it. A short round hobnail vase with a small bunch of flowers is a classic centrepiece, and you can build the rest of the table around it with linen napkins and simple plates. If you want more centrepiece ideas in the same spirit, these simple dining table centrepiece ideas pair well with a handmade vase. A small gold leaf accent piece on the same shelf can warm the whole arrangement. And if you like the look of handmade beads and chains on a shelf, a clay bead chain draped beside the vase adds a soft, handmade layer without competing with the dots.
DIY Hobnail Vase Questions, Answered Honestly
Will a DIY hobnail vase really look like real milk glass?
From a normal distance, yes, especially with the half wooden ball method and flat white paint. Up close, a careful eye can usually tell that the dots were added rather than pressed into the glass, because the paint has a slightly different surface to old glass. On a shelf or a table, among other objects, the vase reads as vintage milk glass.
Which dot method lasts the longest?
Half wooden balls last the longest, because wood and craft glue form a firm bond and the dots themselves are solid. Pearl stickers come next if the vase stays dry, but their adhesive weakens with water. Pop dots and puffy paint are best treated as display only, and both do well with dried stems.
Can I put fresh flowers and water in my DIY hobnail vase?
Yes, with a liner. Slip a small glass, jar or narrow bottle inside the vase to hold the water, so the water never touches the paint or the dots. Never paint the inside of a vase that will hold drinking water or food, and never soak a dotted vase in a sink.
Can I use a coloured vase or a different paint colour?
You can, but white is the safest choice for the milk glass look. A coloured glass base can show through thin paint and tint the white, so use an extra coat if you start with coloured glass. Other paint colours work too. Soft sage, pale blush and warm cream all look lovely with the hobnail pattern, and they suit a coloured room better than plain white.
How do I wash a DIY hobnail vase?
Wipe it with a soft damp cloth and dry it at once. Do not put it in a dishwasher, do not soak it, and do not scrub the dots with anything rough. For a wooden ball vase, a gentle hand wash in lukewarm water is fine as long as you dry it quickly. For pearl sticker, pop dot and puffy paint vases, a damp cloth is the safest clean.
How much does it cost to make a dollar store hobnail vase?
Very little, and that is the point of the project. A plain glass vase and a pack of dots or a small bottle of paint typically cost only a few dollars each at a craft or dollar store, so a finished vase usually comes in at the price of a coffee or two. The wooden ball method costs the most of the four, because you need the balls and the glue, while puffy paint is the cheapest, because one bottle covers several vases.
Your Turn: Start With One Vase and One Method
If you take one thing from this post, let it be this. Start with one vase and one method, and finish it before you buy supplies for five more. If you want the most realistic result, choose half wooden balls and give yourself a slow afternoon. If you want a finished vase today, choose pearl stickers and have it on the table by lunch. The vintage milk glass look is not about spending money. It is about a simple pattern, a steady hand, and a vase that looks like it has always belonged in your home.