Yes, a pool noodle makes a surprisingly good wreath, and a DIY pool noodle wreath is one of the cheapest door decorations you can make. A single noodle, which typically costs a dollar or two, bends into a light, sturdy ring that holds its shape, weighs almost nothing, and takes glue, wire, fabric and greenery without complaint. Most wreaths in this guide cost under ten dollars in new supplies, and many cost nothing if you already have a spare noodle and some ribbon at home.
Build the form properly before you decorate anything. A floppy ring with a weak join will sag, twist and show gaps once you start adding weight. Get the form right, and the same ring can carry seven completely different looks, from a bright rainbow of sliced discs to a quiet wooden bead circle, and you can strip it back and start again next season.
Build a DIY Pool Noodle Wreath Form: 3 Methods Compared
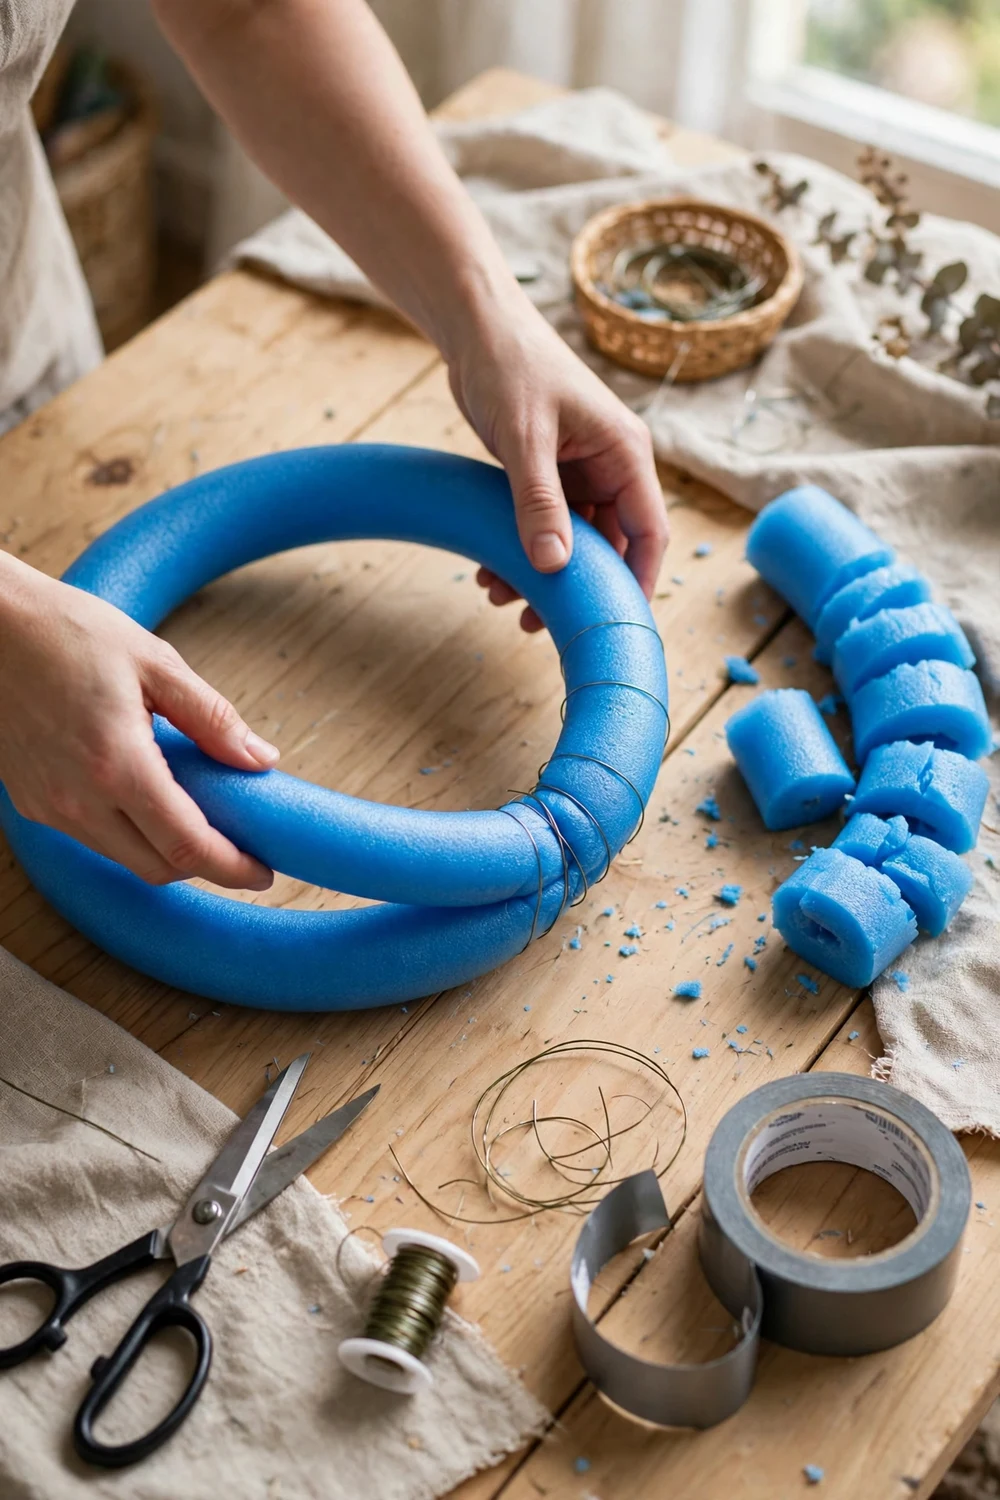
Everything starts with a pool noodle wreath form, the ring everything else attaches to. The foam is light, easy to cut, and springy enough to hold a circle. Pick a size first: 12 inch for a small door or wall, 14 inch for a standard front door, 18 inch for a wide door.
How much noodle does each size take? A standard pool noodle is about 52 inches long, and one noodle is enough for a 12 inch or a 14 inch ring with some left over. An 18 inch ring needs nearly the whole noodle, and a 20 inch ring needs a second noodle joined in. Measure by wrapping the noodle around a bowl or plate of the right size, then cut with a sharp serrated knife rather than scissors, which crush the foam.
| Wreath size | Noodle length needed | Best for |
|---|---|---|
| 12 inch | About 38 inches | Small doors, windows, interior walls |
| 14 inch | About 44 inches | Standard front doors |
| 18 inch | About 57 inches | Wide doors, porch walls, mantels |
| 20 inch | About 63 inches | Double doors, large walls |
| Method | Cost | Time | Strength | Best for |
|---|---|---|---|---|
| Sliced discs | Low | About 45 minutes | Very strong | Rainbow wreaths, kids crafts |
| Split and tape | Lowest | About 15 minutes | Good | Fabric and greenery wreaths |
| Wire core | Low | About 30 minutes | Strongest | Heavy looks, outdoor doors |
Method 1: Sliced discs on wire
This is the method behind the rainbow wreath, and it is the most fun to make with children. Cut the noodle into discs about 1 inch thick with a serrated knife, cutting straight so the discs sit flat. Thread sturdy craft wire through the centre hole of each disc in your chosen colour order, pull it into a circle and twist the ends together firmly. The discs press against each other and lock into a ring with no glue at all. Tuck the wire ends into a disc so nothing sharp pokes out.
Method 2: Split and tape tube
This is the fastest way to learn how to make a wreath with a pool noodle. Bend one noodle into a circle, overlapping the ends by about 4 inches. Push a 6 inch wooden dowel into the hollow centre of one end, then push the other end over it. The dowel acts like a splint and stops the join from bending. Wrap the join tightly with duct tape, going around three or four times, then add a second band 2 inches to each side for extra hold. That is the whole form. It will be covered completely, so the tape never shows.
Method 3: Wire core wrap
When a wreath will carry heavy things, like wooden beads, shells or small pumpkins, build the wire core version. Cut a length of 12 gauge wire a few inches longer than your finished circle, bend it into a ring and twist the ends together. Slit the noodle lengthwise, press the wire into the hollow centre and tape the slit shut every 6 inches. The wire stops the ring flexing under weight, and the foam gives you something soft to pin and tie things into. This is the strongest form, and the one to choose for a pool noodle wreath for front door use in wind, because a stiff ring does not twist on its hanger.
One warning applies to all three methods. Hot glue can melt pool noodle foam, and a high temperature glue gun will leave a dent, or worse, a hole, exactly where you wanted a decoration to sit. Use a low temperature glue gun, and test it on a scrap piece first. Attach things with wire, pins, tape or thread first, and use glue only as a backup. Floral wire pushed through the foam and twisted at the back holds greenery firmly and never melts anything. If you remember one rule, make it this one: tape first, glue second, and never press a hot nozzle straight onto bare foam.
Look 1: The Sliced Disc Rainbow Wreath
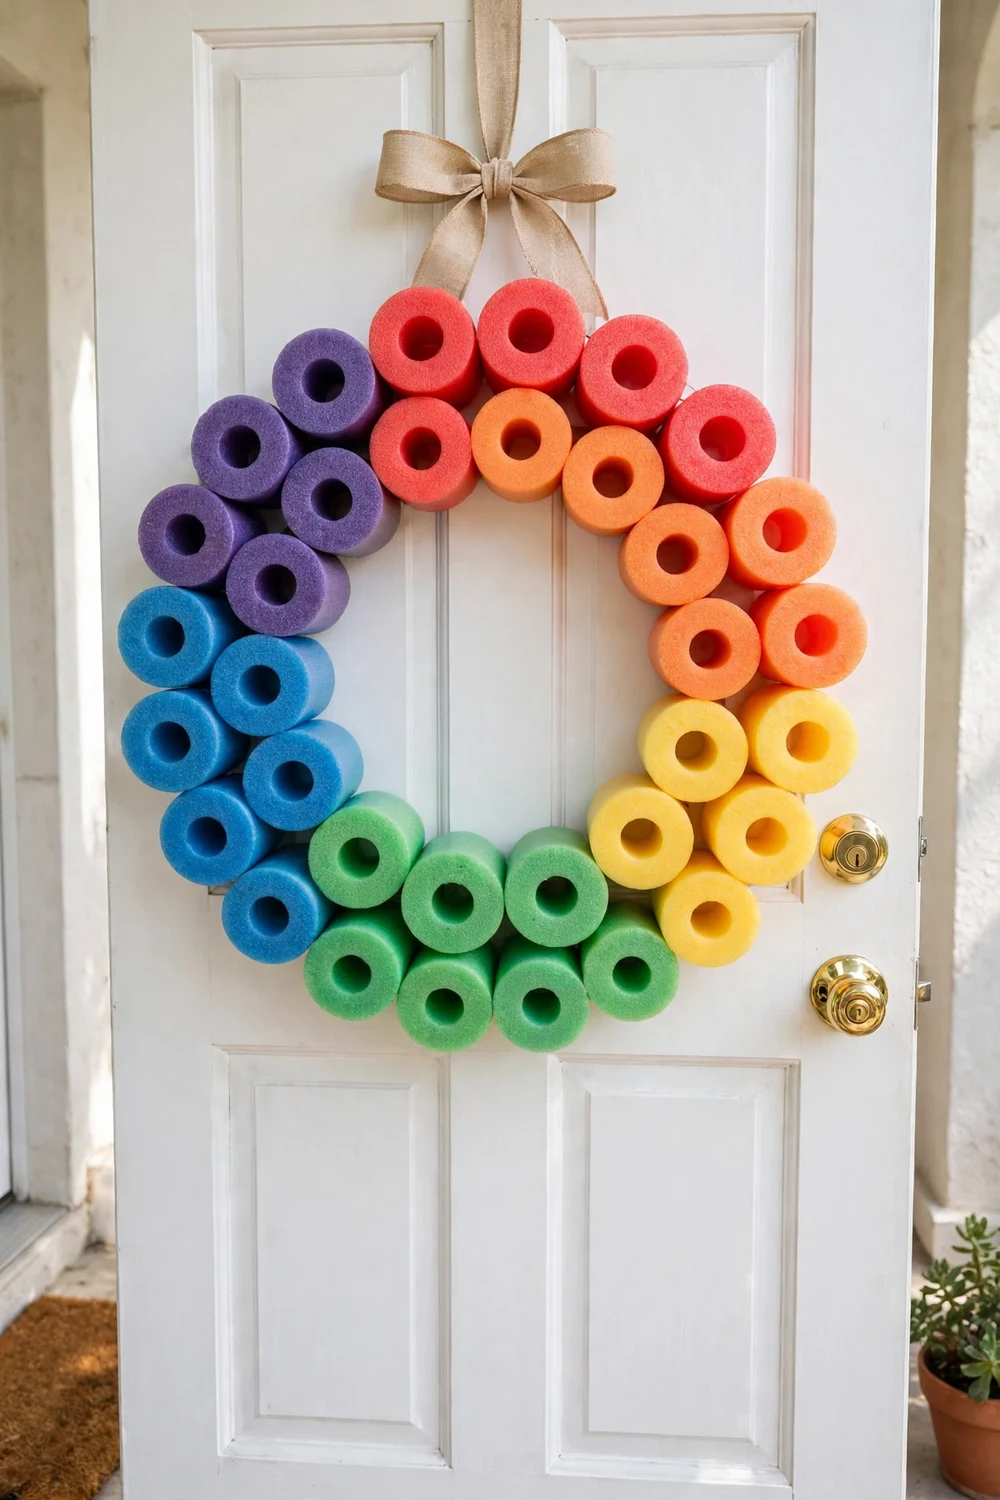
This is the look most people picture when they hear repurposed pool noodle crafts, and it is still the happiest one. The rainbow disc wreath needs no covering at all, because the discs are the decoration. Use the sliced discs on wire form from method 1, and choose your colours before you start cutting. Five or six colours in rainbow order, red, orange, yellow, green, blue and purple, give the clearest result. Coloured noodles give the cleanest colour, but you can also paint plain ones with acrylic paint and let them dry fully before slicing.
Cut each disc about 1 inch thick and keep them even, because even discs sit neatly. You need about 5 discs of each colour for a 14 inch ring, so roughly 30 in total. Thread them onto the wire in colour blocks, not mixed up, and pack them tightly so no wire shows between them. When the circle is complete, twist the wire ends together, trim them short, and tuck the join inside a disc. Add a simple ribbon loop at the top for hanging, and a small bow if you like one.
A few details make the difference between a cheerful wreath and a messy one. Keep the discs facing the same way, with the flat cut side outwards, so the front reads as a neat ring of circles. Do not overload it. A bow and a hanging loop are enough, because the colour is doing the work. This wreath suits a front door, a classroom door, a playroom wall or a birthday party backdrop. It fades in strong sun over a long summer, so bring it indoors at the end of the season and it will last for years.
This is also the best of the seven looks to make with children. Cutting is the only step that needs an adult, and threading discs onto wire is easy and satisfying for small hands. Let each child pick the colour order and own the result. A wreath a child helped to make gets hung with far more pride than a perfect one bought from a shop.
Look 2: The Soft Fabric Wrapped Wreath
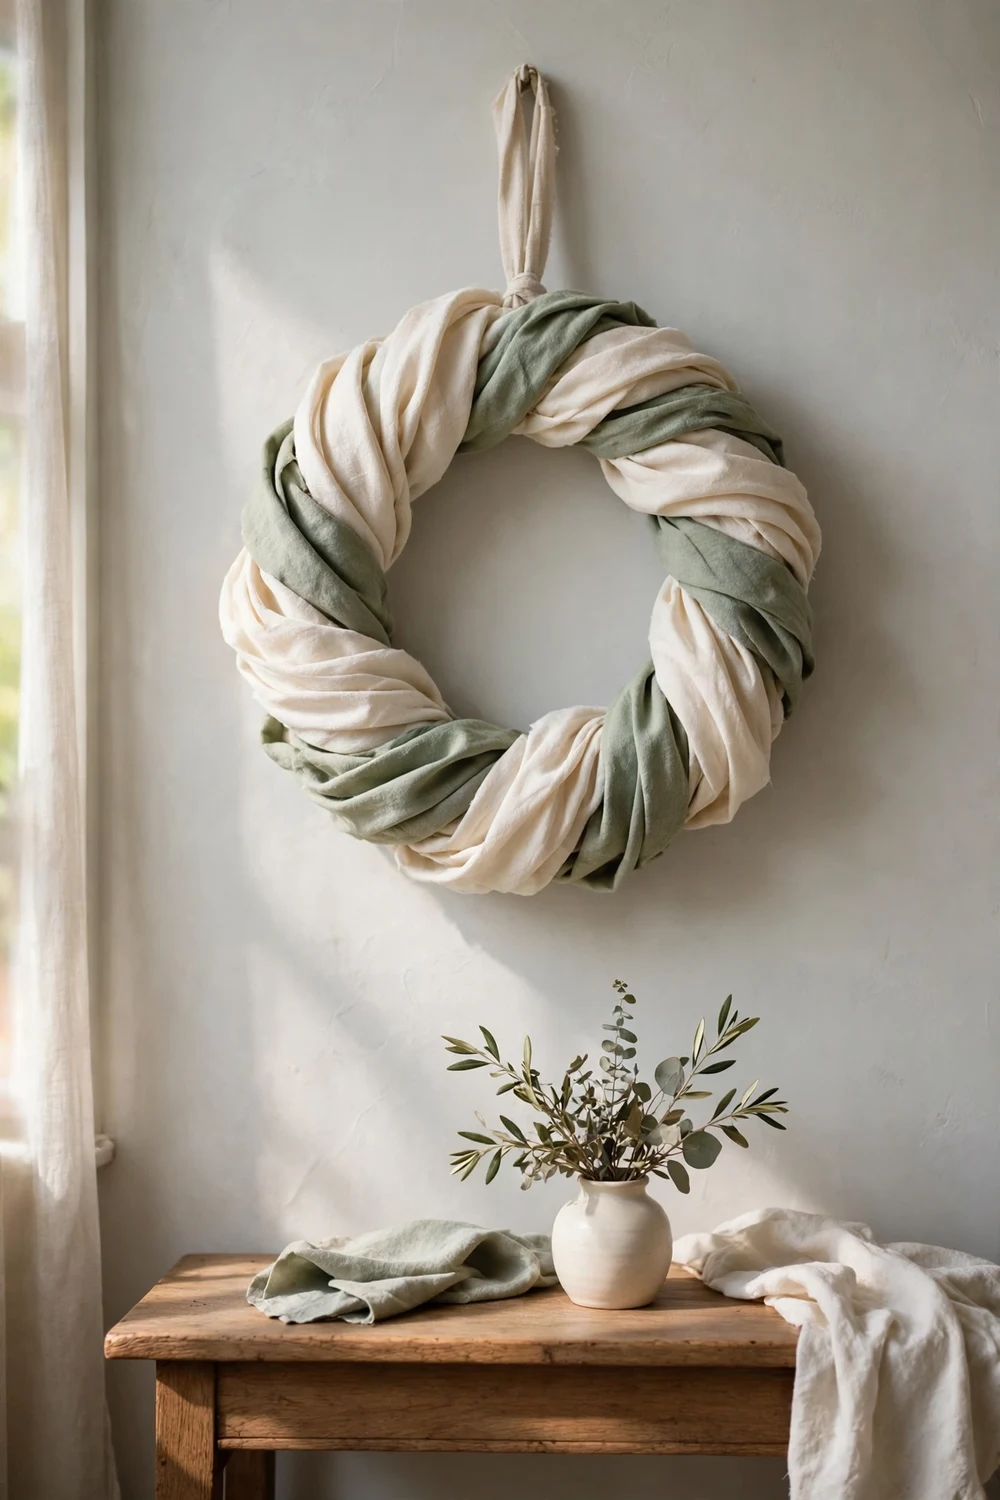
If the rainbow wreath is loud and joyful, the fabric wrapped wreath is its calm opposite, and it is the one I would hang inside my own home. Start with the split and tape form from method 2, in a 14 inch or 18 inch size. You need fabric strips about 3 inches wide and 18 inches long, and roughly 12 to 15 strips will cover a 14 inch ring. Old cotton sheets, linen offcuts, muslin and quilting cotton all work well. Cut or tear the strips, and press them flat or leave them slightly wrinkled.
Wrap one strip at a time around the form, overlapping each turn by about half the strip width so no foam shows through. Pin the start of each strip to the back, wrap steadily around the ring, and pin the end at the back too. Alternate two colours, such as cream and sage green, and the twist gives the wreath its gentle striped pattern. When the ring is covered, tie a fabric loop at the top for hanging from a matching strip.
The beauty of this look is how forgiving it is. A wrinkle is texture, not a mistake, and a slightly uneven wrap reads as handmade rather than sloppy. Check the inside edge as you go, because that is where foam peeks out first. No glue is needed anywhere in this wreath, which makes it easy to take apart and redo in a new colour next year.
Use fabric you already own before you buy anything new. Old pillowcases, a worn tablecloth or offcuts from a sewing project all wrap beautifully, and the wreath costs almost nothing that way. Leftover scraps are also perfect for small sewing projects, and our guide to DIY throw pillow ideas from old clothes and fabric shows ten ways to turn the same kind of scraps into cushions. Hang it above a console table or a bed and keep the styling simple. A small vase and a candle are enough, and luxury DIY candles from thrift store finds shows how to make a matching handmade accent that looks far more expensive than it is.
Look 3: The Fresh Greenery Wreath
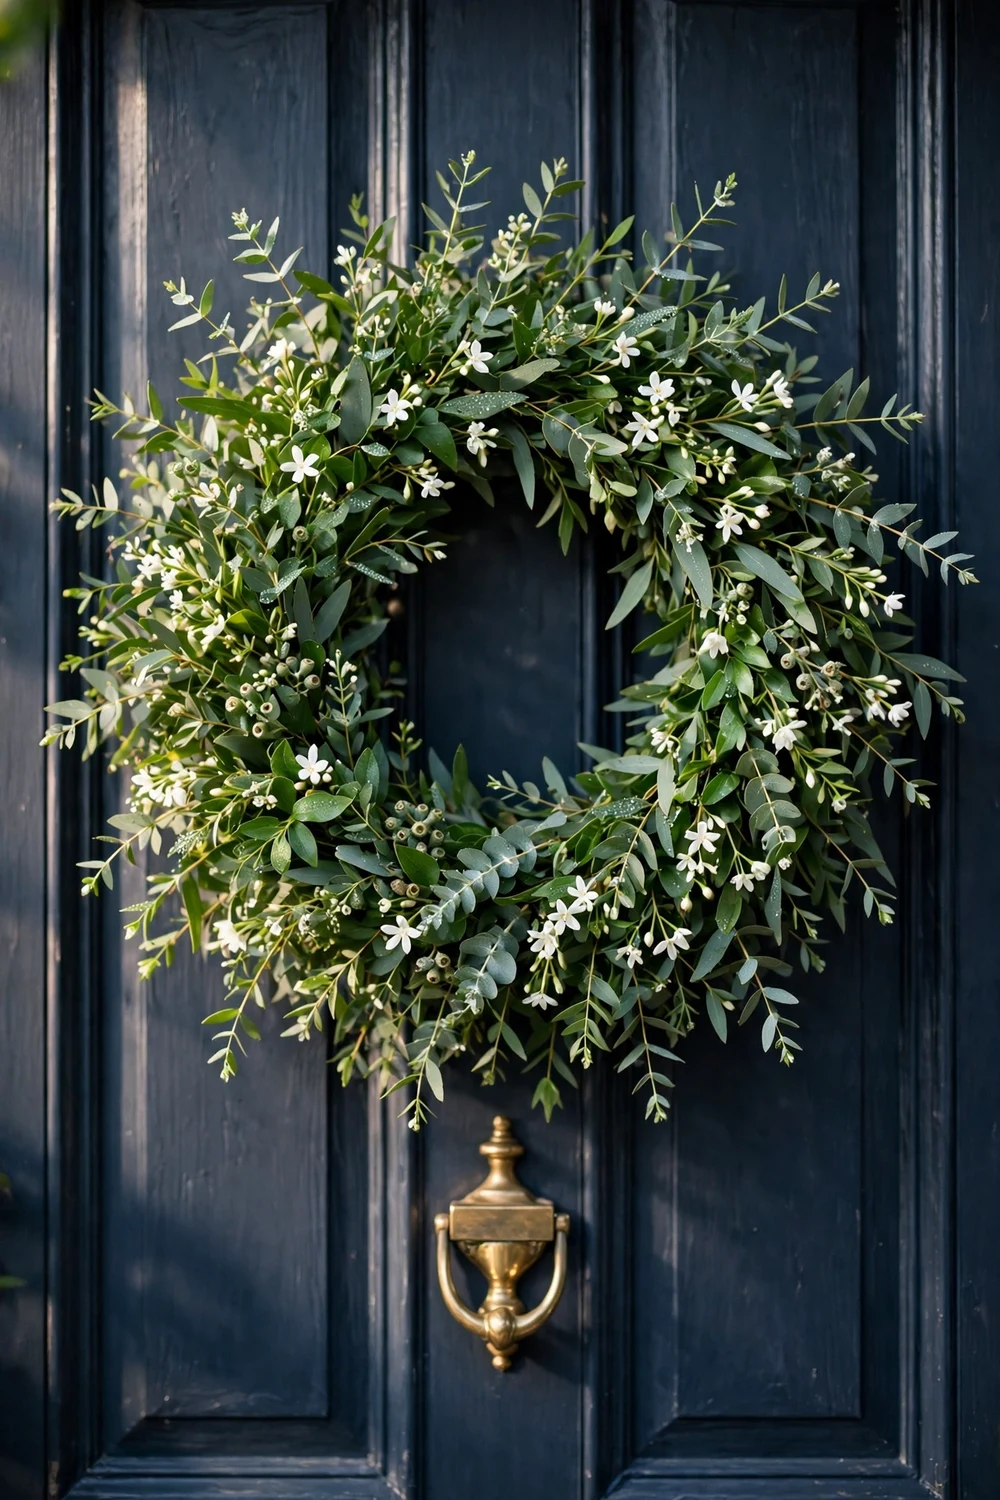
This is the look that surprises people most, because it looks like a proper florist wreath and nobody guesses it started life as a pool toy. Build the split and tape form, then wrap it tightly in green floral tape or dark green fabric so no bright foam shows through gaps in the leaves. This base layer matters more here than in any other look, because greenery never covers a ring completely, and a flash of blue foam ruins the effect.
Work with small bunches rather than single stems. Cut eucalyptus, olive branches, rosemary or any flexible greenery into pieces about 6 inches long, and gather three stems into a bunch tied with floral wire. Lay the first bunch on the form pointing clockwise, and wire it firmly in place by wrapping the wire around the form twice and twisting it at the back. Lay the next bunch over the stems of the first, so the leaves hide the wire, and keep going around the ring. Overlap generously, and plan on 10 to 12 bunches for a 14 inch ring.
Add small white flowers last, tucked in one at a time with a short wire stem. Three or four clusters are enough, and they should sit slightly proud of the greenery so they catch the light. A few sprigs of dried lavender or a thin velvet ribbon tied in a simple bow at the bottom finishes it. Keep the palette green and white, or add blush roses for a softer version.
Fresh greenery lasts about a week on a door, longer in cool weather and less in heat, so make this wreath the day before you need it, or use good quality faux greenery and keep it for months. Mist fresh leaves lightly with water each morning and hang the wreath in shade rather than direct sun. When the wreath is finished, strip the wire and compost the greenery, and the foam form is ready for the next look. That reuse is the real value of a pool noodle wreath form, because one good ring can serve you all year.
Look 4: The Warm Fall Wreath
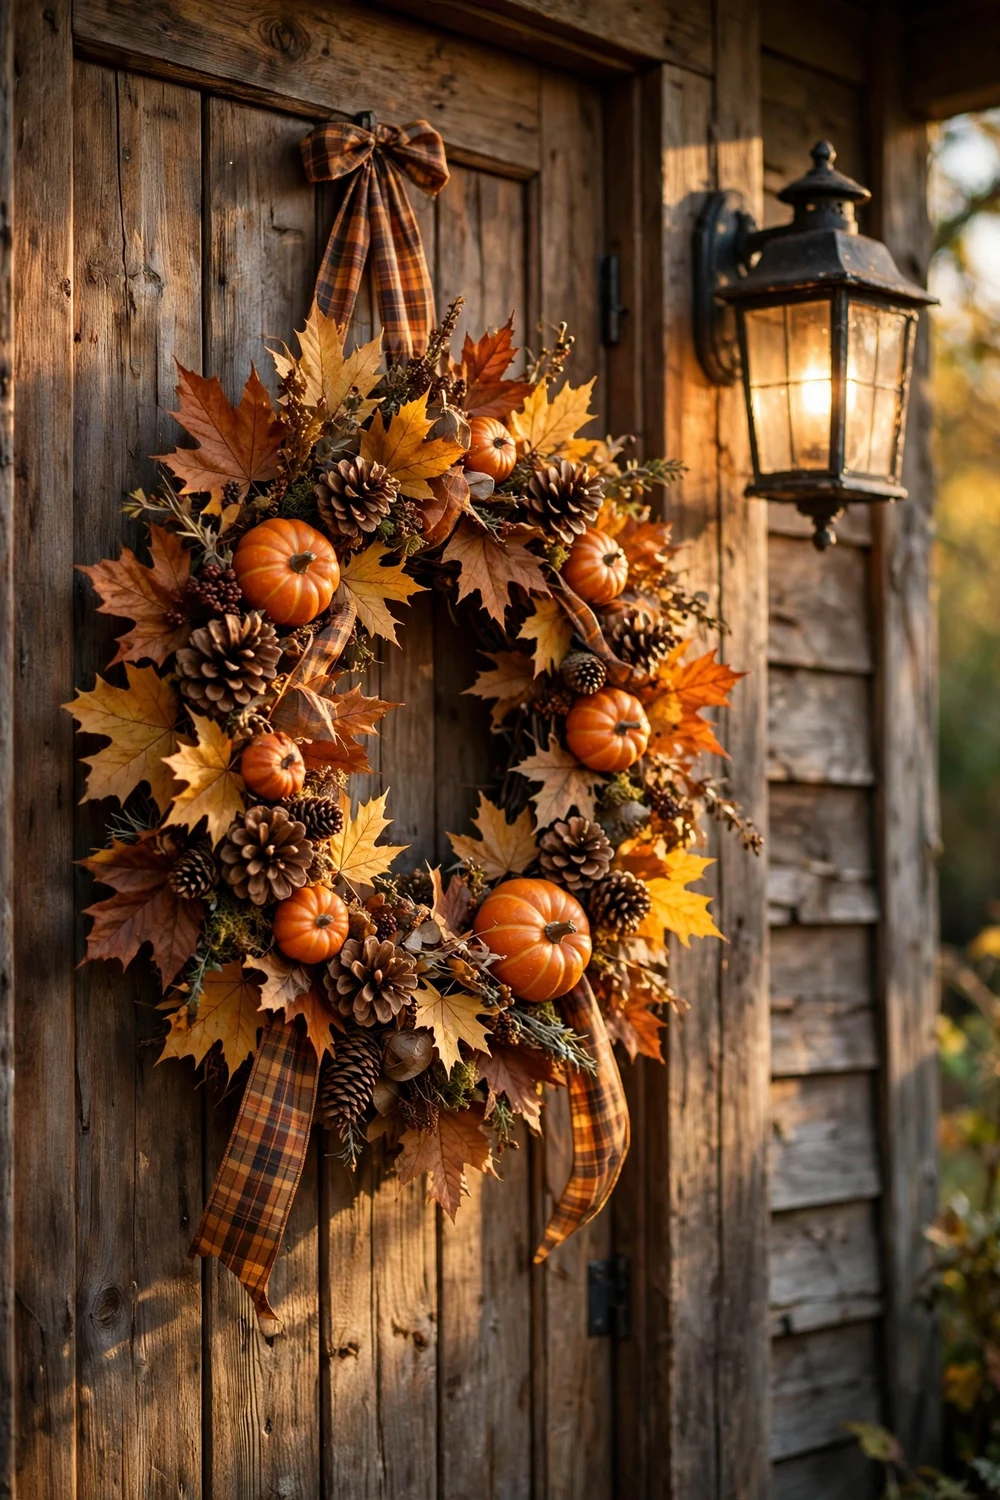
Fall is when a pool noodle wreath really earns its keep. Use the wire core form from method 3 here, because small pumpkins and pinecones add real weight, and a stiff ring will not twist or sag on the door. Wrap the form first in brown or rust coloured fabric so the base disappears under the leaves, then start with the biggest pieces and work down to the smallest.
Place five or six small faux pumpkins around the ring first, spacing them evenly, and wire each one firmly through the foam. Small pumpkins, about 3 inches across, suit a 14 inch wreath. Next add three or four pinecones, wired in the same way and tucked slightly behind the pumpkins so they read as depth rather than clutter. Then fill the gaps with faux maple leaves in rust, gold and deep orange, pushing the stems into the foam. Work in layers and check the balance as you go.
The ribbon matters more than you might expect. A wide plaid ribbon, about 2 inches across, tied in a simple bow at the top gives the wreath its finished, autumnal feel, and two long tails add movement. Cut the tails at an angle and pin them to the form rather than gluing them. If you want to paint your pumpkins, soft cream or sage green paint turns a bright orange pumpkin into something far more stylish, and our guide on how to paint modern pumpkins in five different ways walks through five finishes that work well on a wreath like this.
Hang the fall wreath where it is sheltered from rain if you can, under a porch roof rather than on an open door, because wet leaves go limp and wired pumpkins get heavy when they soak up water. When fall ends, untie the ribbon, snip the wires and store the pumpkins and pinecones in a box for next year. If you are planning the rest of your autumn decorating on a budget, our fall home decor under 40 dollars guide has a room by room plan that pairs well with this wreath.
Look 5: A Coastal Summer Pool Noodle Wreath for the Front Door
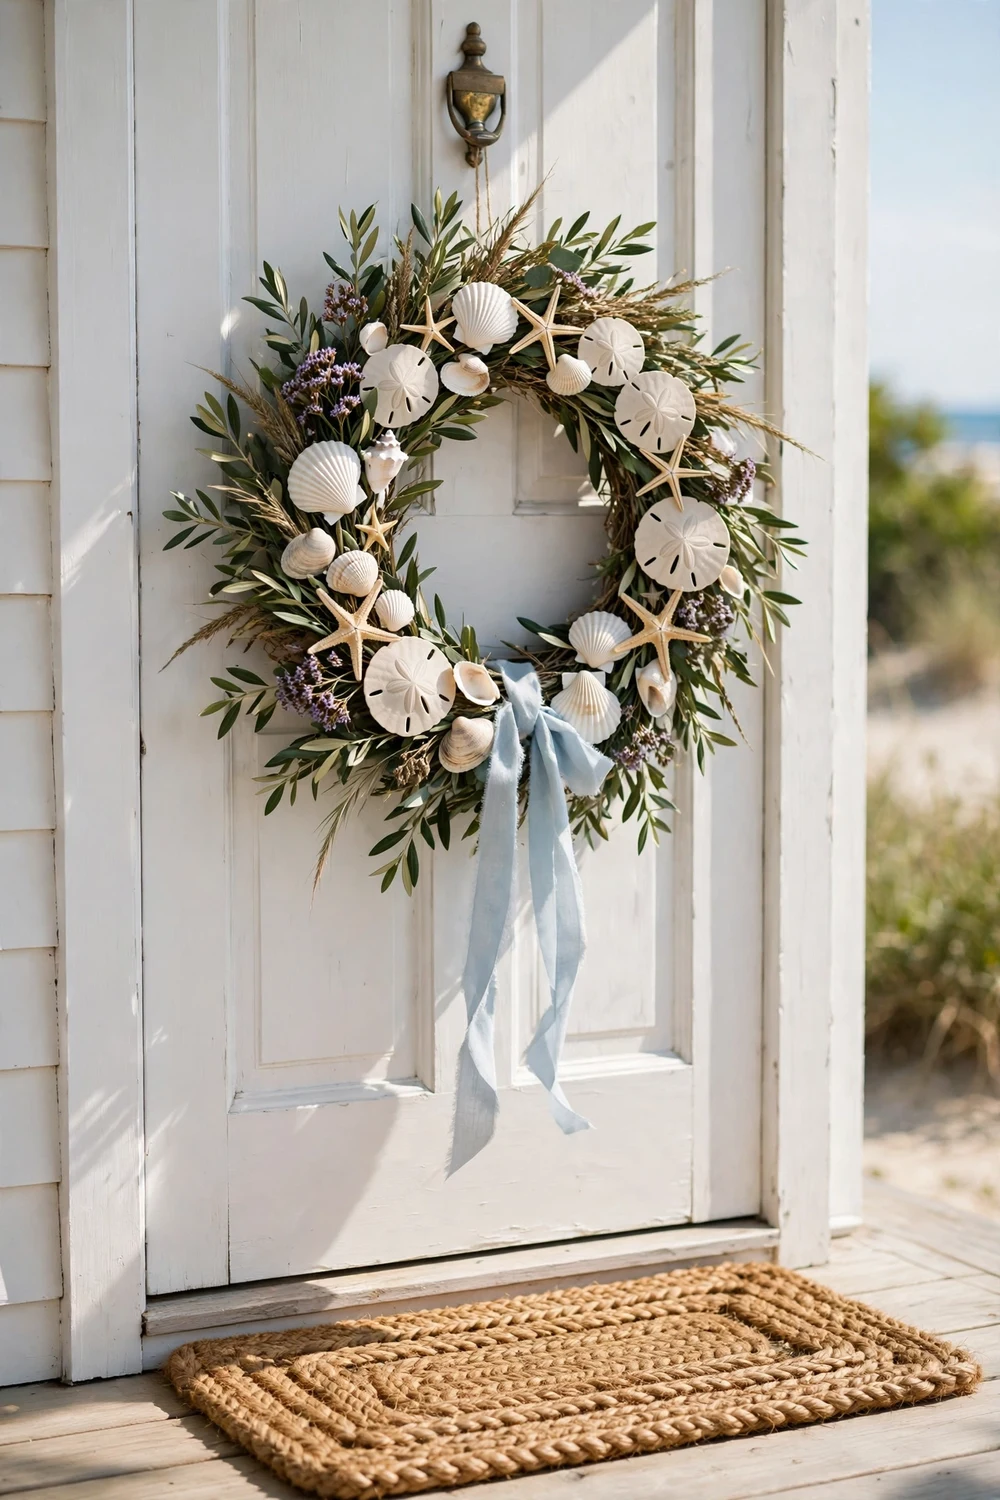
A summer pool noodle wreath belongs on a front door in July. Start with the wire core form, wrapped in natural jute or pale blue fabric, then cover the front of the ring with dried greenery or thin raffia so the shells have something textured to sit against. Olive branches, dried grasses or faux sea grass all work as a soft, beachy base. Wire the greenery on in small bunches and keep it flat rather than bushy.
Shells are the stars here, so place them with care. Space five or six large shells, scallops and sand dollars evenly around the ring, wiring each one from behind so no wire shows. Fill the gaps with smaller shells and two or three starfish, and keep the colours pale: white, cream, sand and soft grey. A pale blue ribbon tied at the bottom, with long tails, finishes the look. Resist the urge to add every shell you own. A wreath with space between its decorations looks calm and coastal, while one covered edge to edge looks crowded and heavy.
Weight is the thing to watch. Shells are heavier than leaves, so check the total weight before you hang the wreath, and use a proper wreath hanger or a strong adhesive hook rated for the weight, not a thin nail. A finished 14 inch coastal wreath usually weighs well under two pounds, but an 18 inch version with large shells can be noticeably heavier, so weigh it on a kitchen scale if you are unsure. Hang it in afternoon shade, because strong sun fades pale blue ribbon.
This is also the wreath that makes the biggest difference to a plain front door, and a few small porch changes around it go a long way. A woven doormat, a potted plant by the door and a clean door frame all help the wreath stand out, and our guide to making your front porch look expensive this summer has twenty practical ideas that cost little. When summer ends, wipe the shells with a dry cloth and store the wreath flat in a box with tissue paper between the shells.
Look 6: The Playful Flip Flop Wreath
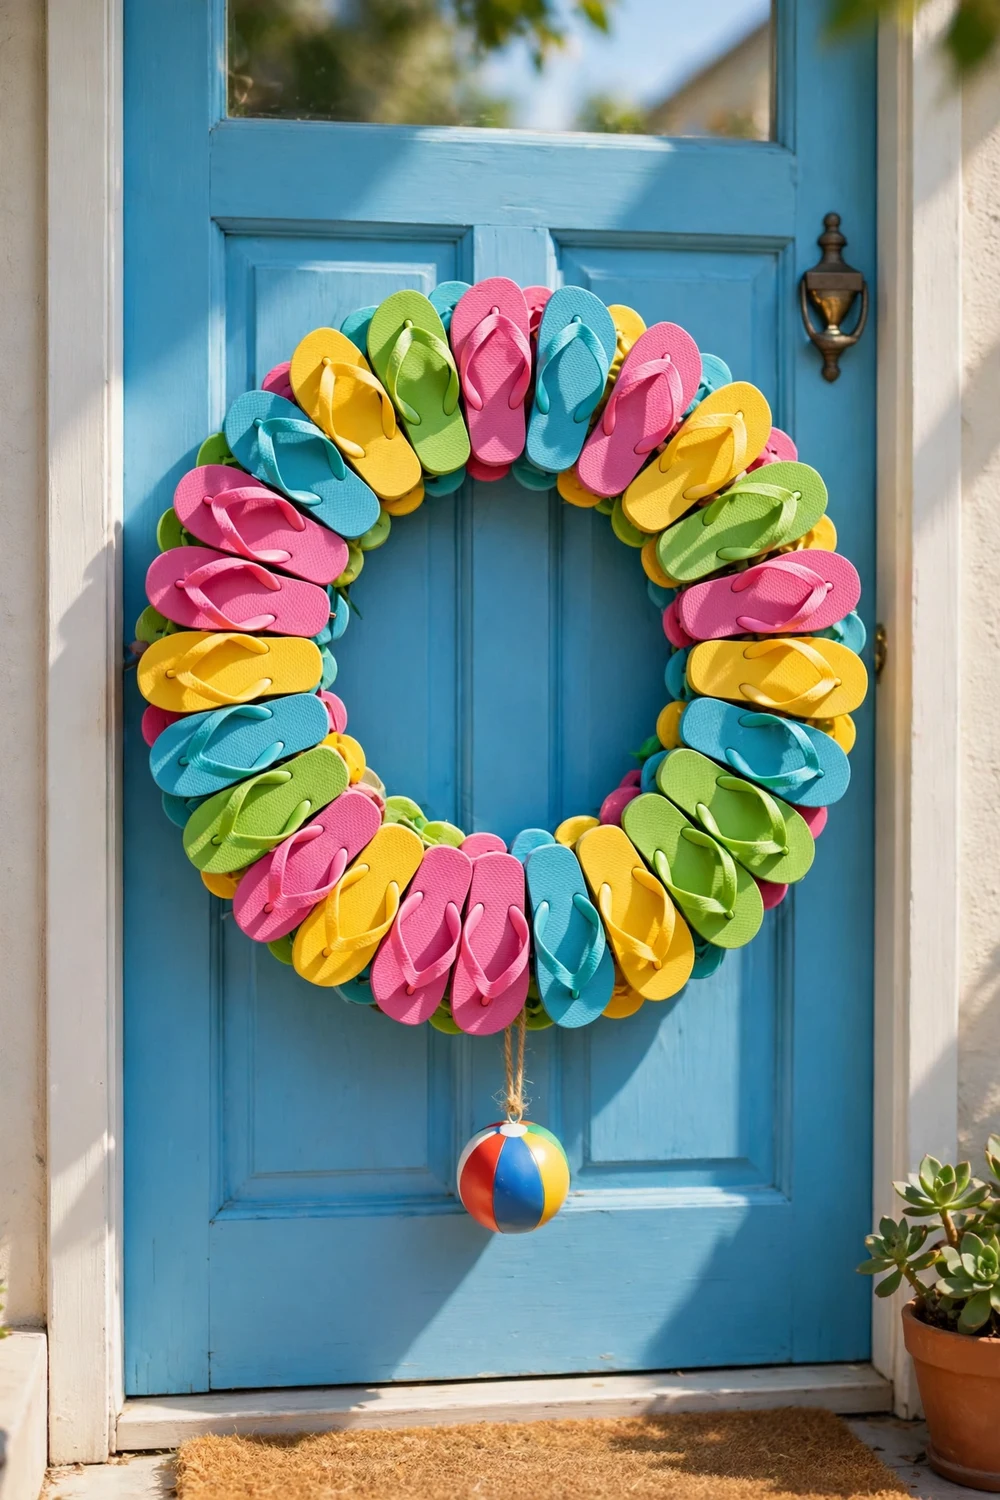
The flip flop wreath is loud, cheerful and completely unserious, perfect for a pool house door, a beach rental, a kids bedroom or a summer party. You need about 18 to 20 small flip flops, the cheapest kind, in bright colours. Small sizes work best, because adult flip flops are too big and the ring gets enormous. Look for kids sizes or small adult sizes, and mix four or five colours in roughly equal numbers.
Build the split and tape form first, then wrap it in bright fabric so no foam shows between the flip flops. Attach the flip flops one at a time, overlapping them in the same direction all the way around the ring, like scales. Push a short length of floral wire through the strap hole of each flip flop and twist it around the form at the back, pulling it tight so the flip flop sits flat. A small beach ball, a starfish or a bright ribbon bow hung from the bottom makes a fun finishing touch.
This wreath is heavier than it looks, so use the wire core form for an 18 inch ring and hang it from a proper hook, not a suction cup. It is also the wreath most likely to get wet, since it lives near pools and beach doors, and that is fine. Flip flops and pool noodle foam both shrug off water, so a splash will not hurt it. Store it flat over winter, because hanging it from one point for months can stretch the foam.
Make this one with children, because it is the silliest of the seven looks, and children have the best eye for colour. Let them choose the order and the bow, and do not correct a colour choice that looks wrong to you. A flip flop wreath is not trying to be elegant, it is trying to make people smile when they reach the door, and a child arranged ring does that better than a perfectly planned one. Keep the spare flip flops in a bag with the form for next year.
Look 7: The Minimalist Wood Bead Wreath
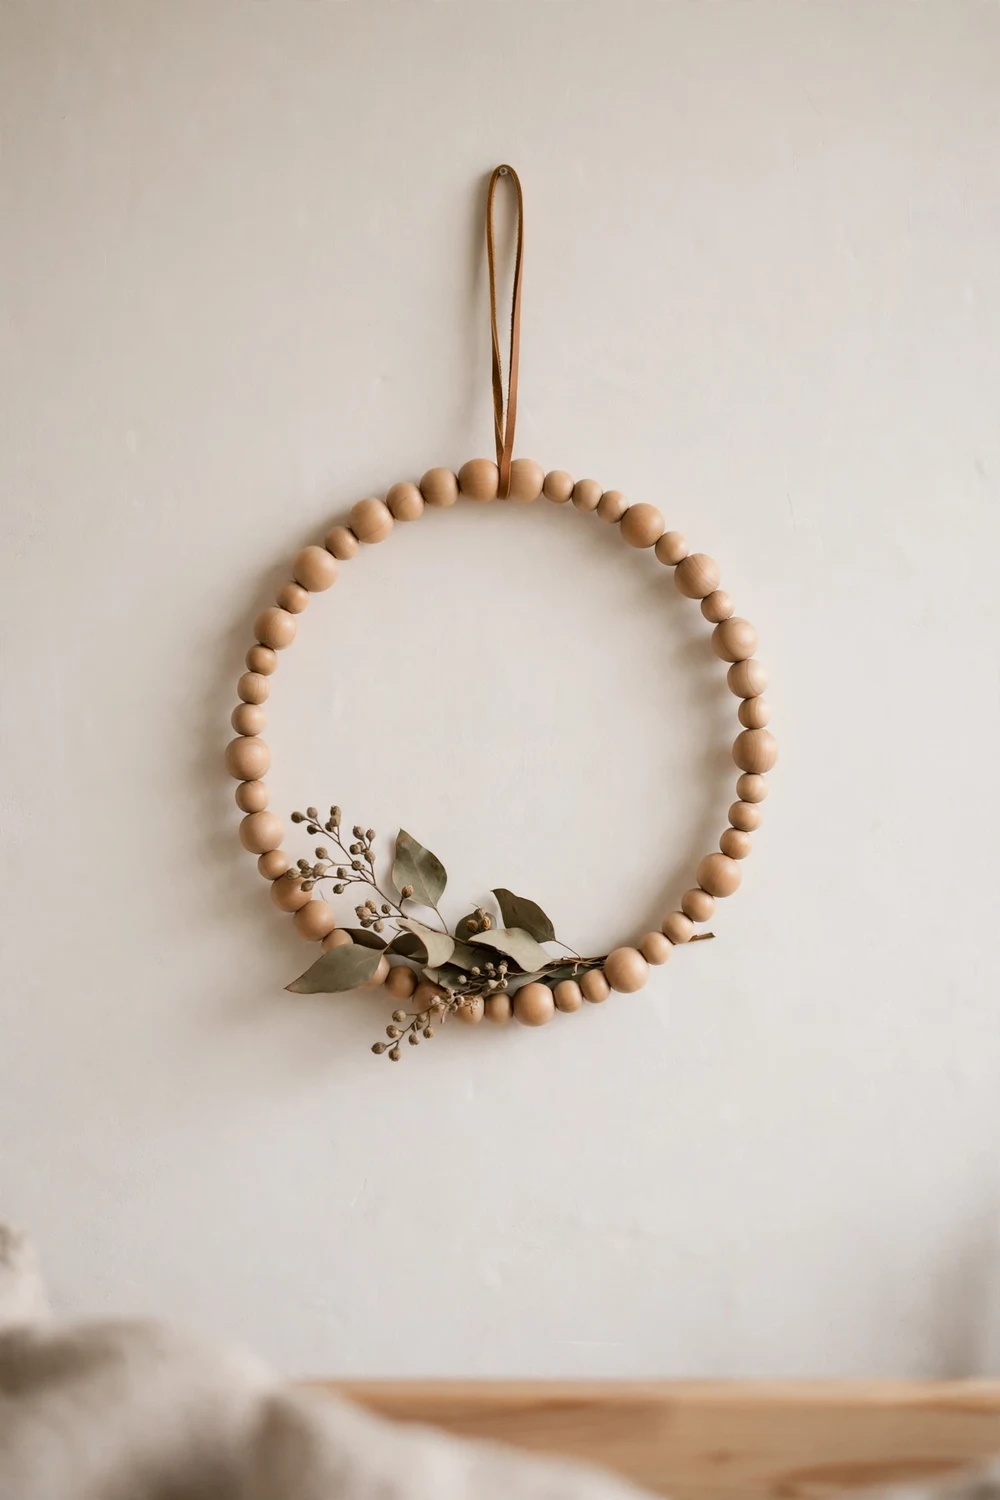
The last look is deliberately quiet. The wood bead wreath is a single circle of natural wooden beads with one small sprig of dried eucalyptus, and it suits a calm living room, a hallway or a bedroom wall far better than a front door. It is also the most satisfying to make, because the work is slow and simple, and the result looks like something from a boutique home store.
Use the wire core form from method 3, wrapped in natural linen or cream cotton so the foam is hidden. You need about 60 to 70 wooden beads in two sizes, roughly 20 mm and 16 mm, for a 14 inch ring. Thread the beads onto strong cord or thin wire in a loose pattern, mostly large beads with a smaller one every third or fourth bead, then wrap the beaded cord around the form in a neat spiral, keeping the turns close together so no fabric shows through. Tie the cord firmly at the back and tuck the knot under a bead.
Finish with a single sprig of dried eucalyptus or olive leaves wired to the bottom of the ring, and a thin leather loop at the top for hanging. That is the whole decoration, and adding more would spoil it. Cut the loop about 8 inches long, fold it in half and attach it firmly to the back of the ring with wire, not glue, because leather and foam do not bond well. Hang it on a plain wall with plenty of space around it.
If you enjoy this kind of slow, hands on making, wooden beads pair beautifully with other simple handmade pieces. A clay bead chain hung beside the wreath adds texture without adding colour, and our guide to a DIY air dry clay chain that looks expensive shows a project in the same spirit that takes an afternoon and costs very little. Keep it indoors, away from damp, and dust it gently every few weeks. Wooden beads darken slightly with age, which only makes the wreath look better.
How to Swap One Form Through the Seasons
The real value of a pool noodle wreath form is not any single look, it is the fact that one ring can carry all seven. One form can be a rainbow wreath in spring, a coastal wreath in summer, a fall wreath in autumn and a greenery wreath in winter, for far less than a single shop bought wreath.
Build one good 14 inch form using the split and tape method, and treat it as your year round base. Keep a small box for each season with its decorations and ribbon. When a season ends, snip the wires, remove the decorations and check the form. Ten minutes of care between seasons keeps a form going for years.
Store the form hanging on a hook rather than flat in a box, because a ring stored flat under other things will flatten. Hang the seasonal boxes beside it, labelled clearly, and the swap takes about half an hour. Start with the lightest look, the fabric wrap or the greenery, and save the heavy shell and pumpkin looks for later.
Pool Noodle Wreath Questions, Answered Honestly
Will it last outside on a front door?
Yes, for a season at a time, if the door has some shelter. The foam handles rain and heat well and does not rot or rust, but long sun fades bright colours and heavy rain soaks fabric and greenery.
Can I use hot glue on a pool noodle?
Only with care, and only with a low temperature glue gun. High temperature glue melts the foam and leaves a dent or a hole. Test on a scrap piece first, and use wire, pins, thread or tape instead.
How many pool noodles do I need?
One noodle is enough for a 12 inch or 14 inch wreath. An 18 inch wreath uses nearly a whole noodle, and a 20 inch wreath needs a second noodle joined in. One noodle also gives enough discs for a 14 inch rainbow ring.
What is the best way to hang it?
Use a proper over the door wreath hanger or a strong adhesive hook rated for the weight. Hang it from a fabric loop tied through the top of the form, not from a nail, which can tear the foam.
Can children help make one?
Yes, and the rainbow disc wreath is the best one to make together. Children can thread discs, choose colours and tie ribbons, while an adult handles the knife work and wire twisting.
How do I store it between seasons?
Remove the decorations and store the form hanging on a hook in a dry place. Keep the decorations in a labelled box with tissue paper between fragile pieces. Never store a wreath flat under heavy boxes, because the foam will flatten and the ring will lose its shape.
Start With One Noodle and See Where It Goes
A DIY pool noodle wreath reminds you why making things at home is worth it. One cheap noodle, a few things you already own, and an afternoon at the kitchen table can give you a front door that looks cared for in every season. Start with the split and tape form, pick the look that suits your home right now, and hang it up today. The form will still be there next season, ready for a new look.