Yes, you can turn almost any old or thrifted canvas into fresh wall art, and DIY repurposed canvas art is one of the cheapest ways to fill a blank wall with something that looks made for your home. The trick is to check the canvas first, then pick a project that matches its condition.
This guide walks you through 8 distinct reuse projects, ordered from easiest to most ambitious. You will find real technique detail here: how many gesso coats to use, which sandpaper grit works, how long each layer needs to dry, and when a canvas is simply not worth saving.
First, Decide Which Canvas Is Worth Saving
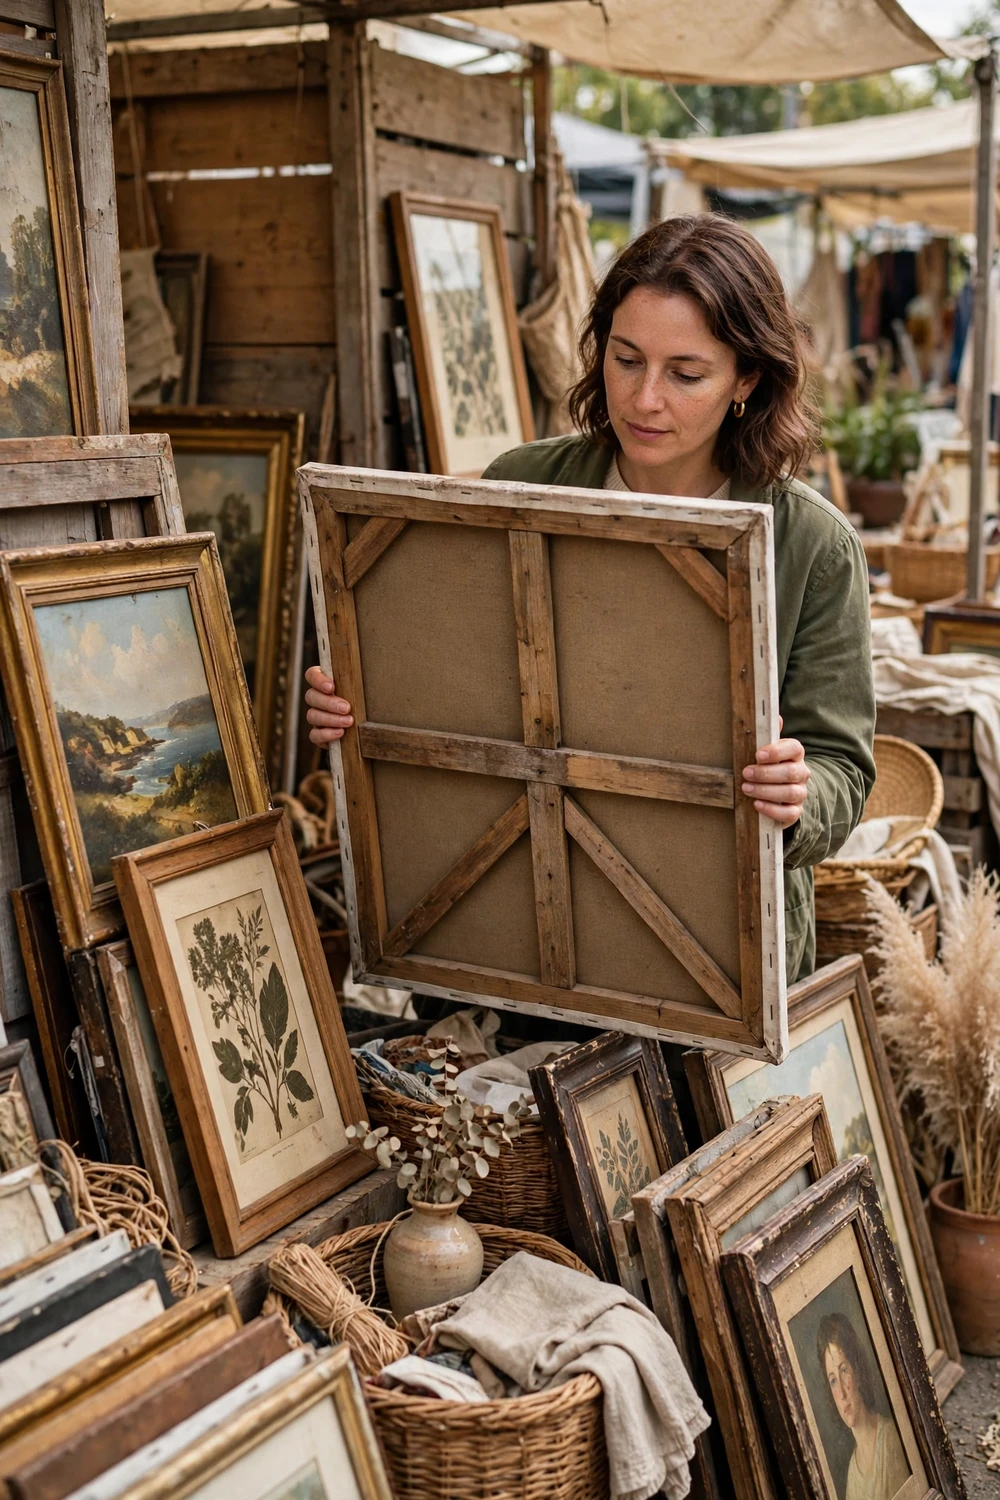
Before you buy a single tube of paint, spend five minutes checking the canvas in your hands. A good thrifted canvas saves you money and gives you a sturdy base. A bad one eats your weekend and still looks tired when you hang it. The check is simple, and it works just as well at a flea market as it does in your own spare room.
Start with the wooden stretcher bars on the back. Press each corner and each side rail. The frame should feel firm, with no wobble and no cracked joints. If a corner moves when you press it, you can often fix it with a little wood glue and a clamp, but a frame that twists in your hands is not worth the effort. Next, look at the canvas itself. It should feel taut when you tap it, like a drum skin. A sagging middle means the fabric has stretched or the staples have loosened, and no amount of paint will pull it tight again.
Then check the surface. Run your palm lightly across the front. A few small cracks in an old oil painting are normal and easy to cover. Wide flaking paint, on the other hand, will keep lifting under your new layers, so walk away from that one. Smell the canvas too. A musty, damp smell usually means mould has settled into the fabric, and that is a health risk you do not want on your living room wall. A dry, dusty smell is fine and will vanish after a wipe down.
Size matters too. A small 20 by 25 centimetre canvas suits a first decoupage project or a chalkboard, but it will disappear on a large wall. Larger canvases, from 60 by 80 centimetres upward, give you room for a proper repaint and make a stronger statement once framed. Carry a tape measure when you shop second hand, so you do not buy a pretty canvas that is far too small for your wall.
The table below sums up the whole check so you can run through it in under a minute.
| What you find | What it means | What to do |
|---|---|---|
| Firm stretcher bars, taut canvas | A sound base for any project | Take it home and start planning |
| Loose corner or slight wobble | Fixable with glue and a clamp | Buy it only if the price is low |
| Sagging canvas or loose staples | The fabric has lost its tension | Use it for tote bags or cut pieces |
| Flaking paint or mould smell | The surface will keep failing | Leave it behind |
| Solid wood frame, scratched finish | Easy to refinish | Keep the frame, even if the art goes |
Once a canvas passes this check, you have a free base for everything that follows. If it fails, do not feel guilty about leaving it. Part of good DIY repurposed canvas art is knowing which piece deserves your time. A quick look at vintage landscape oil paintings will also help you spot the difference between a mass produced print on canvas and a genuinely painted piece, which matters if you plan to sell or gift the finished work.
DIY Repurposed Canvas Art with Gesso: A Fresh Start
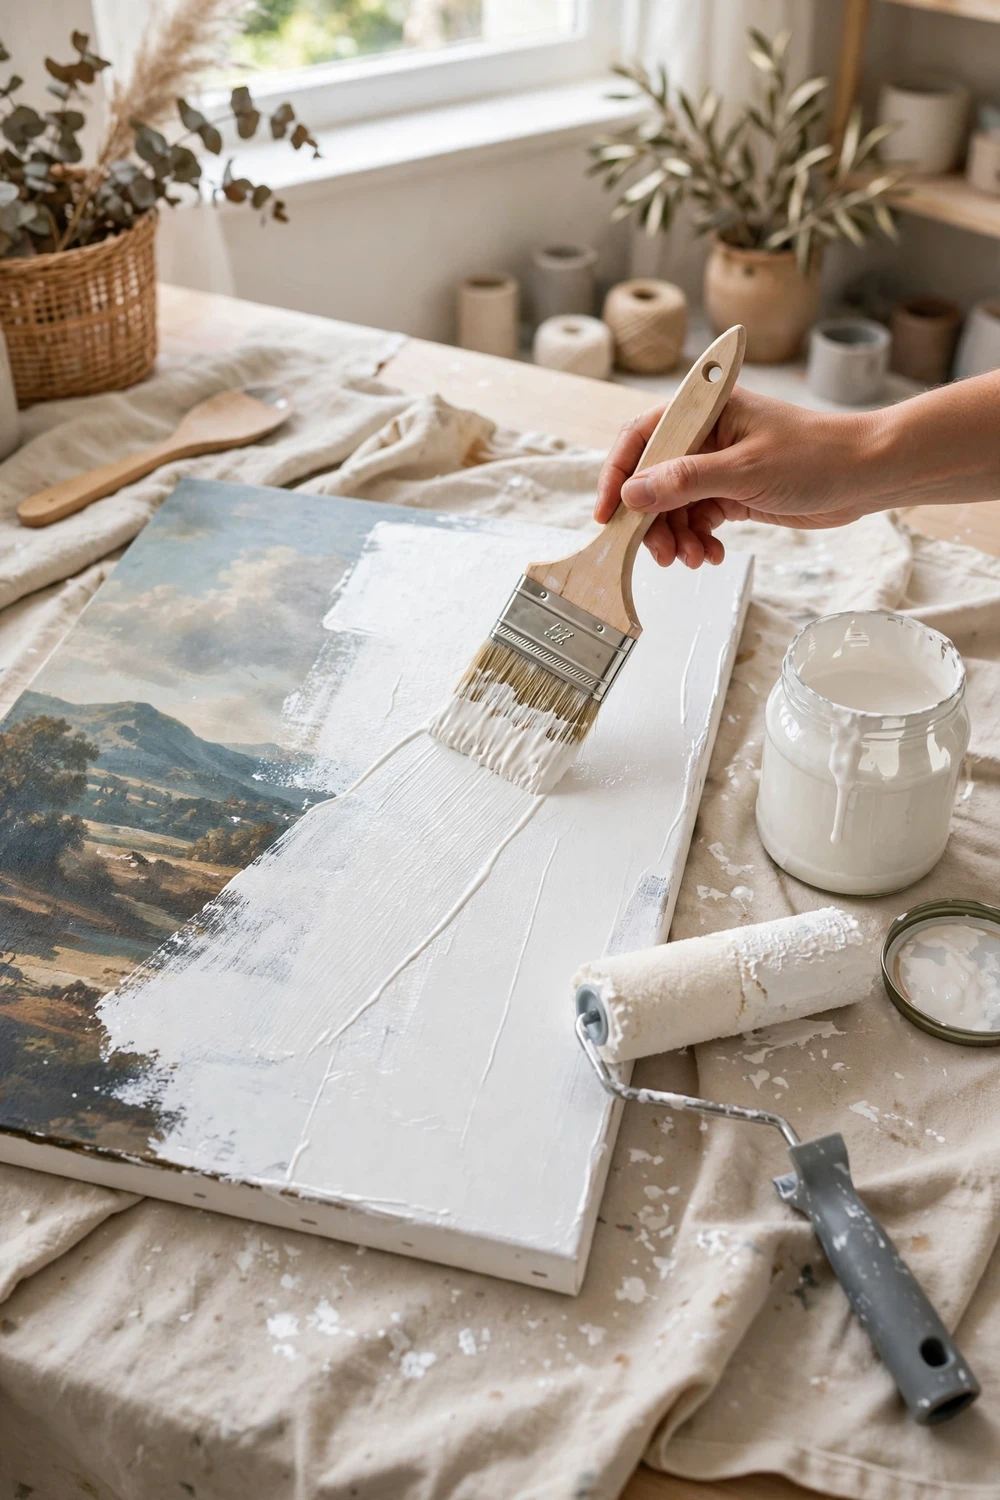
Painting over an old canvas with gesso is the most useful skill in this whole guide, and it is the project I recommend to every beginner. Gesso is a thick white primer that covers the old image and gives your new paint something to grip. Done properly, it turns a tired landscape into a clean white surface that behaves like a brand new canvas.
Start by cleaning the old painting. Wipe it with a dry cloth, then go over it lightly with 120 grit sandpaper. You are not trying to strip the paint off, only to rough up the glossy surface so the gesso can bond. Sand in small circles, stop as soon as the shine is gone, wipe the dust away with a damp cloth, and let the canvas dry for about 20 minutes.
Now brush on the first coat of gesso. Use a wide flat brush, about 5 centimetres, and work in one direction across the canvas. A thin, even coat beats a thick gloopy one every time. Thick coats dry with ridges and take far longer to cure. Let the first coat dry for 30 to 60 minutes. You will know it is ready when the surface feels dry to the touch and no longer looks wet in the centre. Sand it very lightly with 220 grit sandpaper, wipe off the dust, and apply the second coat in the opposite direction. Two coats cover most prints and light paintings. A dark or heavily textured oil painting usually needs a third coat.
Patience is the whole secret here. After your final coat, leave the canvas alone for a full 24 hours before you start painting. Gesso feels dry long before it is fully cured, and painting too soon can cause your new colours to crack or peel. I learned this the hard way on my first repaint, when a beautiful blue sky developed hairline cracks overnight because I had rushed the primer. The table below gives you the drying times for the most common combinations, so you can plan your weekend properly.
| Old surface | Gesso coats | Dry between coats | Wait before painting |
|---|---|---|---|
| Light print or watercolour | 2 coats | 30 minutes | 12 hours |
| Acrylic painting, mid tones | 2 coats | 45 minutes | 24 hours |
| Dark oil painting | 3 coats | 60 minutes | 24 hours |
| Heavily textured paint | 3 coats, sanded between each | 60 minutes | 24 hours |
Once the surface is ready, keep your first repaint simple: soft colour blocking, abstract shapes, or botanical silhouettes. For ideas on building texture into the painted surface, these textured paint ideas show how far a palette knife can take a plain canvas.
Busted Canvas Art with Fairy Lights
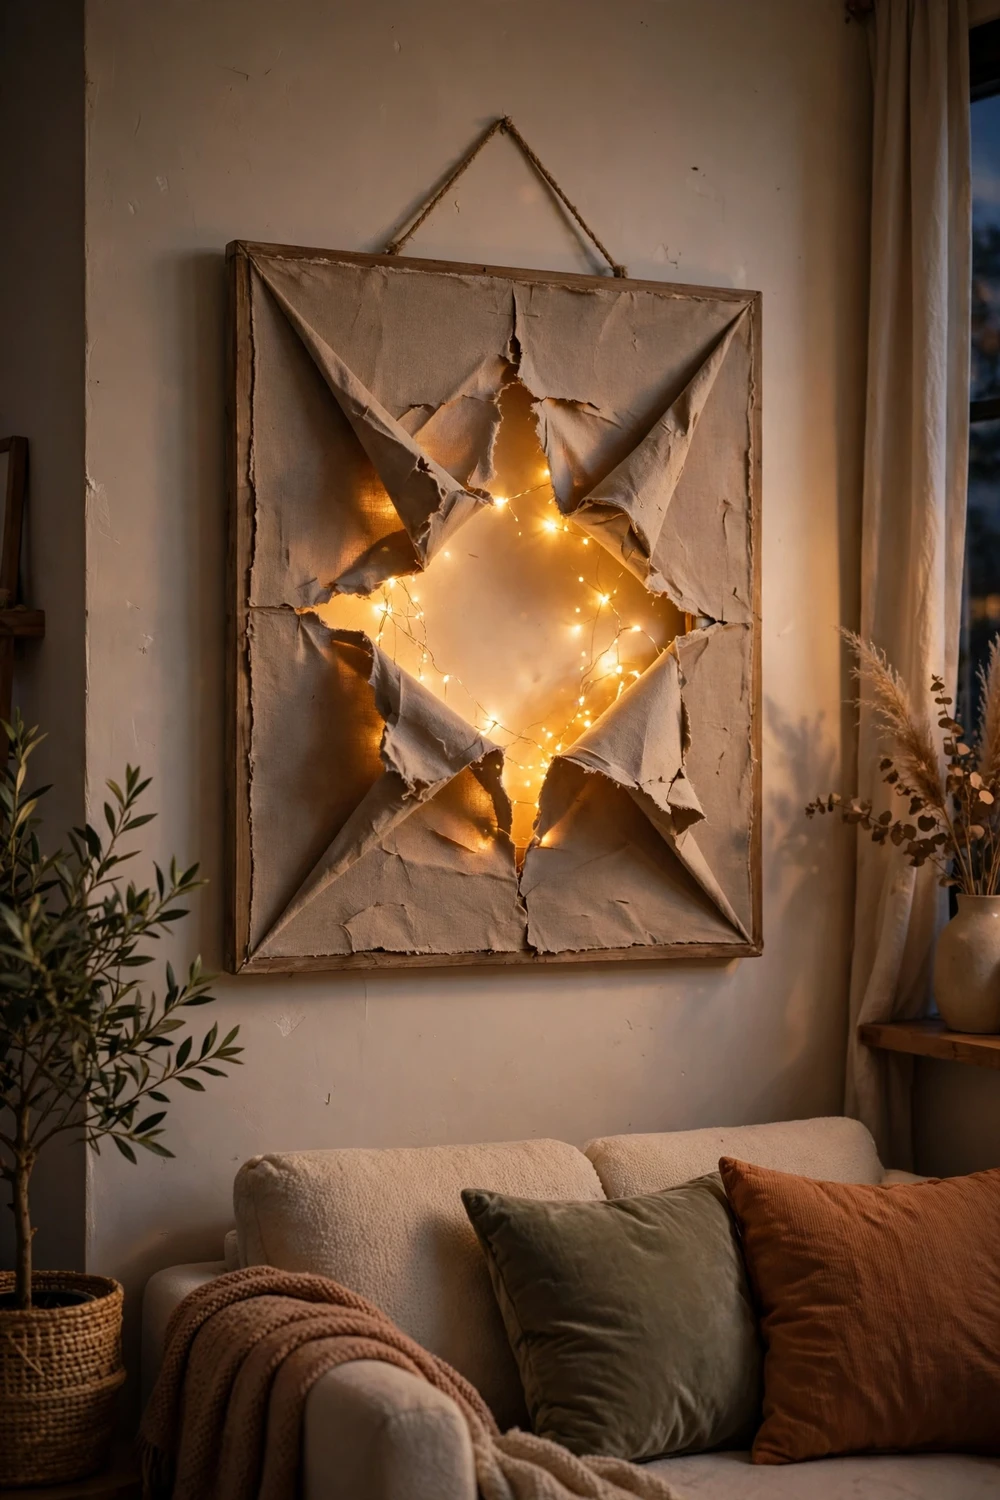
Busted canvas art is the project that surprises everyone. You cut a shape into the middle of a painted canvas, fold the flaps back, and place fairy lights behind the opening, so the painting looks as if it has burst open to reveal a glow inside. It is far easier than it looks, and it uses the kind of canvas that would otherwise go to waste, because the centre is exactly the part you cut away.
Start with a canvas that has a firm frame but a dull or damaged centre. Paint it first, or cover it with gesso and paint a simple design. Abstract washes and solid earthy colours all work well, because the lights will do the talking. Let the paint dry fully for at least 24 hours. Then flip the canvas over and mark your shape on the back with a pencil and a ruler. Draw a square or diamond about one third the width of the canvas, then draw diagonal lines from each corner toward the centre. These lines are your cutting guides.
Cut along the diagonal lines with a sharp craft knife, using a cutting mat underneath and keeping your fingers clear of the blade. Cut only the canvas fabric, not the wooden frame. Fold each triangular flap back toward the frame and glue it flat with strong craft glue, taping it down while the glue sets. A few dabs of hot glue along the fold will hold the shape firmly. Let everything dry for an hour.
Now add the lights. Use battery powered LED fairy lights only, never mains powered strings or candles. LEDs stay cool, which matters because you are placing them against fabric and glue. Tape the battery pack to the back of the frame, low down where it stays hidden, and arrange the light strand in loose loops behind the opening. Test the lights before you hang the canvas, and check that the switch is easy to reach from below. A strand of 20 to 30 lights suits a small canvas, while a large one can take 50 without looking crowded.
Hang the finished piece where it will be seen in the evening, above a sofa or in a hallway that catches the light at dusk. Keep spare batteries in a drawer nearby. This project also suits a canvas with a stained or torn middle, since the cut removes the damaged area completely.
Decoupage and Collage: Paper Over Paint
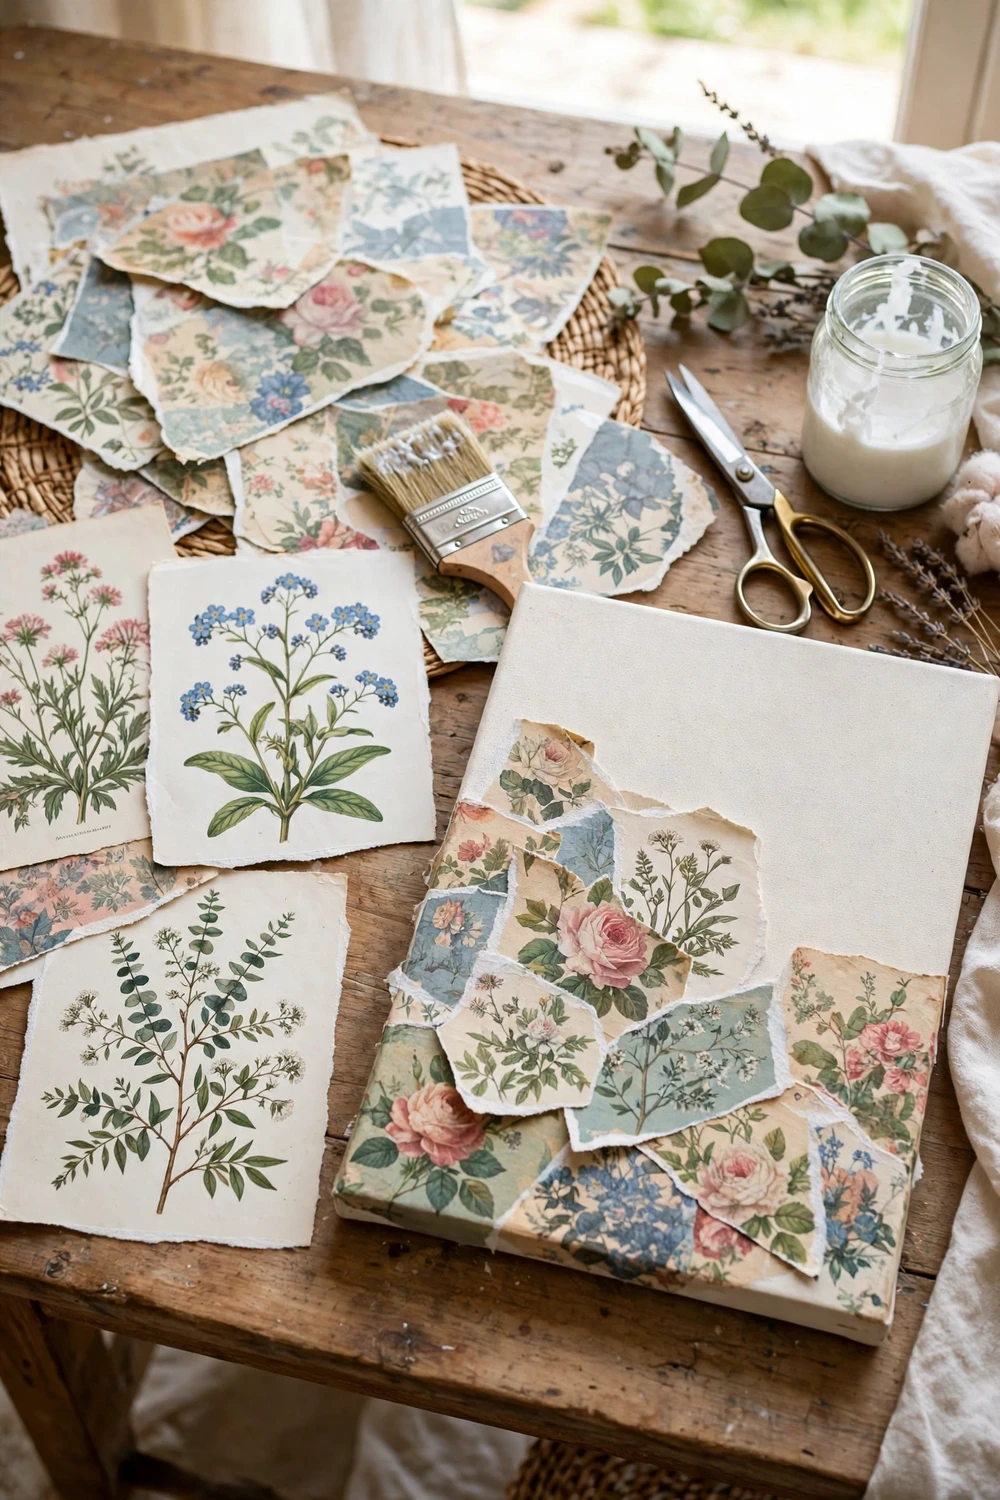
Decoupage canvas art is the gentlest project in this guide, and it suits anyone who loves paper and pattern. You layer torn pieces of decorative paper onto a canvas with glue, building up a collage that looks intentional rather than random. Vintage floral prints, botanical illustrations, old maps, and sheet music all work beautifully, and the torn edges give the finished piece a soft, handmade feel.
Choose your paper before you touch the canvas. Thin paper works best, because thick card stock wrinkles and lifts at the edges. Tear the sheets into pieces roughly 5 to 10 centimetres across, keeping the most beautiful parts of each print intact. A rose, a leaf, or a line of music makes a better focal point than a random scrap. Lay the pieces out on the canvas without glue first, and move them around until the arrangement feels balanced. Leave small gaps of the canvas showing through, because those gaps stop the collage from looking crowded and give the eye somewhere to rest.
Glue one piece at a time. Brush a thin layer of decoupage glue onto the canvas, press the paper down, then brush another thin layer over the top. Smooth from the centre outward, pushing out air bubbles as you go, and overlap the edges slightly so no bare canvas shows where you do not want it. If a bubble appears, prick it with a pin and press it flat while the glue is still wet. Let the first layer dry for about 2 hours.
Sealing is what separates a collage that lasts from one that peels. Once the whole design is dry, brush two thin sealing coats over the entire surface, letting each coat dry for 2 hours. Use a clear matte sealant for a soft, paper like finish, or a satin one for a slight sheen. Avoid thick coats, which can turn cloudy as they dry.
Small treasures suit this technique too. Pressed flowers, ticket stubs, and postcards can join the paper layers, as long as they are flat and fully dry. If you enjoy displaying small collected objects, vintage printer tray displays use the same idea on a larger scale. Keep your palette to two or three colours, and the collage will look calm rather than busy.
Chalkboard Paint Canvas for the Kitchen
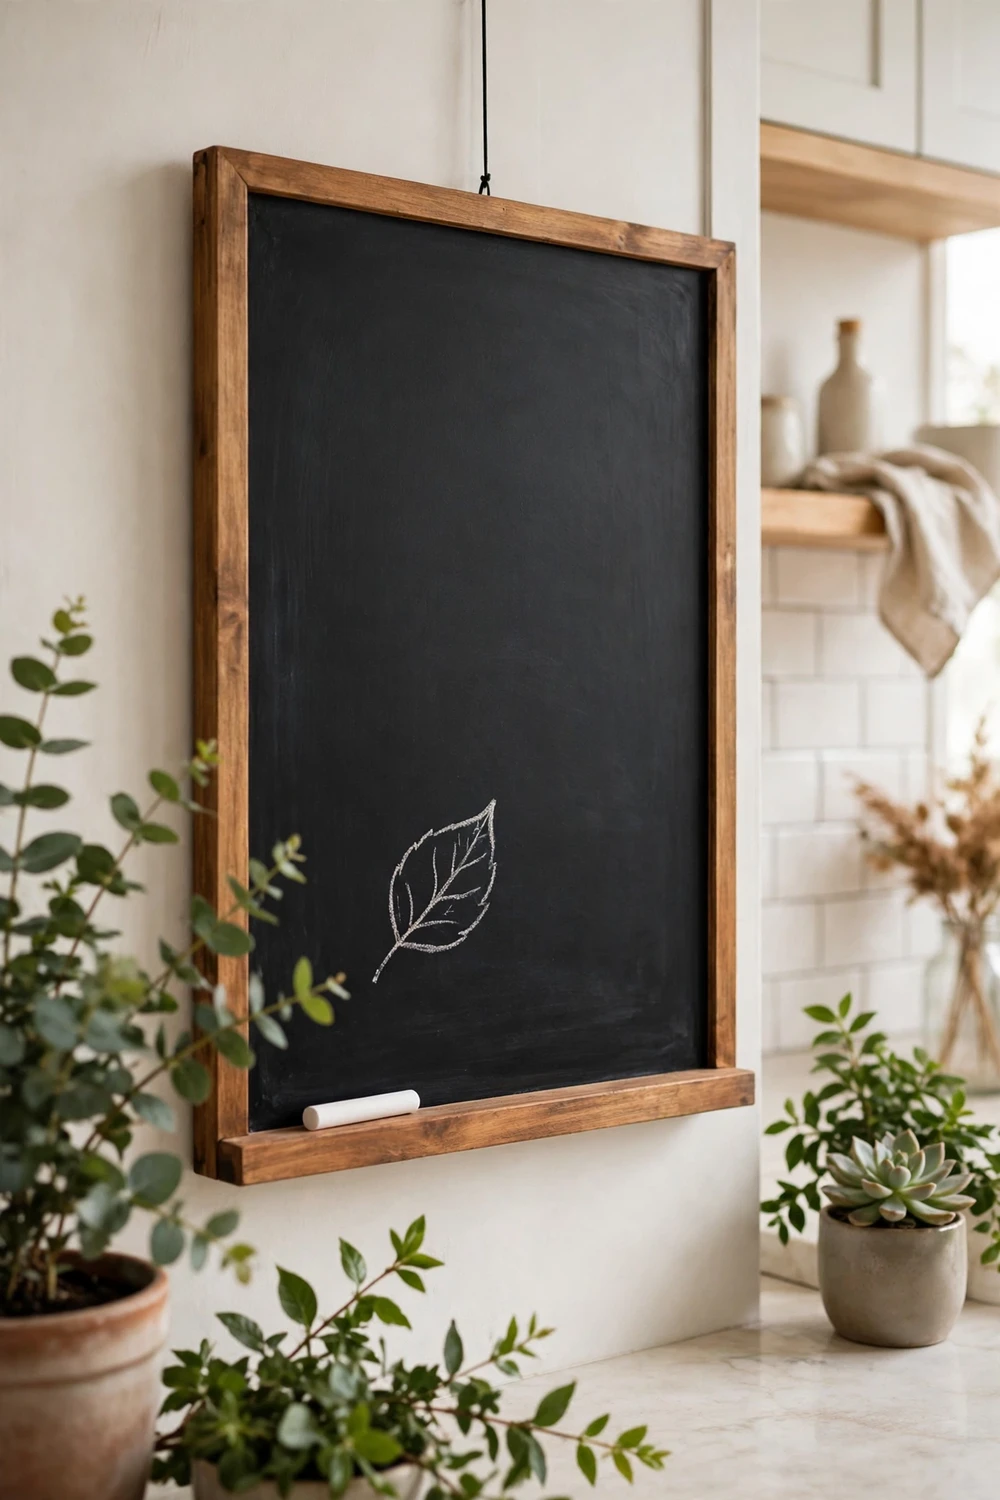
A chalkboard canvas is the most practical project in this guide, because it does a job as well as looking good. In a kitchen it holds the weekly menu or a shopping list. In a hallway it becomes a welcome board, and in a child’s room it is a drawing surface that never runs out of paper. When you tire of the message, you wipe it clean and start again.
Start with a small to medium canvas, ideally 40 by 50 centimetres or smaller. A large chalkboard looks impressive, but it is heavy to move and harder to erase cleanly. Sand the surface lightly with 120 grit sandpaper and wipe away the dust, just as you would before gesso. Then brush on chalkboard paint in thin, even coats. Two coats cover most surfaces, but three coats give a smoother writing surface and erase more cleanly. Let each coat dry for at least 2 hours, and sand very lightly with 220 grit sandpaper between coats to keep the surface smooth.
Here is the step most people skip, and it is the step that decides whether your chalkboard works or smudges forever. After the final coat, you must let the paint cure for a full 3 days before you write on it. Do not rush this. Chalkboard paint hardens slowly, and writing on it too soon leaves permanent ghost marks that no amount of erasing will remove. Once the 3 days have passed, season the surface by rubbing a stick of white chalk sideways across the whole board, then erase it with a damp cloth. This fills the tiny pores in the paint and stops your first message from leaving a permanent shadow.
Frame the canvas with a simple wood frame, or leave it unframed for a softer look. Add a small wooden ledge along the bottom edge to hold chalk and an eraser, fixed with two small screws from the back. Hang it at eye level near the fridge or the back door, where the family naturally passes. Keep a damp cloth nearby for erasing, and avoid permanent markers completely, because they will stain the surface.
Build a Wood Frame That Makes It Look Bought
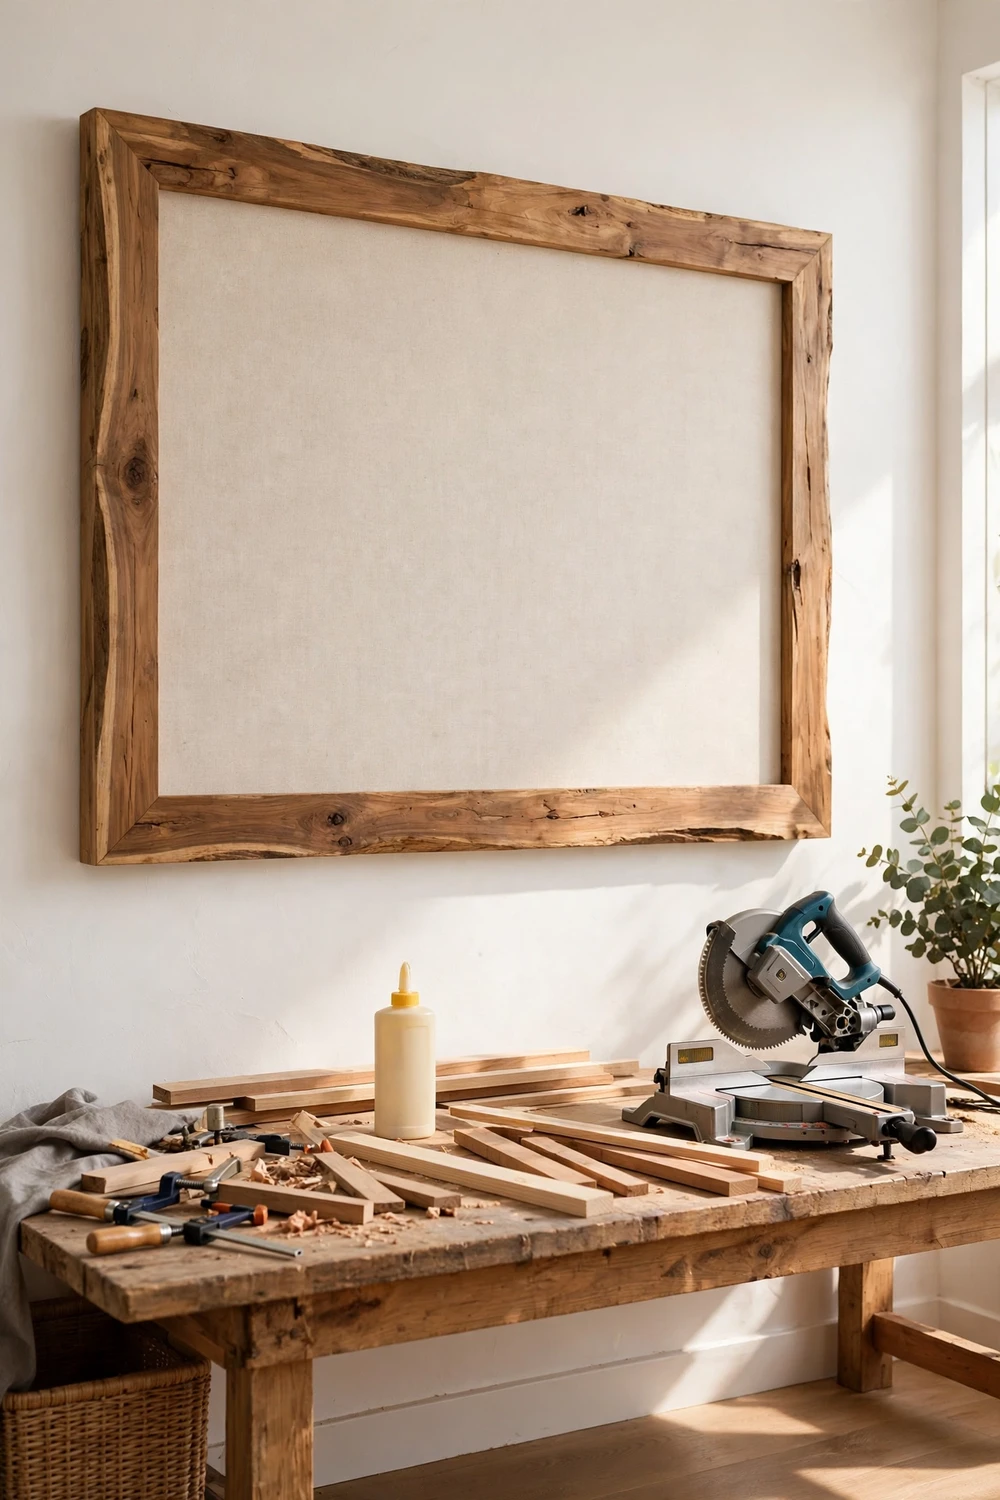
Sometimes the painting is fine and the frame is the problem. A thin black plastic frame can make even a good repaint look cheap, while a solid wood frame lifts the whole piece. Building a simple floating frame is one of the most satisfying projects in this guide, because the change is instant. You will wonder why you waited so long.
Measure your canvas first, and measure twice. A floating frame sits around the canvas with a small gap of about 5 millimetres on each side, which creates a neat shadow line that looks professional. Add the gap to each side, then add the width of your wood strips. For a canvas that measures 60 by 80 centimetres, using wood strips 4 centimetres wide, you will need two strips of 88 centimetres and two strips of 68 centimetres, once the mitre cuts are taken into account. Cut a little long rather than a little short, because you can always trim, but you cannot stretch a strip that is too short.
Cut the ends at 45 degrees so the corners meet cleanly. A mitre box and a hand saw work fine for softwood strips, and they cost very little. Sand each cut edge smooth with 120 grit sandpaper, then dry fit the frame around the canvas before you glue anything. If a corner gaps, trim it a fraction at a time until the joint closes. Glue the corners with wood glue, hold them with a clamp or strong tape, and let them set for at least 2 hours. Small brad nails driven in from the sides will strengthen the joints, but they are optional if the glue holds well.
Stain or paint the frame before you fit the canvas, because it is much easier to finish wood when it is flat on a bench. A clear wax or a light oak stain suits most homes. If your room leans modern, a matte black paint finish looks sharp against a pale canvas. Slide the canvas into the frame from the front, and fix it in place with small screws or canvas clips on the back. Hang the finished piece with two picture hooks rather than one, so it stays level and does not swing on the wall.
This frame also rescues a canvas you bought for the frame alone. If you want more ideas for making a framed piece feel like part of a styled room, framed textile art from an old rug shows the same framing thinking applied to fabric.
Cut It Down: Canvas Tote Bags and Fabric Pieces
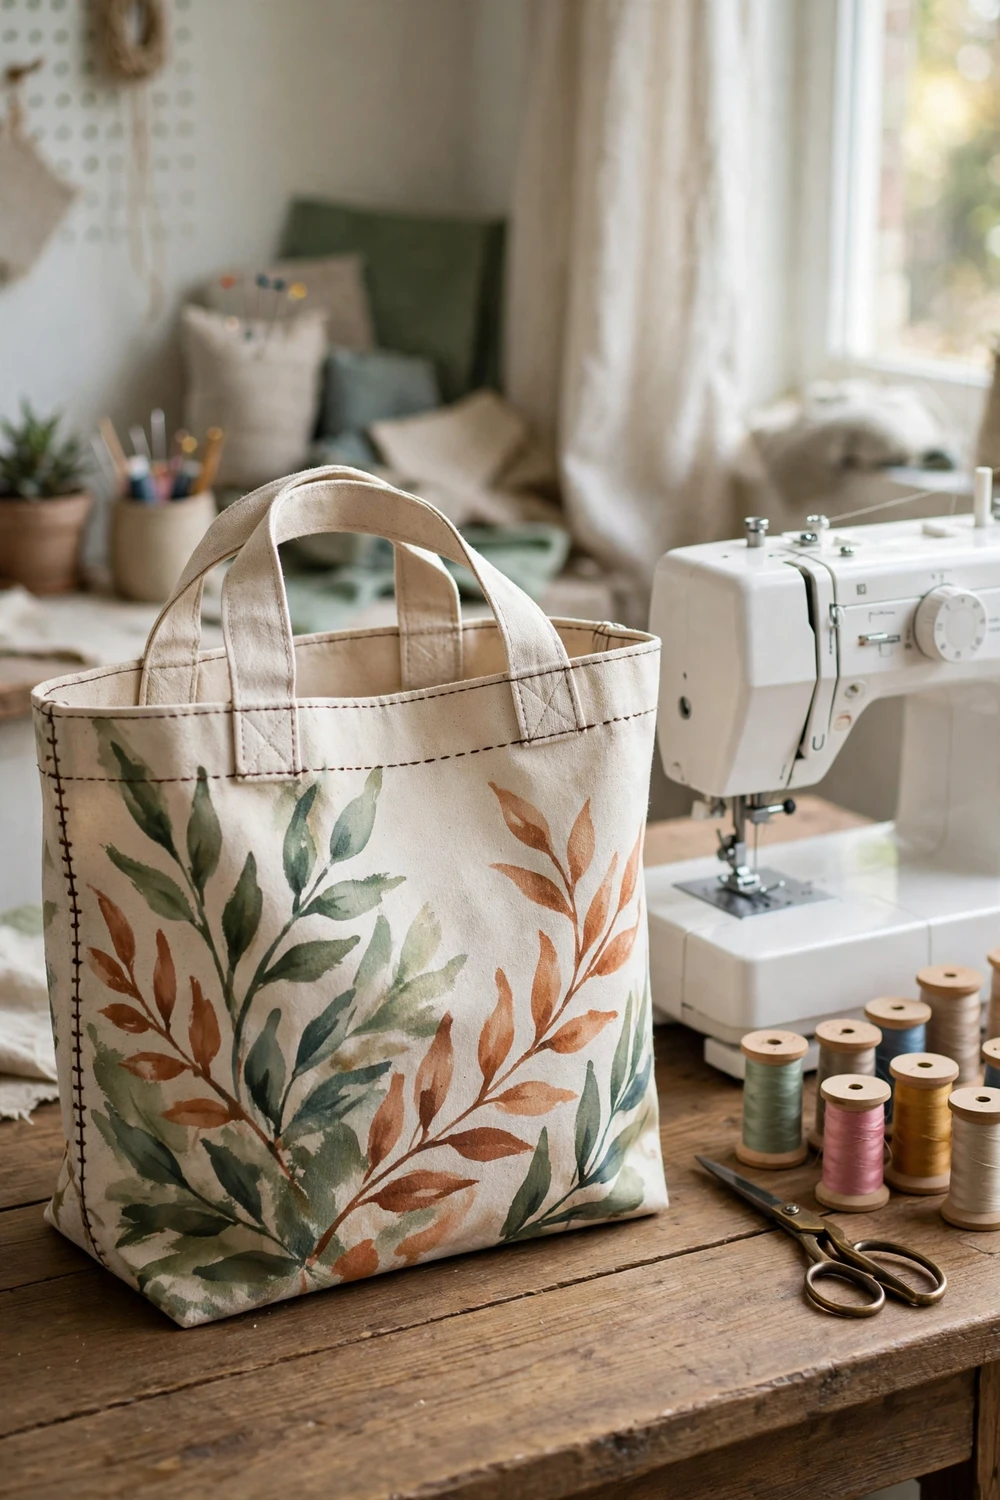
Not every old canvas deserves to stay on a wall. Some have torn corners, warped frames, or paint that will never look right again. Those canvases still hold good fabric, and that fabric makes a sturdy tote bag, a cushion cover, or a set of storage pouches. This is the most ambitious project in the guide, but it is also the one that saves a canvas from the bin completely.
Start by removing the canvas from its frame. Pull the staples out with pliers, working around the edges slowly so you do not tear the fabric. Lay the canvas flat and cut away any damaged sections. A typical 60 by 80 centimetre canvas gives you two bag panels of about 38 by 40 centimetres each, plus enough spare fabric for handles. Wash the fabric gently by hand in cool water with a mild detergent, and let it dry flat. This step matters, because old paint can crack if you machine wash it, and a hand wash lets you see which areas are fragile.
Cut your panels with a 1.5 centimetre seam allowance on every side. If the painted side is your favourite, place it on the outside of the bag. If it is too busy, flip it and use the plain back as the outside, with a painted pocket on the front. Sew the side and bottom seams with a strong thread, then box the bottom corners by folding each into a triangle and stitching across it about 5 centimetres from the point, so the bag stands up on a table.
Handles need care, because they carry the weight. Cut two handle strips about 60 centimetres long and 6 centimetres wide, fold the long edges in, and stitch them flat. Attach each handle with a boxed cross stitch, a square of stitching with a diagonal cross through it, which holds far better than a single straight seam. Add a cotton lining if you want a neat interior, and press every seam with an iron on a low setting.
The finished bag is strong enough for books, groceries, or craft supplies, and the painted fabric makes it unlike any shop bought bag. Smaller offcuts become zip pouches, book covers, or patches for a plain cushion. Nothing goes to waste.
Hang It Like a Gallery: Arranging Your Finished Pieces
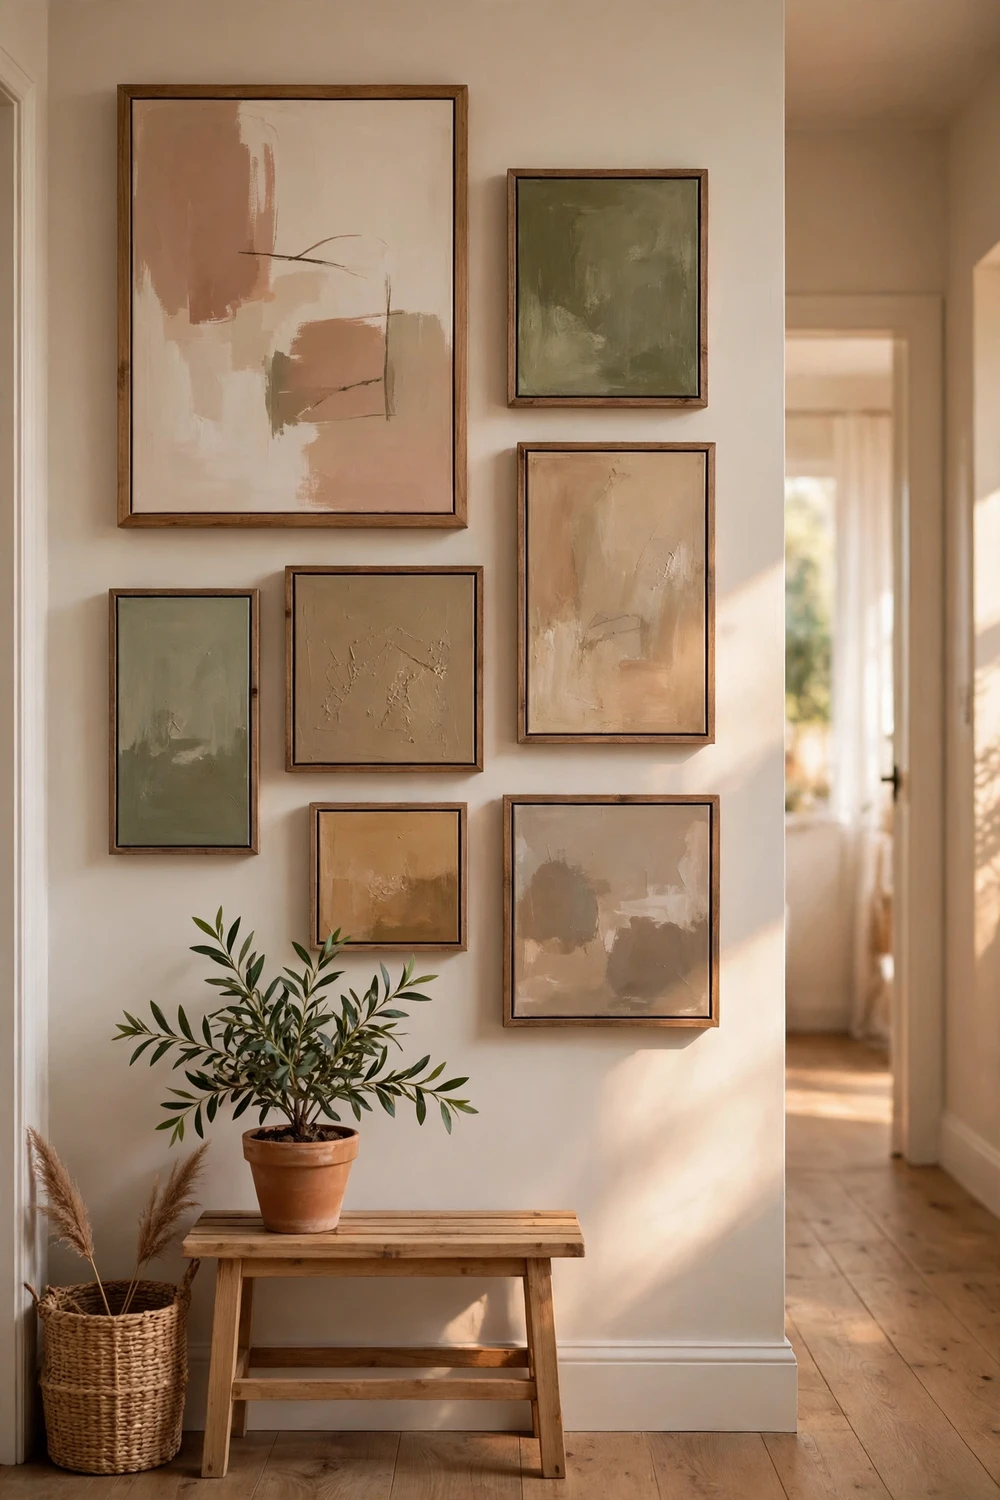
Once you have two or three finished canvases, the next question is how to hang them so they look like a collection rather than a random pile. A gallery wall rewards a little planning, and the best way to plan is on the floor, not on the wall. Lay your canvases on a rug or a large sheet, and move them around until the arrangement feels right. Take a photo from above each time you change something, because the camera shows you gaps and clashes your eyes miss.
Start with your largest piece as the anchor. Place it slightly off centre, about 145 centimetres from the floor to its middle, which is roughly eye level for most adults. Build outward from there, keeping a gap of 5 to 8 centimetres between frames. This spacing matters. Pieces hung too far apart look lost, and pieces hung too close together look crowded. Keep the outer edges of the arrangement roughly in line, even if the pieces inside are different sizes, because a tidy outline makes a mixed group feel deliberate.
Mix your finishes rather than matching them all. A gesso repaint beside a decoupage piece and a chalkboard beside a framed canvas all work together when the colours share a common thread. Pick two or three colours that appear in most of your pieces, and let those colours tie the wall together. Earthy greens, warm creams, and soft terracotta sit comfortably with wood furniture.
Do not forget the furniture below the wall. A bench or a small shelf grounds the arrangement and gives the eye somewhere to land. For styling ideas that keep a shelf looking calm, these shelf decor tips explain how to layer objects without clutter. If you want to extend the gallery with printed art, a printable bird gallery wall pairs beautifully with repurposed canvases.
Hang each piece with proper hooks rated for its weight, and use a small spirit level as you go. Step back after every piece, because a gallery wall is judged from across the room, not from a ladder. When it is finished, stand back and look at the whole wall. Those canvases were once forgotten paintings in a thrift shop or a spare room, and now they are the first thing people notice when they walk in.
Your Canvas Questions, Answered Straight
Can you paint over any old canvas?
Almost any canvas with a firm frame and a dry surface can be painted over. The exceptions are canvases with flaking paint, mould, or a sagging surface. Those will keep failing under new paint, so choose a different project for them, such as tote bags or a cut down collage.
Do I need gesso before repainting an old painting?
Yes, in nearly every case. Gesso covers the old image and gives your new paint a surface it can grip. Without it, dark colours from the old painting can show through, and your new paint may peel. Two coats cover most paintings, while dark oils need three.
What is busted canvas art?
Busted canvas art is a technique where you cut a shape into the centre of a painted canvas and fold the flaps back to reveal fairy lights behind the opening. It works best with battery powered LED lights, which stay cool and are safe against fabric and glue.
Will decoupage paper peel off a canvas?
It can peel if you skip the sealing step, but a properly sealed collage lasts for years. Brush two thin sealing coats over the finished design, letting each one dry for 2 hours. Thin paper sticks better than thick card, and torn edges hold better than cut edges.
Can I use chalkboard paint on canvas?
Yes, chalkboard paint works well on a primed canvas. Apply two or three thin coats, let the paint cure for a full 3 days, then season the surface by rubbing chalk across it and erasing it. Skipping the curing time is the most common reason a chalkboard smudges.
How do I hang a heavy framed canvas safely?
Use two picture hooks rated for the weight of the piece, fixed into a wall stud or a proper wall plug, and hang the canvas from two points rather than one. A single nail lets a heavy frame swing and tilt, while two hooks keep it level and spread the load.
Start with the Canvas You Already Own
You do not need to buy anything to begin. Look around your home for the canvas you stopped noticing years ago, or pick up a tired painting at a thrift shop this weekend for the price of a coffee. Check the frame, run your hand across the surface, and choose the project that fits what you found. A sound canvas becomes a gesso repaint. A damaged centre becomes a glowing busted canvas. A torn corner becomes a tote bag.
My own view is simple. The gesso repaint is the project that teaches you the most, because once you can prime a canvas properly, every other idea in this guide opens up. Start with one canvas, finish it properly, and hang it where you will see it. The next one will feel easier, and before long you will look at old paintings the way a gardener looks at a bare patch of soil, full of possibility.