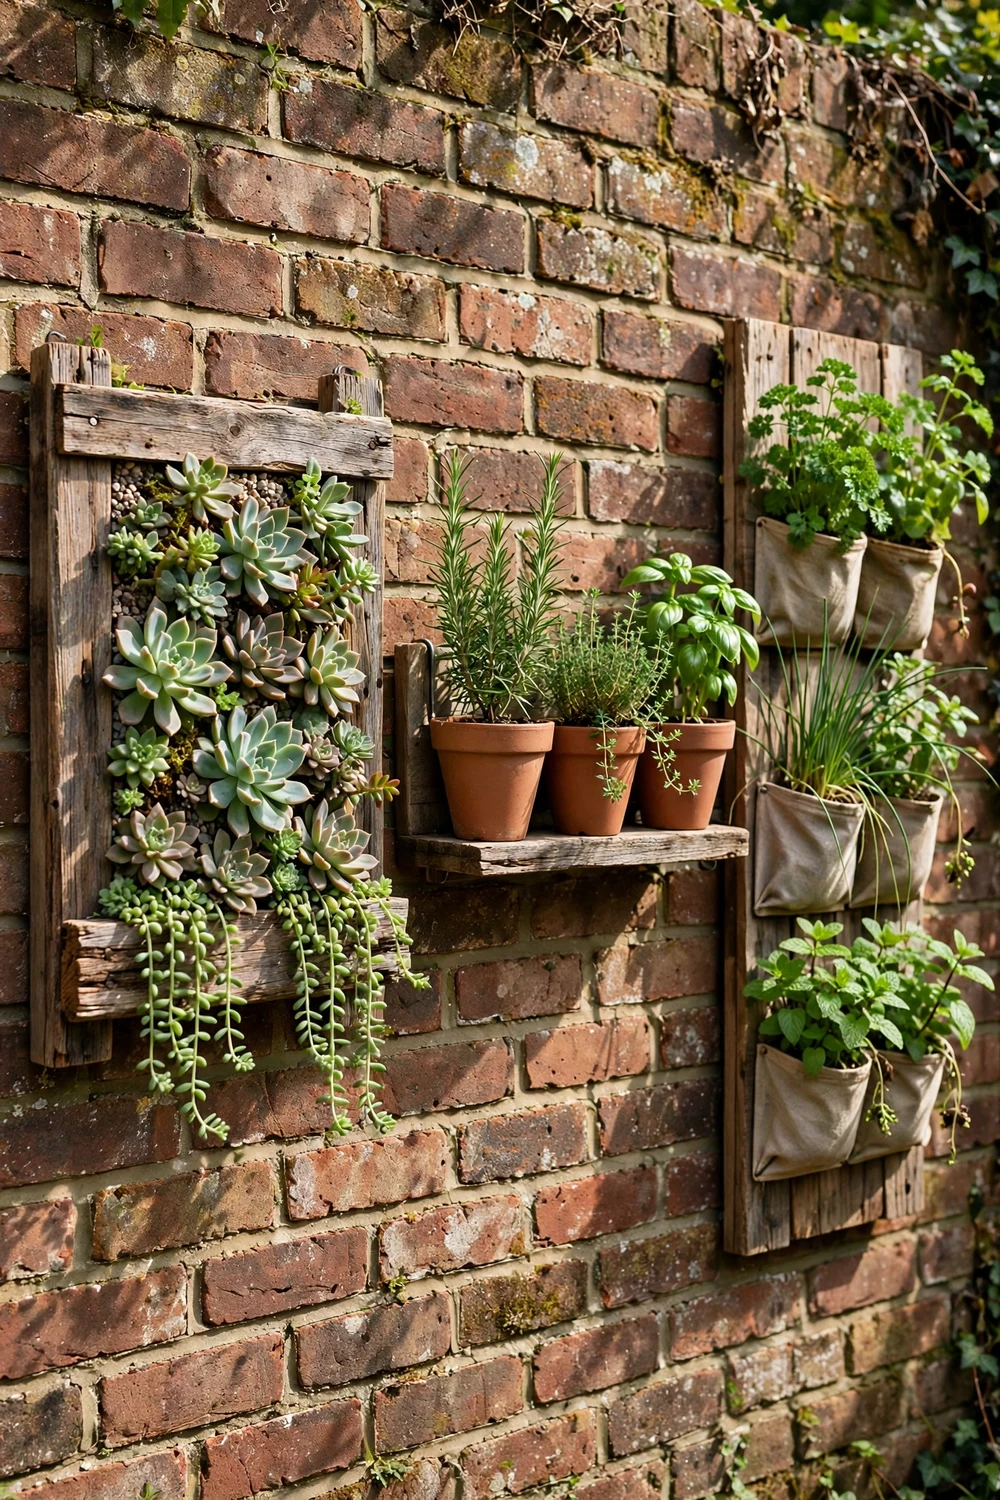
Yes, scrap wood works well for a DIY vertical wall planter, as long as you pick sound boards, keep the soil from sitting against bare wood, and hang the finished planter on fixings that suit your wall. Old fence boards, pallet planks and offcuts from other projects are all fair game, but soft, crumbling or flaking boards belong in the firewood pile, not on your wall. A dry, solid plank that still holds a screw will last several seasons outdoors once it has a simple protective finish.
Pick your build by what you want to grow and how much wall you have. A hardware cloth succulent frame suits a sunny wall and a hands off plant lover. A pot rail planter is the best choice for kitchen herbs, because you can lift a pot down, snip what you need and put it back. A pocket herb wall fits the most plants into the smallest space, which makes it the right pick for a narrow balcony wall or a fence panel. The rest of this guide walks through all three builds, then covers hanging, watering and planting, so the finished planter looks good and stays up.
How to Choose the Right DIY Vertical Wall Planter for Your Wall
Start with the wall, not the wood. A brick or block wall takes screws and plugs happily, a timber fence takes wood screws straight into the rails, and a rendered wall needs care, because a fixing in the wrong spot can crack the render. A plasterboard wall indoors only works if you can find the studs behind the board. Measure the space first, and leave at least 15 cm clear around the planter for air and for watering.
Sun decides more than style does. Check the spot at mid morning, noon and late afternoon, and note the hours of direct sun it really gets. Most kitchen herbs want four to six hours, succulents want six or more, and a shaded north facing wall suits only leafy herbs. A wall with fierce afternoon sun dries a shallow planter fast, so plan for deeper soil or tougher plants there. Under three hours of sun, choose the pocket wall with parsley, mint, chives and lettuce leaf, not rosemary or lavender.
Indoor or outdoor matters too. An outdoor planter can drain freely, while an indoor one needs a drip tray, a waterproof backing and watering that never runs down the plaster. I keep indoor planters to one rail with three pots, watered over the sink.
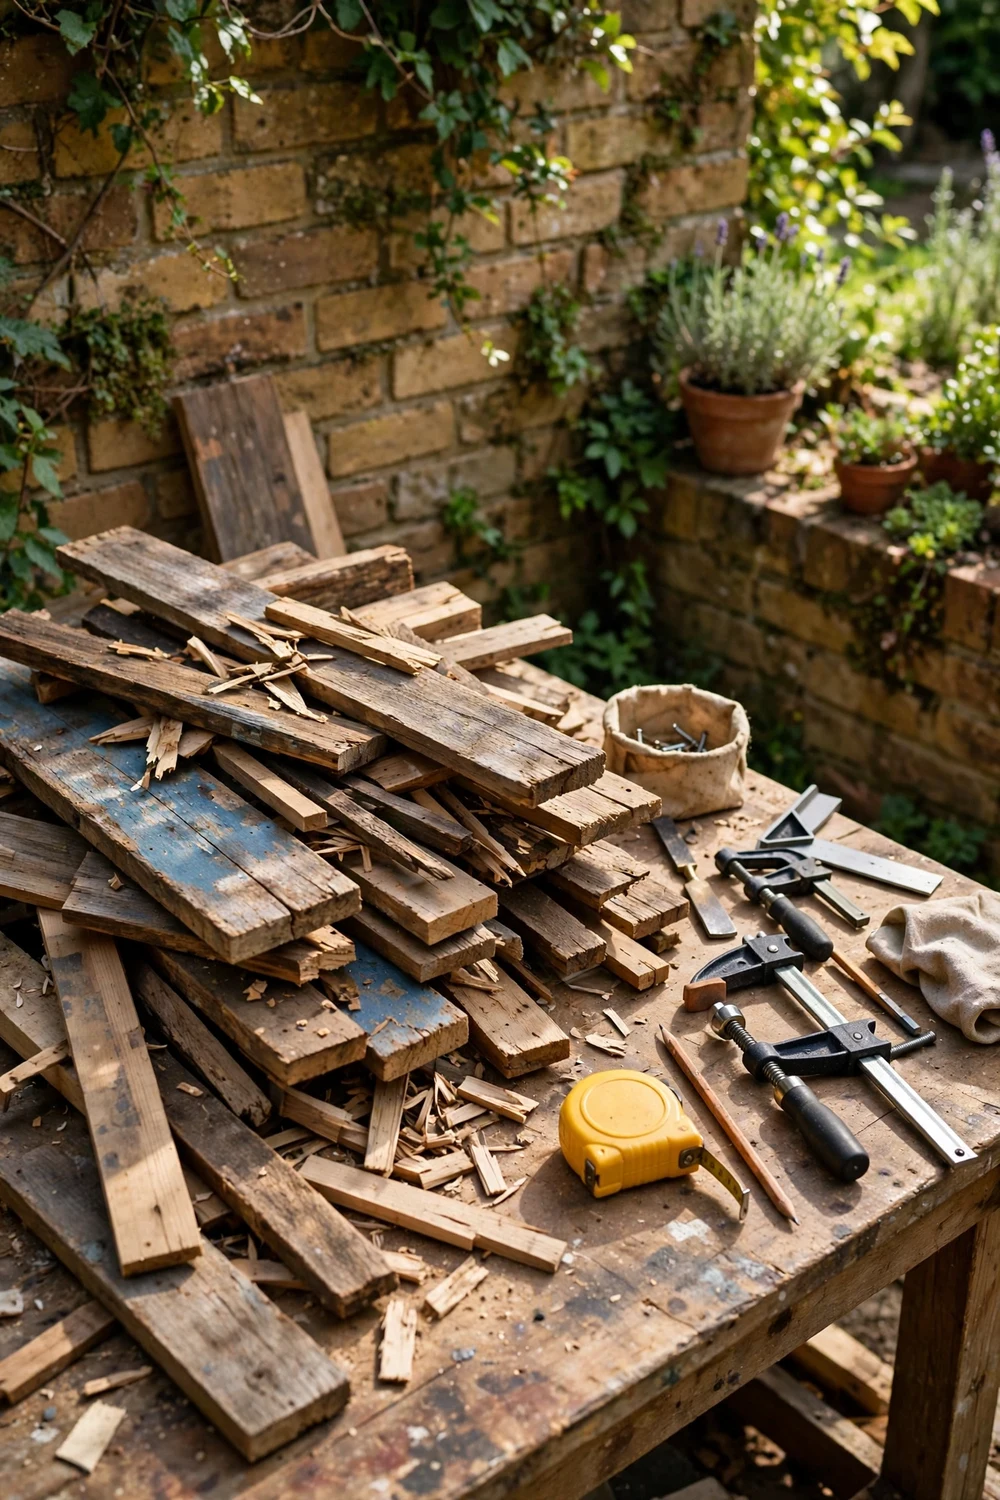
Now sort the scrap pile. Reject any board that bends easily, smells musty, has soft black patches or crumbles at the ends. Keep boards at least 12 mm thick for frames and rails, and save thin slats for dividers and trim. Pull out old nails and wash the boards with warm soapy water. If you are collecting wood scrap planter ideas, remember that weight is the real test. Wet soil is heavy, and a planter that feels light when empty can double in weight after watering, so stick to the sizes in this guide and hang from two fixings spread wide. If you are still shaping the rest of the garden, these warm and inviting outdoor space ideas will help the new planter sit naturally with everything around it.
Build 1: Hardware Cloth Succulent Frame, the Living Picture
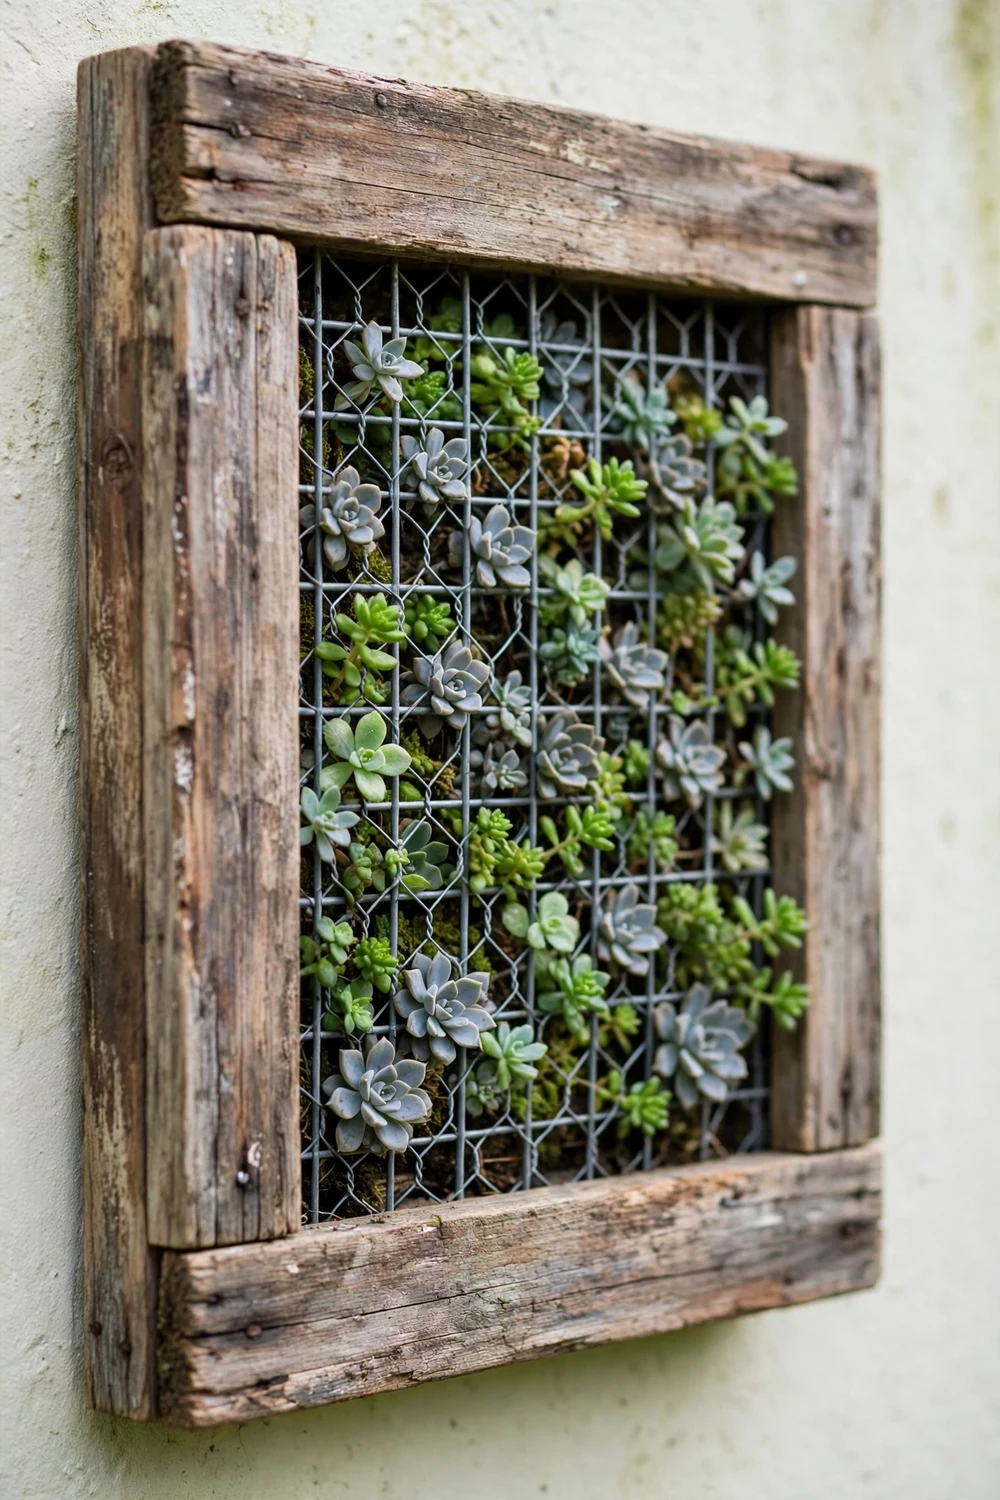
A succulent wall planter DIY project starts with a shallow wooden box, a sheet of hardware cloth across the front and a layer of moss that holds the soil in place while the roots take hold. The finished frame hangs like a picture, with succulents growing out through the mesh in a pattern you design. It looks complicated, but only the planting is fiddly, and it will be ready to hang once the plants have rooted.
For a frame 60 cm wide and 45 cm tall, cut two side pieces 45 cm long, a top and bottom piece 60 cm long, and a back board of thin plywood or reclaimed panelling 60 cm by 45 cm. The frame boards should be about 9 cm deep and at least 18 mm thick, so the box holds enough soil for the roots. You also need hardware cloth cut to 58 cm by 43 cm with 12 mm mesh openings, 40 mm exterior screws, a staple gun, sphagnum moss and cactus potting mix.
Build the frame first. Lay the four boards on edge, form a rectangle, and check the corners are square by measuring both diagonals, which should match. Drill pilot holes, because old dry wood splits easily near the ends, then drive two screws into each corner. Screw the back board on from behind with short screws every 15 cm, and check the frame sits flat. Sand any high corner until it settles.
Line the box with landscape fabric or a cut open compost bag over the back board, which stops soil washing through gaps in reclaimed boards. Pack the box with damp cactus mix to 1 cm below the top edge, then lay a 2 cm layer of soaked sphagnum moss over the soil and press it flat. Lay the hardware cloth over the moss and staple it to the frame every 5 cm, pulling it taut. The moss stops soil falling out once the frame hangs upright, and the mesh holds the plants while they root.
Planting is the slow, happy part. Poke a hole through the moss and mesh with a pencil, push the roots through and tuck moss around the base. Space rosettes about 8 cm apart, and put trailing types near the bottom edge so they spill over the frame. Small cuttings work as well as bought plants. Let the frame lie flat for three to four weeks while the roots grip, watering lightly once a week, and only then hang it upright. Hang it too soon and the plants will slide out in a heap. Finish the wood with two coats of exterior wood oil on all sides, including the back. A faux driftwood finish for outdoor furniture suits reclaimed boards well.
Build 2: Pot Rail Herb Planter, the Cook’s Favourite
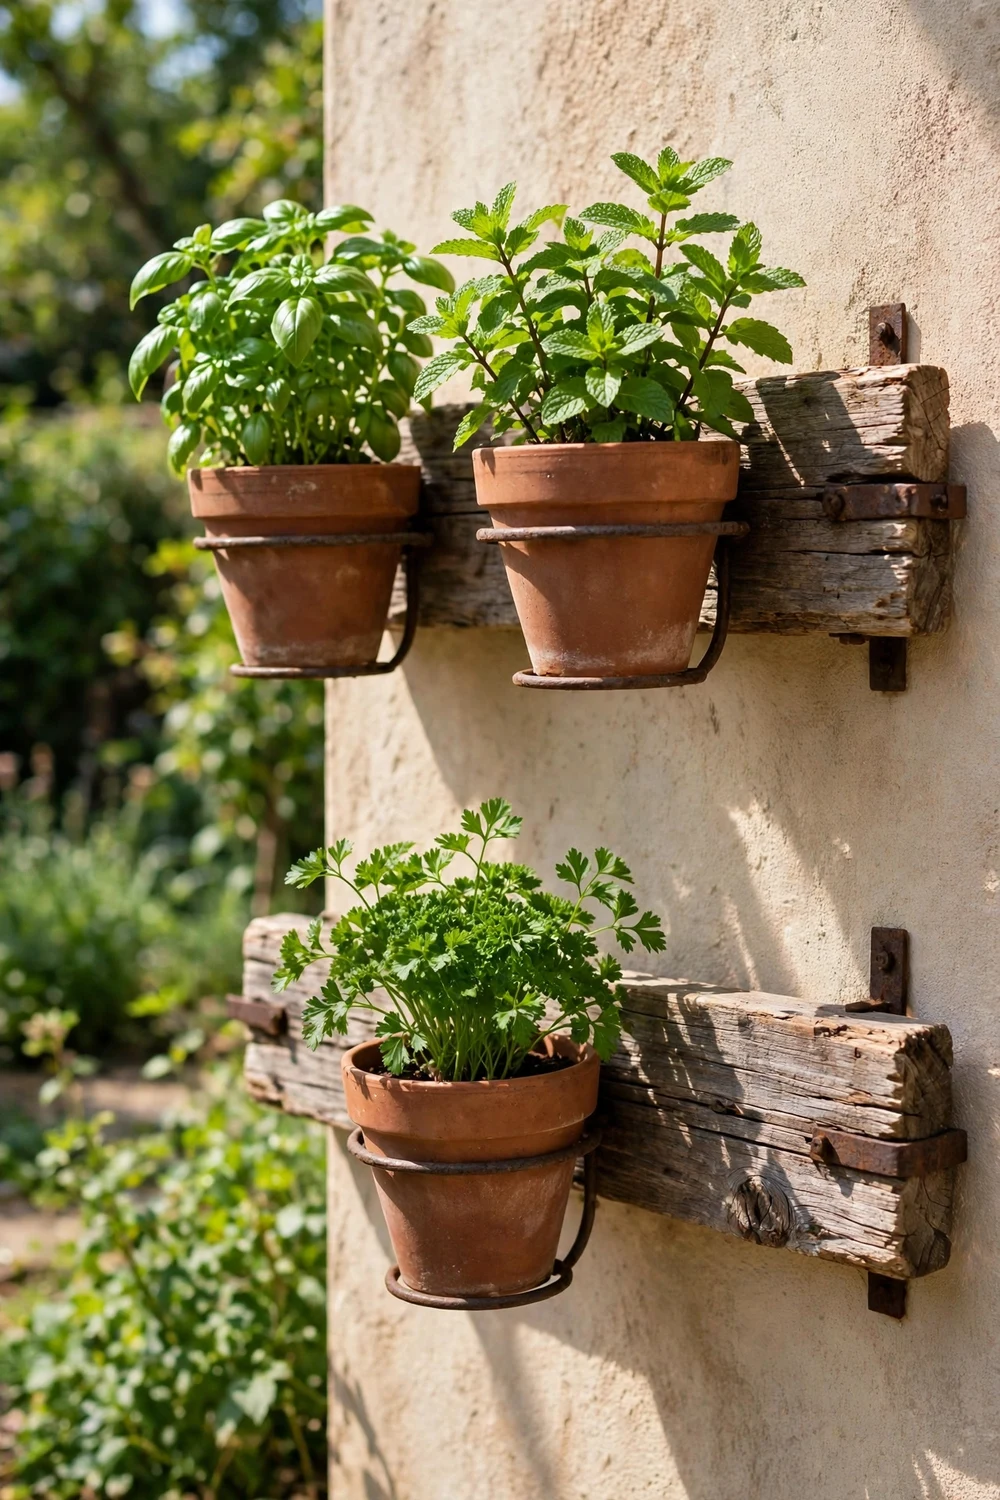
The pot rail is the most useful of the three builds if you cook. Two horizontal rails hold terracotta pots in metal rings, and each pot lifts out. Herbs stay at chest height by the back door, so you actually use them. It is the fastest build here, and a beginner can finish it in a couple of hours.
For a two rail planter holding six pots, you need two rails of scrap board, each 90 cm long, 12 cm wide and at least 20 mm thick, plus two upright battens 70 cm long. You need six metal pot rings to grip terracotta pots of about 13 cm diameter at the rim, six matching pots, 50 mm exterior screws, and wall plugs and screws to suit your wall. Choose rings with a flat plate, which keeps the ring level under a wet pot.
Mark the rail positions before you drill. Hold the top rail at about 150 cm from the ground, mark the fixings 10 cm in from each end, then mark the lower rail 35 cm below it. That spacing leaves room for tall rosemary below. Check every mark with a spirit level, because a sloping rail shows once the pots are in.
Fix the rings to the rails on the bench, not on the wall, spaced 28 cm apart so the pots can bush out without tangling. Screw each ring plate to the front face of the rail with two short screws, and test the fit with an empty pot. The pot should sit rim caught on the ring, base hanging free, and not tip when nudged. If a pot sits crooked, loosen the ring, level it and try again.
Hang the rails next. On sound brick or block, screw through the rails into wall plugs, one fixing 10 cm in from each end and one in the middle. On a timber fence, screw into the fence posts or horizontal rails, and add the upright battens behind the rails for stiffness. On an uneven wall, pack a small wedge behind the rail so it stays straight.
Pot the herbs in a free draining mix, two parts potting mix to one part coarse grit or perlite, never heavy garden soil. Fill each pot to 2 cm below the rim and water well before hanging it in its ring. Put thirsty basil and parsley on the lower rail, within easy reach, and woody rosemary and thyme on the top rail for sun and airflow. A single rail with three pots suits a narrow wall, with a second rail added below later. Keep the width under 120 cm unless you add a middle fixing, because a long rail full of wet pots bows. A scrap wood window box planter uses the same measuring habits and pairs well beside it.
Build 3: Pocket Herb Wall, the Most Plants in the Smallest Space
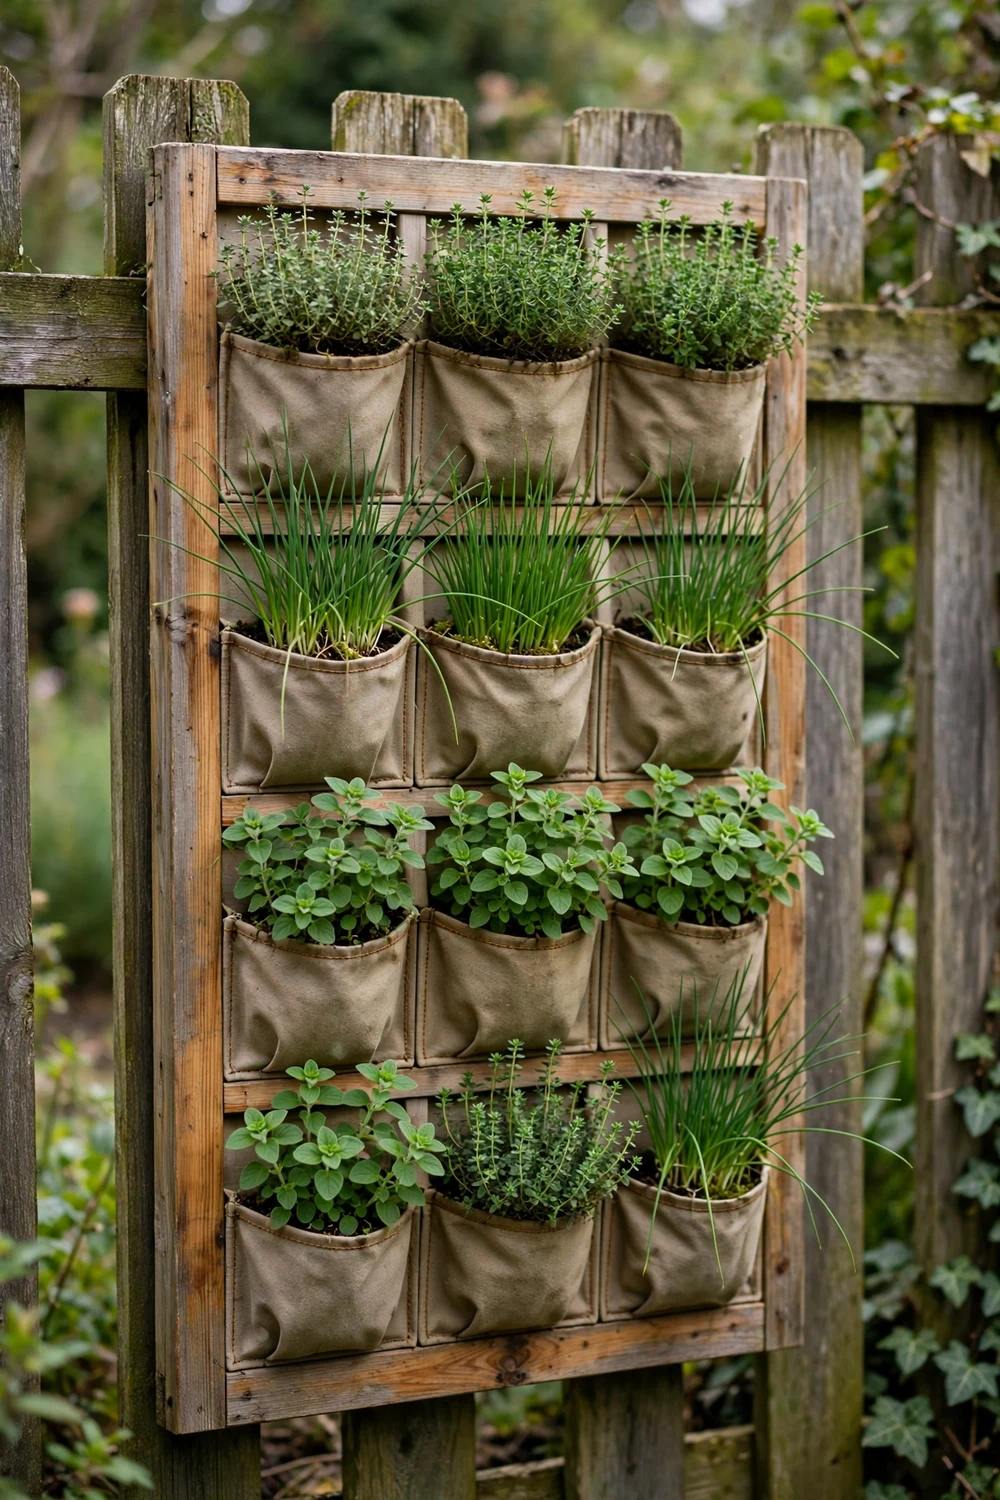
The pocket herb wall is the build for a narrow space. A frame 60 cm wide and 90 cm tall holds twelve herbs, one per pocket. It is the best herb wall planter outdoor option for a balcony, a fence panel or a shed wall. It dries out faster than pots, so it suits a gardener who waters little and often.
For a twelve pocket wall, cut two side boards 90 cm long, a top and bottom board 60 cm long, and three dividers 56 cm long, all from scrap at least 15 mm thick. You need a backing board of thin plywood or reclaimed panelling, 60 cm by 90 cm, and pocket material, heavy cotton canvas, old denim or felt liner, cut into twelve pieces about 20 cm wide and 25 cm tall. Add 40 mm screws, a staple gun and thin batten to clamp each row. Felt liners need no sewing.
Build the frame like a shallow tray, back board screwed on behind, dividers fixed between the sides at 22 cm intervals. The dividers shelf each row and stop the top rows pressing below. Sand the front edges smooth, because you will brush against them every time you pick herbs.
Fix the pockets row by row from the bottom. Fold the top edge over a thin batten and staple it to the divider above, then staple the bottom edge below, leaving it loose enough to bulge out and hold soil. A tight pocket squeezes the roots. Leave a 3 cm gap above each pocket for the trowel.
Fill each pocket with a light mix, two parts potting mix to one part composted bark or coconut coir, one herb per pocket, crown level with the top. Water slowly until it runs from the bottom, then wait and water again, because dry pocket material sheds water. Put thirsty parsley, chives and basil in the bottom row, where they catch drips, and rosemary, thyme and oregano in the top rows, where they dry fastest. Give mint one pocket only.
Hang the pocket wall where you can reach every row without a ladder, and where drips fall on soil or paving. A fence panel is ideal, screwed through the frame into the rails at four points. After the first heavy rain, staple any pockets that sag. A backyard makeover plan can help you place it for sun and easy reach.
The table below sums up the three builds, so let your cooking decide if you can only build one. A daily basil cook will get more joy from a pot rail, a gardener with a sunny wall and little time will get more from the succulent frame, and a small garden owner will get the most from the pocket wall.
| Build | Best for | Skill | Build time | Plants | Wall type |
|---|---|---|---|---|---|
| Hardware cloth succulent frame | Sunny wall, living picture, low care | Medium | One afternoon | Succulents and sedums | Brick, render, timber |
| Pot rail herb planter | Kitchen herbs, easy picking | Easy | Two hours | Basil, parsley, mint, rosemary | Brick, fence, shed wall |
| Pocket herb wall | Small space, most plants | Medium | Half a day | Twelve herbs in rows | Fence, shed, balcony wall |
How to Hang a Vertical Wall Planter Safely
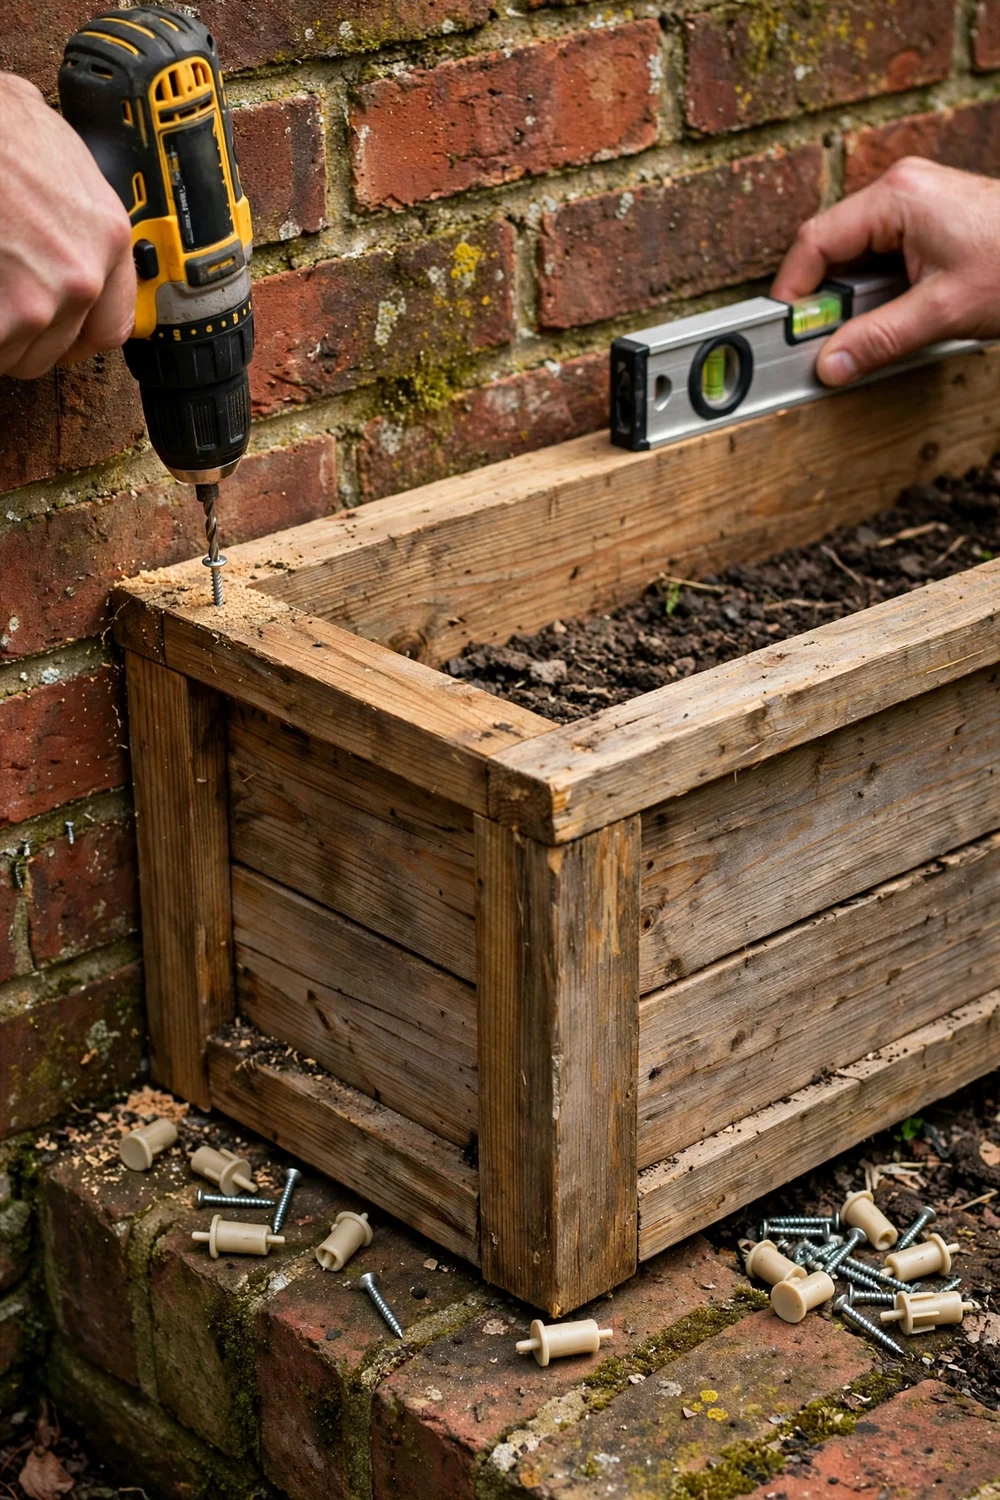
A hanging wall planter fails in one of two ways, the fixings pull out of the wall, or the wood splits where the screw goes in. Work out the wet weight, pick fixings rated above it, and spread the load across at least two points.
Weigh the finished planter, or estimate it honestly. A succulent frame of the size in this guide weighs about 8 to 10 kg planted and watered, a two rail pot planter with six terracotta pots runs to about 12 to 15 kg wet, and a twelve pocket herb wall can reach 15 to 18 kg after a good soaking. These are typical figures for the sizes given. Weigh it on bathroom scales if unsure, and choose fixings rated for at least twice that weight.
Brick and block walls are the friendliest. Drill into the brick itself, not the mortar joint, and use wall plugs that match your screw size. For a planter up to 15 kg, use at least two fixings of 8 mm plugs with 60 mm screws, one near each top corner, and a third in the middle over a metre wide. Push the plug fully in and drive the screw until it bites firmly without spinning. A screw that spins has stripped its plug, so fit a larger one and try again.
Timber fences and shed walls need a different approach. Screw into the fence posts or the horizontal rails, never into a single thin fence board, which will not hold the weight. If the planter sits between posts, screw a horizontal batten across the posts first, then fix the planter to it. Use 50 mm exterior wood screws, drill pilot holes, and put at least two screws at each end of the batten. Check the posts are sound first, because a wobbly post leans further under a wet planter.
Rendered walls need extra care. Drill slowly and stop the moment the bit breaks through the render, because pushing hard cracks a wide patch. Use a fixing made for the wall underneath, and seal around it so rain cannot track in. Never hang a heavy planter from plasterboard alone. Find the studs and screw into the timber, and if you cannot find one where you need it, move the planter.
Fit the planter with a small gap behind it. Two short battens, or 10 mm rubber spacers, screwed to the back of the frame, keep air moving between the wood and the wall, which is the cheapest insurance against damp and rot. Check the fixings twice a year. Tug the planter firmly, look for rust, and check the wood around each fixing for softness. If you cannot drill the wall, use a freestanding frame or sturdy hooks over a fence, and keep it small and light. Never trust adhesive hooks or suction pads with a wet planter.
Watering and Drainage Without Damaging the Wall
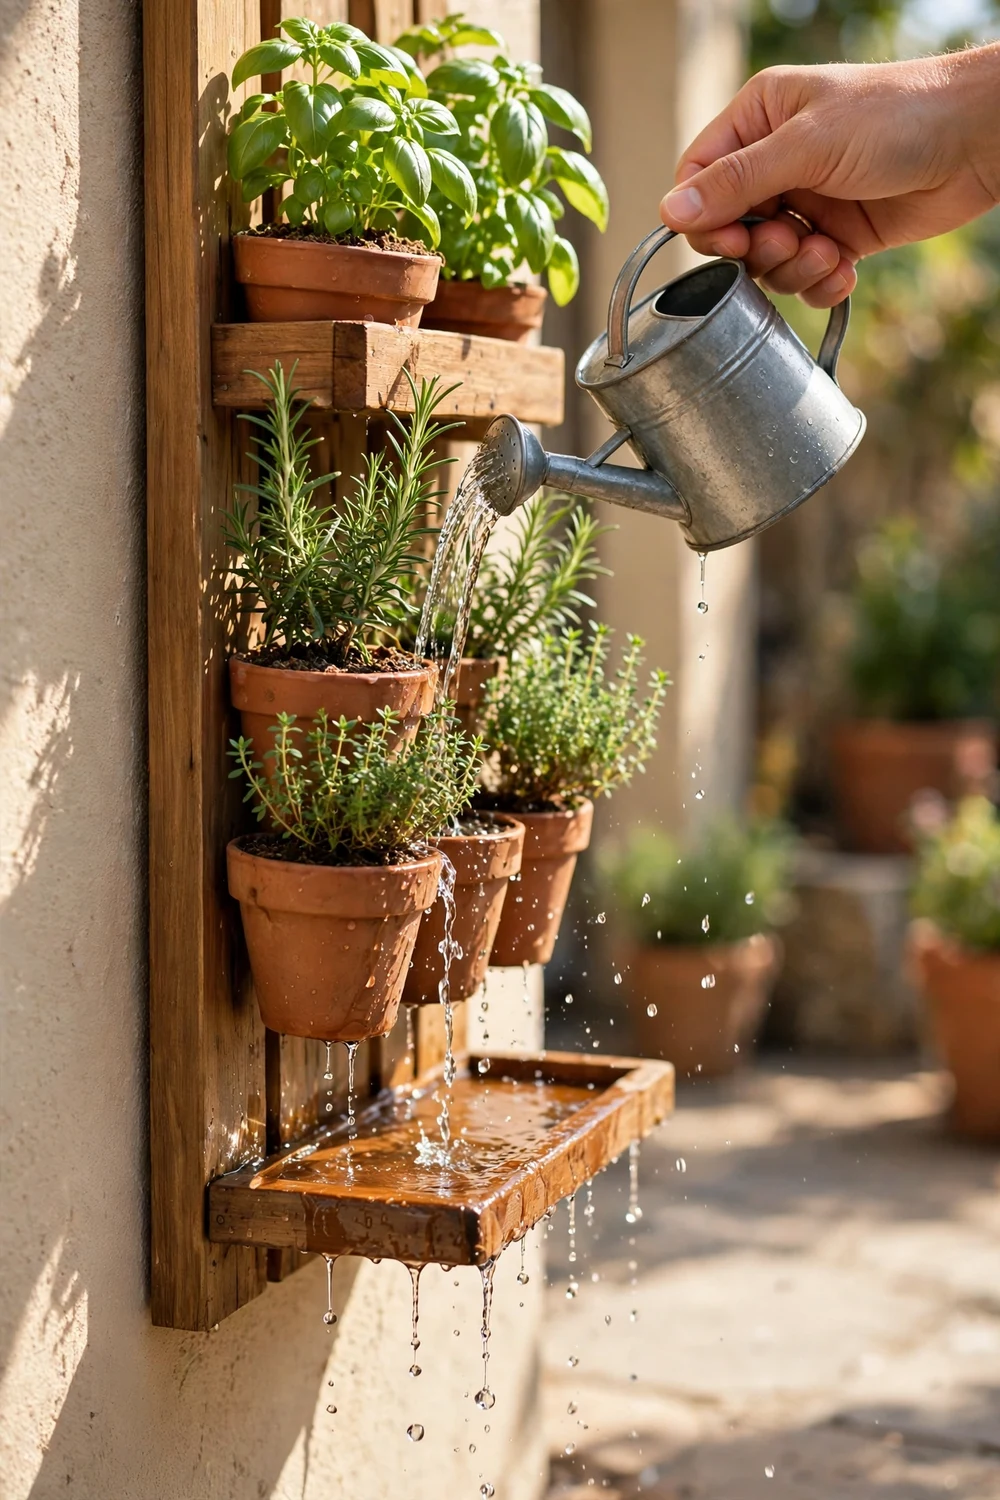
Water is the part most guides skip, and it is the part that causes the most damage. A vertical planter cannot drain the way a pot on the ground does, because the water has nowhere to go except down the wall or out of the bottom of the frame. Plan the drainage before you hang the planter, and you will never have to explain a damp stripe on the wall or a rotten fence panel.
Water slowly, from the top, in two passes. The first wets the surface, and the second, five minutes later, soaks in properly. Dry potting mix sheds water, and a fast pour runs straight off and down the wall. A small can with a rose head spreads water gently, and a narrow spout lets you aim at the soil, not the leaves. Water in the morning when you can, so the leaves and the wall dry during the day.
Give every build a drip path. For the pot rail, fit a shallow tray or a length of guttering under the lowest rail, tilted so water runs to one end and drips clear of the wall. For the succulent frame, a small tray under the bottom edge catches what the moss and mesh miss. For the pocket wall, the bottom row catches much of the drip, and a tray underneath catches the rest. Empty the tray after watering, because a tray left full breeds mosquitoes and rots the wood beneath it.
Keep the wood dry between waterings. The back of the frame should never sit wet against the wall, which is why the 10 mm gap matters so much. If you see a dark damp patch, take the planter down, let the wall dry, and check the back of the frame for soft wood. A frame that stays damp rots from the back first, where you cannot see it, so renew a coat of exterior oil on the back yearly.
Learn the signs, because a vertical planter shows them fast. Succulents with soft, see through leaves are drowning, so stop watering for two weeks. Herbs with dry, crisp leaf edges are thirsty, and the fix is a slow soak, not a flood. Mint wilts dramatically, so it makes a useful early warning plant.
Indoors, the rules are stricter. Water over the sink or a tray, and never let water run down the wall behind the planter. Take pot rail pots down, let them drain for ten minutes, and only then hang them back. For a pocket wall indoors, use a measured jug, a cup per pocket, and check the tray before you walk away. A drip onto a skirting board will stain it in a week. Before the first hard frost, empty the pots or bring tender plants inside, because frozen wet soil cracks terracotta and splits shallow frames.
What to Plant in Your Vertical Wall Planter
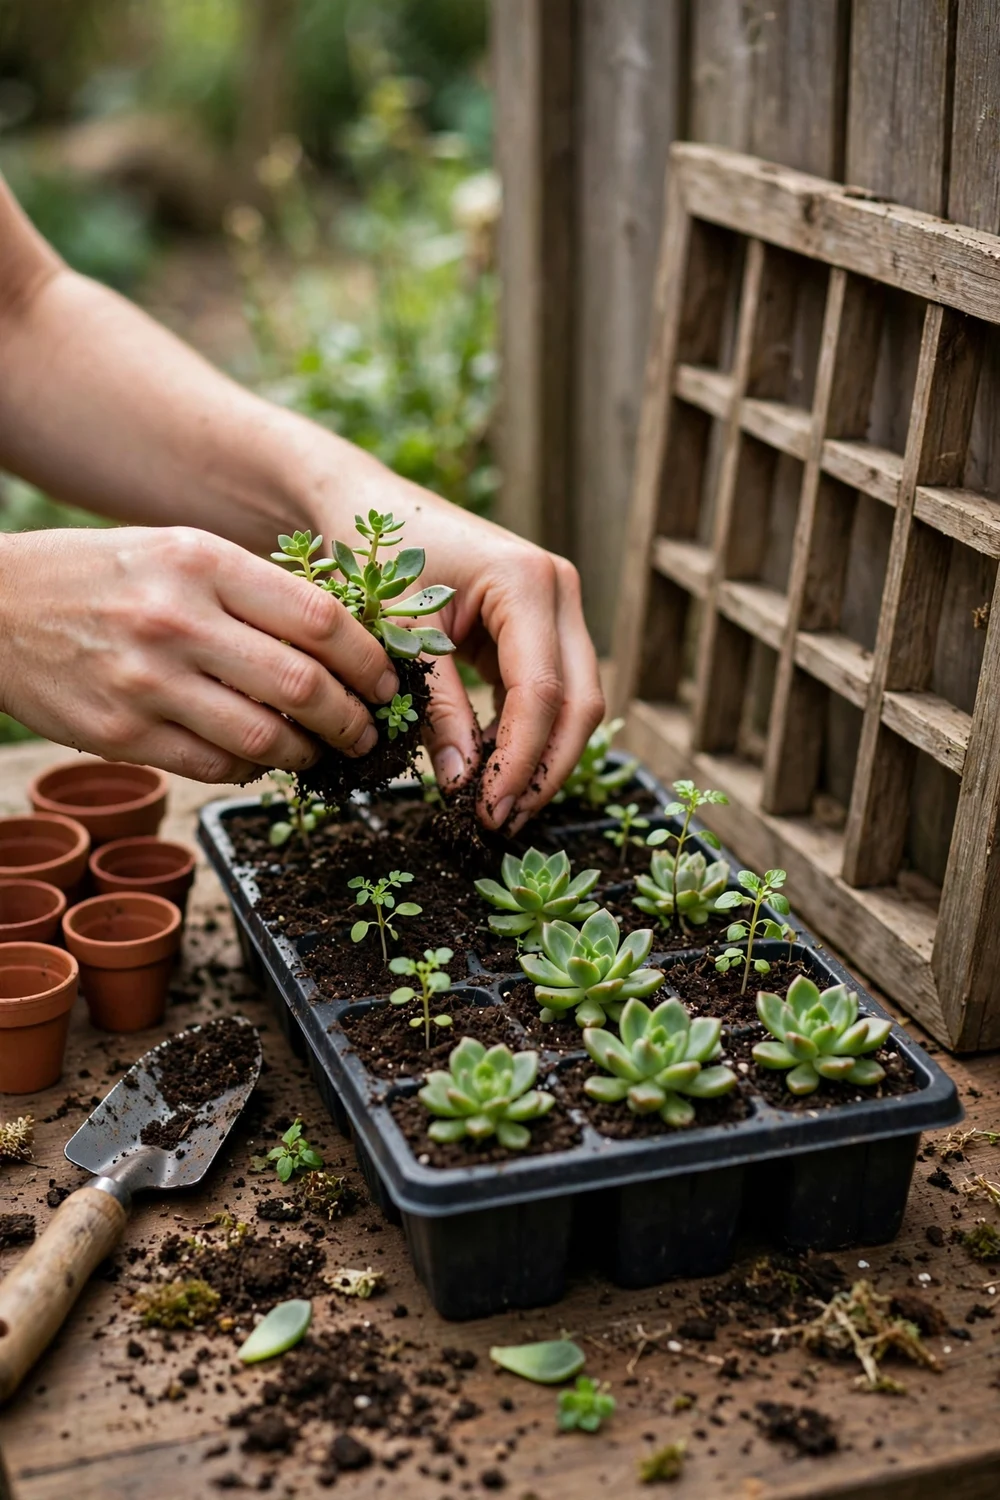
The plants make or break a vertical planter. A plant that wants deep, damp soil will sulk in a shallow frame, and a spreader will swamp its neighbours. The winners have small root systems, modest water needs and a shape that suits growing sideways or downwards.
For the succulent frame, choose rosettes and low spreaders. Echeveria, sempervivum and small sedums are the reliable trio, because they root shallowly, hold water in their leaves and forgive missed watering. Mix leaf colours and sizes, and add a trailing sedum at the bottom edge. Avoid tall, top heavy succulents, which pull out of the mesh, and avoid cacti where children can reach. Plant in a cactus mix with extra grit, three parts mix to one part coarse grit, and water only when the soil is dry.
For the pot rail and the pocket wall, herbs are the natural choice. Rosemary, thyme and oregano love sun and sharp drainage and grow woody and tough. Basil and parsley want more water and a little shade in the hottest part of the day, so put them low. Chives are almost unkillable and come back year after year, the safest first plant. Mint is vigorous, so give it a pot of its own.
Leafy extras work well in a pocket wall with some shade. Loose leaf lettuce, baby spinach and strawberries all grow happily in pockets, with fruiting plants in the middle rows, where their fruit hangs clear of the soil. Avoid large vegetables and deep rooted plants, because a pocket does not hold enough soil.
Soil matters more in a vertical planter than in a bed, because there is so little of it. Use a light, free draining potting mix, never heavy garden soil, which compacts. For herbs, mix two parts potting mix with one part composted bark or coconut coir. For succulents, use a cactus mix with added grit. Feed lightly, a half strength liquid feed once a month in the growing season is plenty. If you want the planting to welcome visitors too, these feng shui plants for your front door show how plant choice shapes the feel of an entrance.
| Plant | Sun | Water | Best build | Vertical fit |
|---|---|---|---|---|
| Echeveria, sempervivum | Full sun | Low | Frame | Excellent |
| Trailing sedum | Full sun to shade | Low | Frame | Excellent |
| Rosemary, thyme | Full sun | Low | Rail | Good |
| Basil, parsley | Sun, some shade | Regular | Rail | Good |
| Chives | Shade | Regular | Pockets | Excellent |
| Mint | Shade | Regular | Own pot | Good, keep contained |
| Strawberries | Full sun | Regular | Pockets | Good |
Buy small plants and let them grow into the planter. A small plant settles faster, roots in more firmly, and costs less if one fails. Check the roots before planting and tease out any circling the pot. Give new plantings two weeks of gentle care, watering lightly and keeping them out of fierce midday sun.
Questions People Ask About Vertical Wall Planters
Will a vertical wall planter damage my wall?
It should not, if you hang it with a small air gap behind it and a drip tray, using fixings that suit the wall. Most damage comes from a planter sitting flat against a damp wall, or from water running down the render every time you water.
What wood is best for a vertical wall planter from scrap wood?
Sound, dry boards at least 12 mm thick, with no soft black patches or musty smell. Old fence boards, pallet planks and hardwood offcuts all work. Avoid flaking paint, unknown treated timber, and boards that split near a screw.
How do you water a wall planter without dripping down the wall?
Water slowly in two passes, aim at the soil with a rose head can, and fit a tray or guttering under the lowest row to catch drips. Indoors, water pots over the sink and let them drain before rehanging.
How much weight can a vertical wall planter hold?
A succulent frame weighs about 8 to 10 kg wet, a six pot rail about 12 to 15 kg, and a twelve pocket wall about 15 to 18 kg. Use fixings rated for at least twice the wet weight, spread across at least two points.
Which herbs grow best in a herb wall planter outdoors?
Rosemary, thyme, oregano and chives are the toughest, because they love sun and sharp drainage. Basil and parsley need more water and a little afternoon shade, so put them low. Mint grows fast and needs a pot of its own.
Can I build a vertical wall planter indoors?
Yes, but keep it small, with a waterproof backing and a drip tray, watered over the sink. A single rail with three pots is a good indoor size. Choose parsley, chives and mint, and put it near a bright window.
A Small Build That Changes How You Use the Wall
A DIY vertical wall planter is a small project with an outsized reward. One weekend, a pile of scrap wood and a few plants turn a blank wall into a herb station or a living picture. Start with the build that fits your wall and your cooking, hang it properly, water it slowly, and plant it with things you will actually use. If the planter sits near a seating area, these elegant garden party ideas show how a planted wall can turn an ordinary evening outside into something worth lingering over. Build it once, build it well, and it will feed you for seasons to come.