A frugal pantry is not a pantry full of matching canisters. It is a pantry where you can see what you own, reach what you use, and stop buying a fourth bag of rice because the last three were hidden behind a bin on the top shelf. Most pantry waste is not about willpower. It is about a shelf you cannot see into, a deep cupboard with no zones, and a shopping trip made without a list.
Start frugal pantry organization by spending nothing: empty the pantry completely, measure every shelf, group food by how you actually cook, and put everyday items at eye level. Only then buy one or two organizers for a specific problem you cannot fix with free containers, labels and a cardboard tray.
That order matters. Buying organizers before measuring is the single most common way people overspend on a pantry, because they end up with pieces for problems they do not actually have, and they use only a few of them. The method below is written for a small or awkward pantry, not a walk in one. If your shelves are deep and narrow, your door cannot open fully, or you rent and cannot drill, this is the version that fits.
Step 1: empty it completely
Pull everything off the shelves and group items by type: canned goods, pasta, baking supplies, snacks, spices, and so on. This inventory step costs nothing and tells you exactly what you are storing. You will likely find duplicates and expired items, which can free up significant space without buying a single bin.
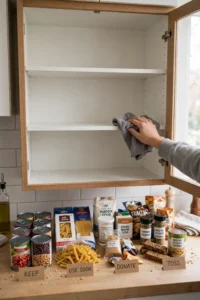
Sort into four piles as you go: keep, use soon, donate if unopened and accepted locally, and toss. Check best by dates, but use judgement too: a dented can, a stale open packet, or a spice you have not touched in a year are all taking up a spot a staple needs. Wipe the shelves while they are empty. A clean shelf makes the new zones feel like a fresh start, and it catches crumbs and spills that attract pests.
Step 2: measure the shelves, not the room
Grab a tape measure and write down four numbers for each shelf: width, depth, the gap between shelves, and the height from the shelf to the shelf above it. Also measure how far the door opens, because in many small pantries the door stops at about halfway and that space is unusable. Note whether the shelves are vented wire, because small cans and jars tip and drop through the gaps unless you lay a piece of cardboard cut to fit the shelf flat on top. It costs nothing and takes about two minutes per shelf.

These numbers matter more than any product review, because a bin that is too tall or too deep wastes vertical or horizontal space. Keep the tape measure and notepad handy when you compare options later. A container that fits your shelf exactly is worth more than a prettier one that wastes 10 cm at the back.
Step 3: set a spending number before you browse
For a small pantry, a realistic range might be $20 to $100, as a typical range rather than a promise, depending on whether you need basic shelf liners or a full set of stackable containers. Write down what you actually need, not what looks nice, and commit to that list. A clear budget prevents the common pitfall of overspending on decorative items that do not improve function.
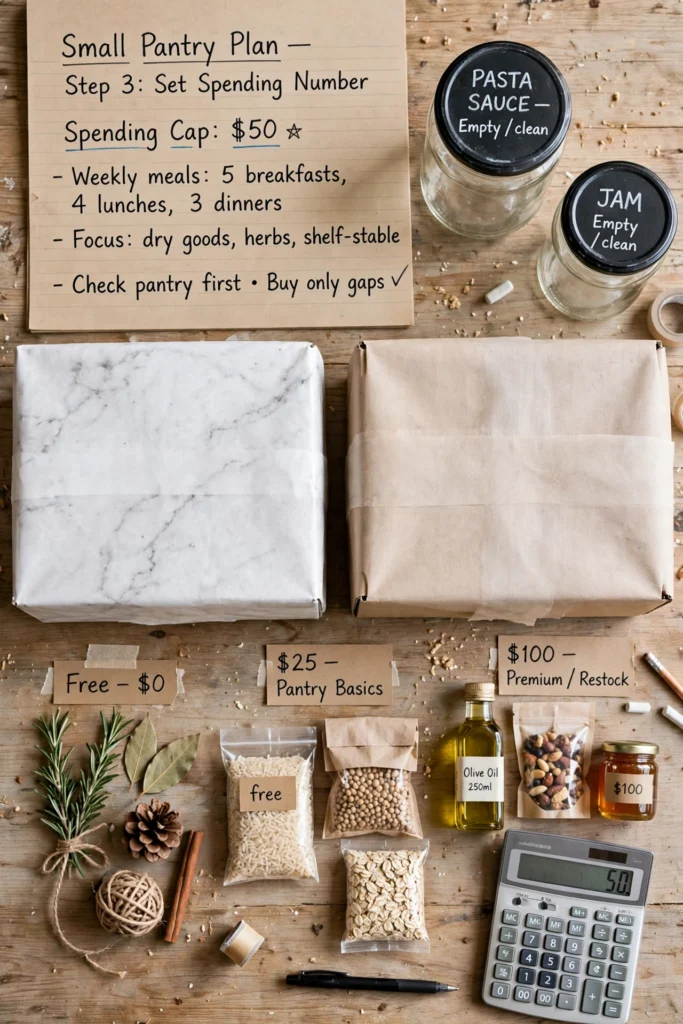
The free first path is simple: clean glass jars from pasta sauce, jam or pickles work well for dry goods like rice, oats and cereal. Use a permanent marker or chalk label on the lid. Cardboard boxes from deliveries can be cut down and covered with contact paper to make lightweight bins for packets and small bags. This approach is nearly free, but it has drawbacks: glass jars are heavy, and cardboard absorbs moisture and can attract pantry pests if not kept dry. Knowing those limits helps you decide where to spend later.
| Budget tier | What it usually buys | Best for |
|---|---|---|
| Free to $20 | Jars, cardboard trays, labels, shelf liner | A first pass, renters, a pantry you are still learning |
| $20 to $50 | Step risers, turntables, a few airtight containers | Deep shelves, canned goods, spices that vanish |
| $50 to $100 | A fuller set of uniform containers, stackable shelves, door rack | A pantry you will keep long term, a family kitchen |
Step 4: group food by use, not just by type
Grouping by type alone, all cans together, all pasta together, sounds tidy and often fails in practice. Group by how you cook instead: breakfast, grains and pasta, cans and sauces, baking, snacks, and spices. That way a meal comes from one zone, not five shelves. Put the ingredients for meals you make weekly together, and keep the one off ingredients, like a special baking flour, in a separate backup zone.
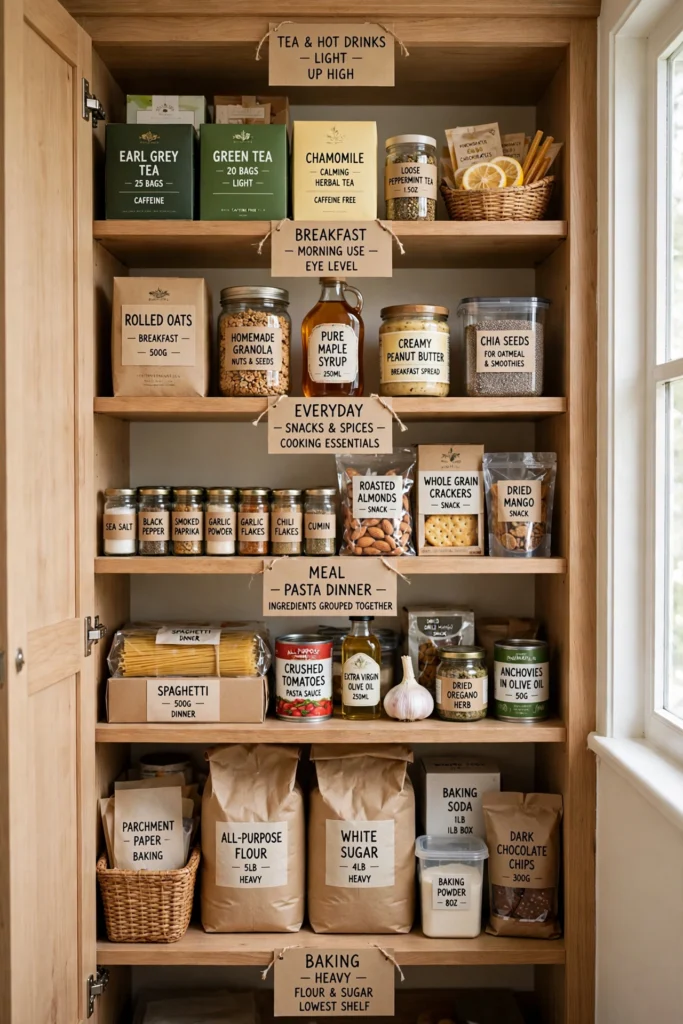
Think in zones by height and weight as well. Everyday items go at eye level, light backups go up high, and heavy items go low. A full bag of flour on a high shelf is awkward and unsafe to lift down, while a light box of tea bags up high is no problem at all. Keep detergent style logic out of the pantry, but keep the same safety rule: heavy low, light high, everyday in the middle.
Step 5: zone the shelf so you can see everything
Small pantries often have wasted space above and below the eye level shelf. A simple step riser lets you see what is at the back of a shelf and doubles the usable area for cans. For canned goods, a tiered organiser that angles cans forward helps for the same reason: the back row stops being a mystery.

Use the full height. Many cabinets have one shelf with a large gap above it. A riser or a stackable shelf can double that space. On a cabinet door, use a rack or removable hooks only if the door still closes. Measure the gap first, because a rack that stops the door closing will be removed within a week, however useful it looked in the shop.
| Pantry zone | Where it lives | What goes there |
|---|---|---|
| Everyday | Eye level, front of shelf | Breakfast, tea and coffee, cooking oil, salt |
| Cooking | Middle shelves, grouped by meal | Grains, pasta, cans, sauces, baking basics |
| Backup | Top shelf, labelled | Spare stock, bulk buys, seasonal items |
| Use soon | One basket, front and visible | Items near their date, odds and ends, leftovers to finish |
| Heavy | Lowest shelf or floor of a closet pantry | Flour, sugar, large oil bottles, bulk rice |
Step 6: buy only the organizers that fix a named problem
Now, and only now, buy. Name the problem first, in a sentence. “Cans at the back disappear” buys a riser. “Spice jars get lost behind larger items” buys a tiered spice step or a shallow drawer insert. “Packets fall over” buys a small bin. If you cannot name the problem, do not buy the product yet. Live with the free version for a week and see which problem actually annoys you daily.
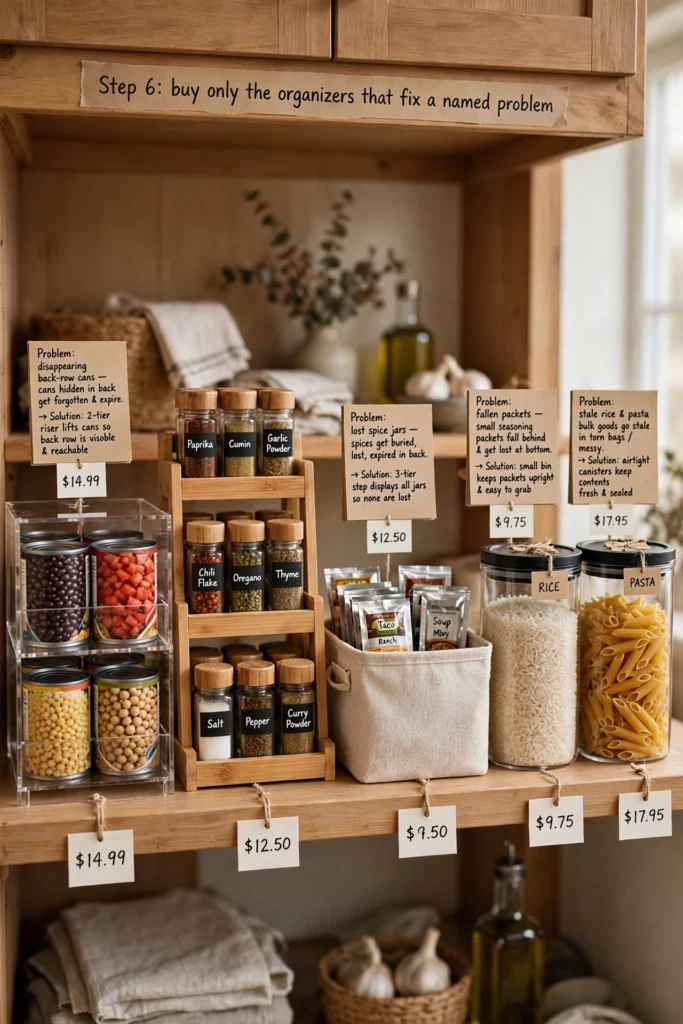
Spend $50 to $100 on purpose built organizers only if you get durability and uniform sizes in return. Clear acrylic canisters, stackable wire shelves and adjustable risers are often under $20 each as a typical range. A set of four or five airtight containers might cost $25 to $40 as a typical range, but they keep food fresher and make the pantry look tidier. The trade off is paying for convenience and appearance, which is worth it if you value quick visual scanning over frugality. Compare the long term cost too: DIY bins may need replacing after a year or two, especially if handled often, while thick plastic or glass containers can last a decade.
Step 7: label everything, including the date
Label every decanted container with what it is and the date you filled it. That second part is the one people skip, and it is the one that saves food. A jar of flour without a date is a guess. A jar with a date is a plan. Use masking tape and a pen if you do not want to buy a label maker. The label does not need to look like a shop display. It needs to be readable at arm’s length, in a hurry, with a child asking questions beside you.

Keep a running inventory in whichever form you will actually maintain. A physical list on the fridge works well if you prefer pen and paper. A free notes app on your phone means your inventory is always with you at the store. Choose whichever you will actually maintain. The best system is the one you stick with, and a perfect system you abandon in week two is worse than a scruffy list you check every shop.
Step 8: keep it working with a five minute reset
Organizing once is easy. Keeping it that way takes a little upkeep, but far less than you would expect. Spend two minutes a few times a week straightening shelves and returning stray items to their zones. When you unpack groceries, apply the first in, first out method right away: new stock goes behind old stock, so the oldest item gets used first.
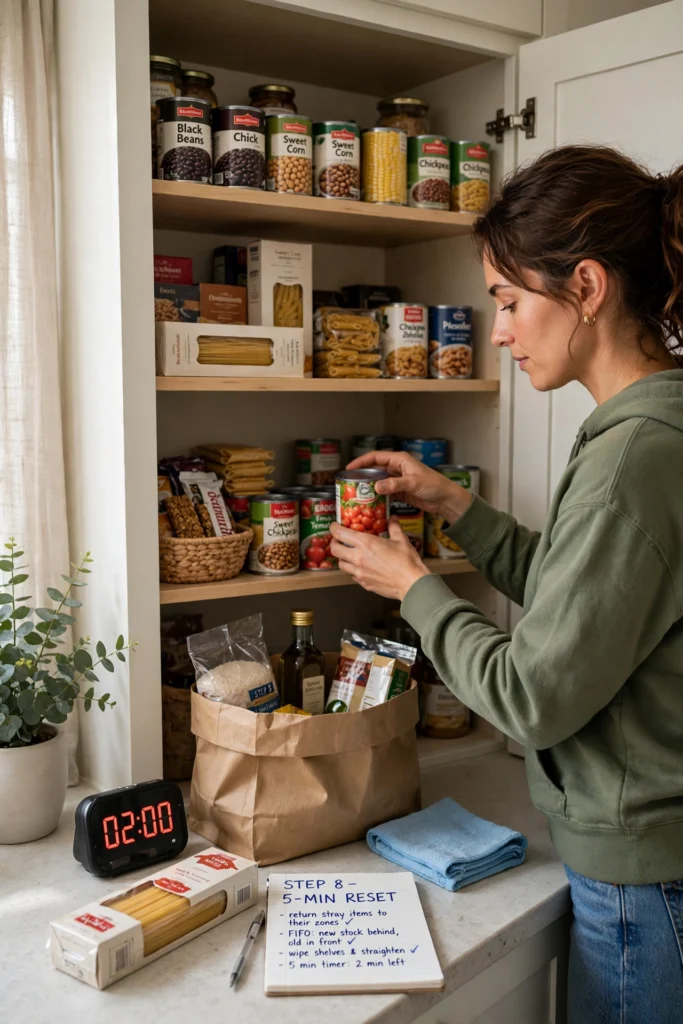
Plan a deeper clean every three to four months. Empty the shelves, wipe them down, check expiration dates, and reassess your categories. This seasonal reset catches anything that slipped through and keeps pests away. Your life changes too, and your pantry should follow. A new diet, a growing family, or a different cooking routine all call for adjustments, so revisit your zones now and then to make sure your system still fits your real habits.
When your pantry is a cabinet, not a room
A cabinet pantry needs the door and the full shelf height to work. Use a riser or a stackable shelf to double the space above a low shelf, use the inside of the door for spice packets, measuring cups or wraps, and try freestanding sliding baskets that sit on the shelf and pull out like drawers, with no screws. Store spices separately, because a tiered spice step stops small jars from getting lost behind larger items.
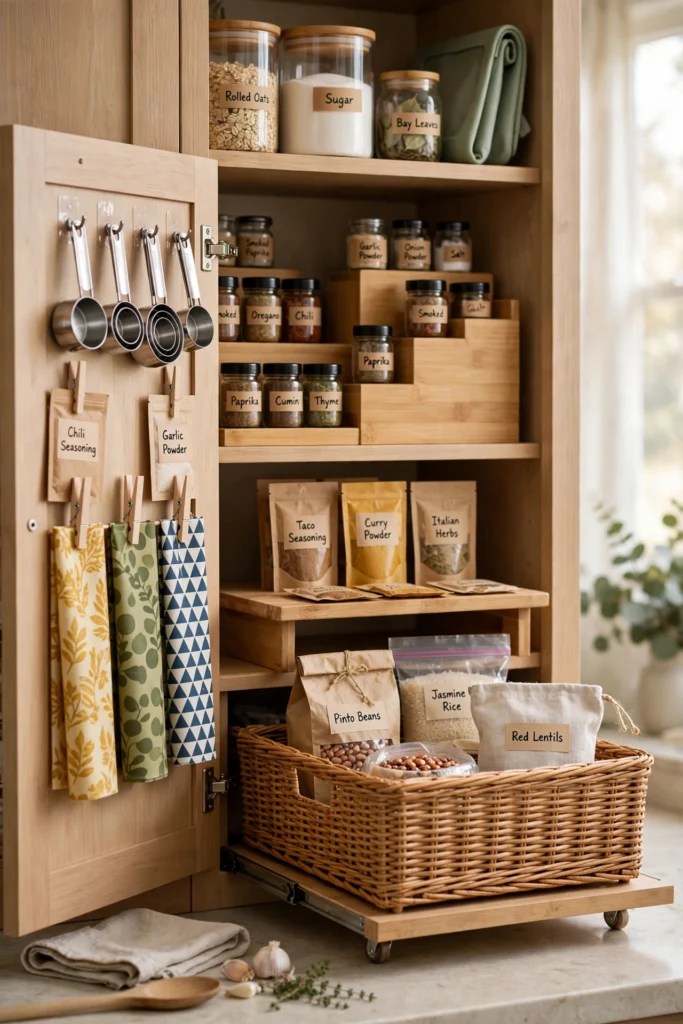
If you have no pantry at all, claim a zone instead of a room. One dedicated cabinet becomes your whole pantry. A tall, narrow bookcase near the kitchen, a thrifted hutch, or a rolling cart in a gap all do the same job, as long as the zone has a boundary and a rule: food for this week lives here, backup lives elsewhere. A rolling cart is especially useful in a small kitchen, because it can move to where you cook and then park in a gap, much like the mobile coffee setups in our coffee station ideas for small apartments.

Closet pantries and kitchens with no pantry at all
In a closet pantry, add an over door rack, bins on deep shelves, and heavy items on the floor. Deep shelves need bins you can pull out like drawers, otherwise the back half becomes a graveyard for duplicate purchases. Label the bins by zone, not by brand, so anyone in the house can put shopping away correctly without asking.

With no pantry, use a cart, a dedicated cabinet, or a freestanding shelf, and work the backs of your doors and the tops of your cabinets. The inside of every cabinet door is free storage you are currently wasting, and the dusty gap between your upper cabinets and the ceiling is overflow storage for light, rarely used items in closed boxes. Anchor tall furniture against tipping, and ask your landlord about the small screw an anchor needs if you rent. The same renter safe thinking runs through our renter friendly apartment upgrades, which are built around changes you can undo when you move.
Buying in bulk without wasting food
Buying in bulk saves money, but only if you will actually use what you buy. Stick to bulk purchases of non perishables you know you eat often, like rice and pasta. Skip bulk amounts of items that spoil fast unless you can freeze portions. Always check the unit price, not just the sticker price. Sometimes the smaller package is the better deal, especially if the bulk pack will go stale before you finish it.

Make sure you have proper storage to keep bulk goods fresh and pest free before you buy in bulk, not after. An open bulk bag in a damp cupboard is not a saving. It is a future clear out. Decant bulk dry goods into airtight containers, label them with the date, and keep the original cooking instructions tucked inside the lid or photographed on your phone.
Meal planning around the pantry you already have
Before shopping, look at what you already have and build meals around it. If you have got beans, rice, and canned tomatoes, that is chili or a burrito bowl with little extra cost. Planning meals this way uses up what you own before it expires. You will shop less often, spend less, and waste almost nothing.
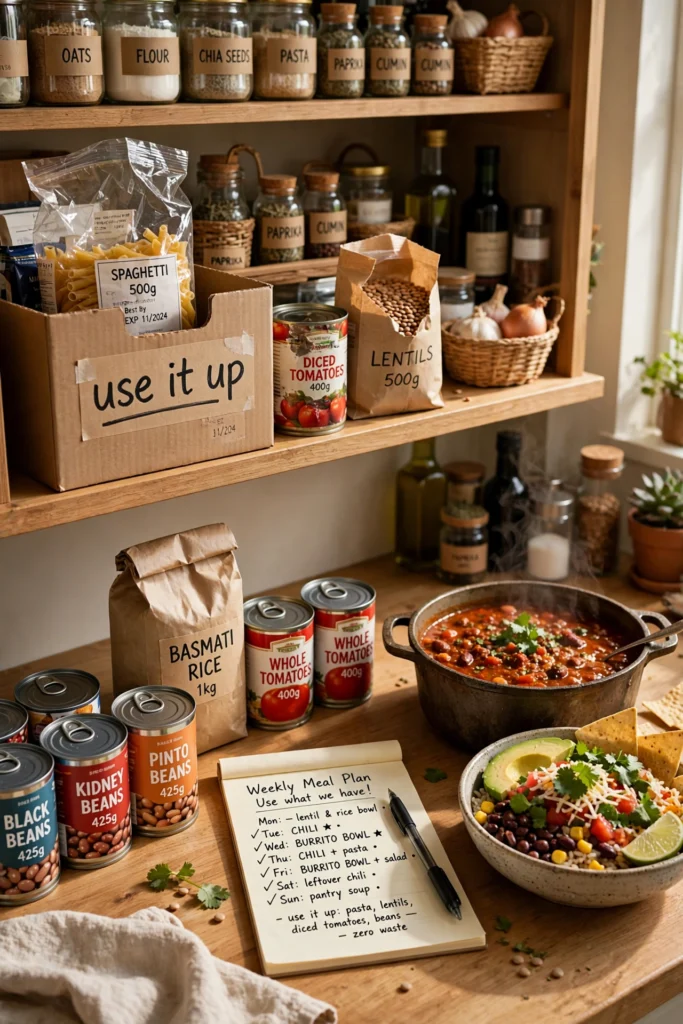
Start with the use it up basket. Designate one bin or shelf as your use it up zone. Place items nearing their expiration date or odds and ends here. Before planning meals, check this basket first and build around it. This single trick rescues forgotten food and squeezes value out of every purchase, and it is the fastest way to see whether your pantry zones are actually working.
Staples that earn their shelf space
Not every staple deserves the same priority. The staples that earn their space are the ones that combine into many meals: rice, pasta, canned tomatoes, beans, oats, flour, oil, and a few spices you actually use. These ingredients last a long time and combine into endless meals, giving you the most nutrition per dollar as a general principle, not a measured claim.

Be honest about the rest. A spice bought for one recipe two years ago, a sauce you did not like, or a bulk buy you regretted are all taking a spot a staple needs. Donate what is unopened and accepted locally, toss what is past its best, and free the shelf. A smaller, used pantry beats a large, ignored one every time.
Adjusting your pantry by season
Your pantry needs to shift with the seasons. In winter, you might stock more soup ingredients and hearty grains. In summer, lighter staples and grilling basics make sense. Rotate seasonal items to the front when they are in heavy use and tuck off season goods toward the back. This keeps your most used items within easy reach year round.

Seasonal rotation is also a good moment to check for pests, moisture, and stale stock. A pantry that is checked four times a year rarely surprises you. A pantry that is never checked will surprise you all at once, usually when you find a bag you forgot you owned.
Common frugal pantry mistakes to avoid
The most common mistakes are buying organizers before measuring, over buying organizer pieces and then using only a few, decanting every item into matching canisters, and labelling containers without the date you filled them. Decanting everything looks beautiful on a shelf and wastes time and containers on items that were fine in their original packaging. Decant only open dry goods that spill, go stale, or are hard to pour. Leave sturdy boxes and cans in their packaging.
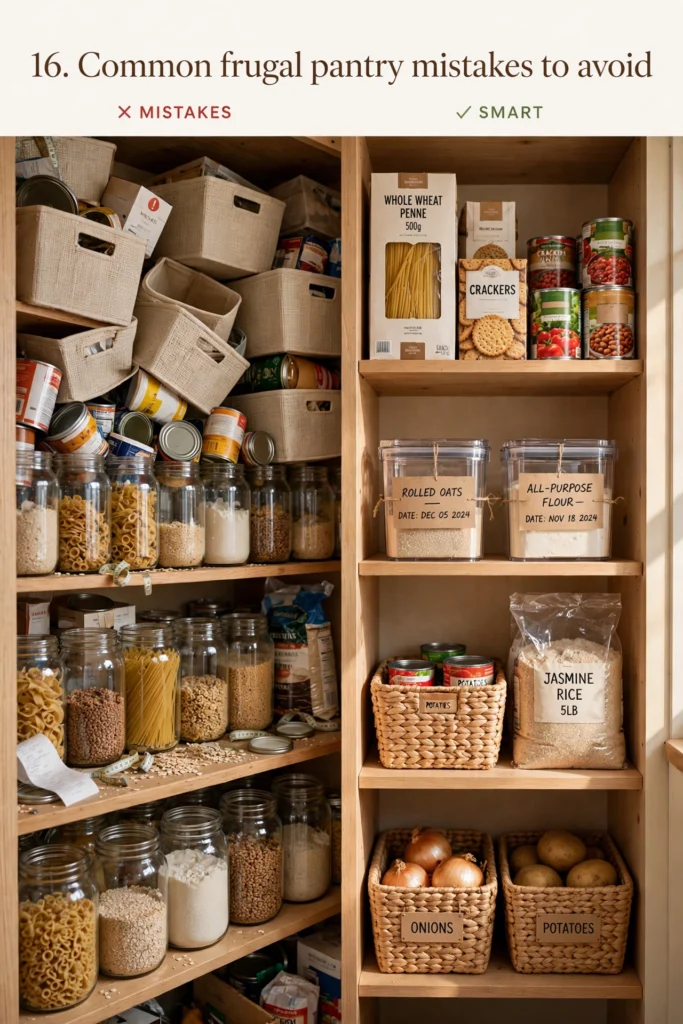
Another mistake is organising for a photograph rather than for cooking. A pantry that looks perfect but makes you move six jars to reach the rice will not stay perfect. Put the rice where your hand goes first, even if it is not the prettiest spot. Function first, then make the function look tidy with matching bins in one zone at a time, not all at once.
Questions beginners ask about frugal pantries
How do I start pantry organization on a very small budget?
Start with the free pass: empty the pantry, measure the shelves, group food by use, and use jars and cardboard trays you already own. Only buy after a week of living with that system, and only for a problem you can name.
Should I decant everything into matching containers?
No. Decant open dry goods that spill or go stale, like flour, rice and oats. Leave cans, sturdy boxes and unopened packets in their packaging, and label any container you do decant with the contents and the date.
How do I stop buying duplicates?
Keep a running inventory on paper or on your phone, and check it before you shop. A use it up basket at the front of the pantry also helps, because it makes the food you already own visible before you buy more of it.
What is the cheapest way to fix deep shelves?
Use bins you can pull out like drawers, or a step riser for cans. A piece of cardboard cut to fit a wire shelf stops small items tipping through, and it costs nothing.
How often should I deep clean a pantry?
Every three to four months is a good rhythm. Empty the shelves, wipe them down, check dates, and reassess your zones. A quick two minute tidy a few times a week keeps it in shape between deep cleans.
Your first Saturday, in order
Do not try to do everything in one afternoon and then never touch the pantry again. Do the free pass on Saturday morning: empty, measure, sort, zone, label. Cook one meal from the use it up basket that evening, so the new system pays off on day one. Then live with it for a week.
At the end of that week, buy one thing, and only one thing, for the problem that annoyed you most. A riser, a door rack, or a set of containers for the dry goods you actually decant. That single purchase, chosen from real use, will do more than a trolley full of organisers bought before you measured a shelf. If your kitchen is part of a small home, the same measure first habit helps everywhere else too, from studio apartment layouts to apartment design ideas that have to work in a few square metres.
A frugal pantry is not about owning less for its own sake. It is about owning what you use, seeing what you own, and spending money only where it actually makes cooking easier. Start free, measure honestly, and let the pantry earn its next purchase.