DIY marbled vases are one of the cheapest ways to make a Halloween entryway look like you spent real money on it. The trick is water marbling with nail polish. You float drops of polish on warm water, swirl them into a pattern with a toothpick, then dip a white vase straight through the surface. The polish wraps around the glass in a marbled skin, and the whole thing takes about ten minutes per vase once your supplies are ready.
Start with a white or white primed vase so the colours stay bright, work fast because polish skins over quickly, and wear gloves. Black, orange, purple and metallic gold are the Halloween palette that works best, and a trio of finished vases on a console table, filled with dried branches or bare twigs, reads as deliberate seasonal styling rather than a craft project.
There is a particular kind of Halloween decorating that feels forced, and then there is the kind that makes a guest pause in the doorway. A marbled vase belongs to the second kind. It has the look of something hand poured in a studio, with veins of colour that no two pieces share, and it costs a fraction of what a similar vase sells for in a homeware shop. You do not need a steady hand or any painting skill, because the water does the patterning for you.
This guide walks through the whole project in order, and it covers the mistakes that waste polish and the fixes that save a vase.
What You Need: Supplies and Choosing the Right Vase for DIY Marbled Vases
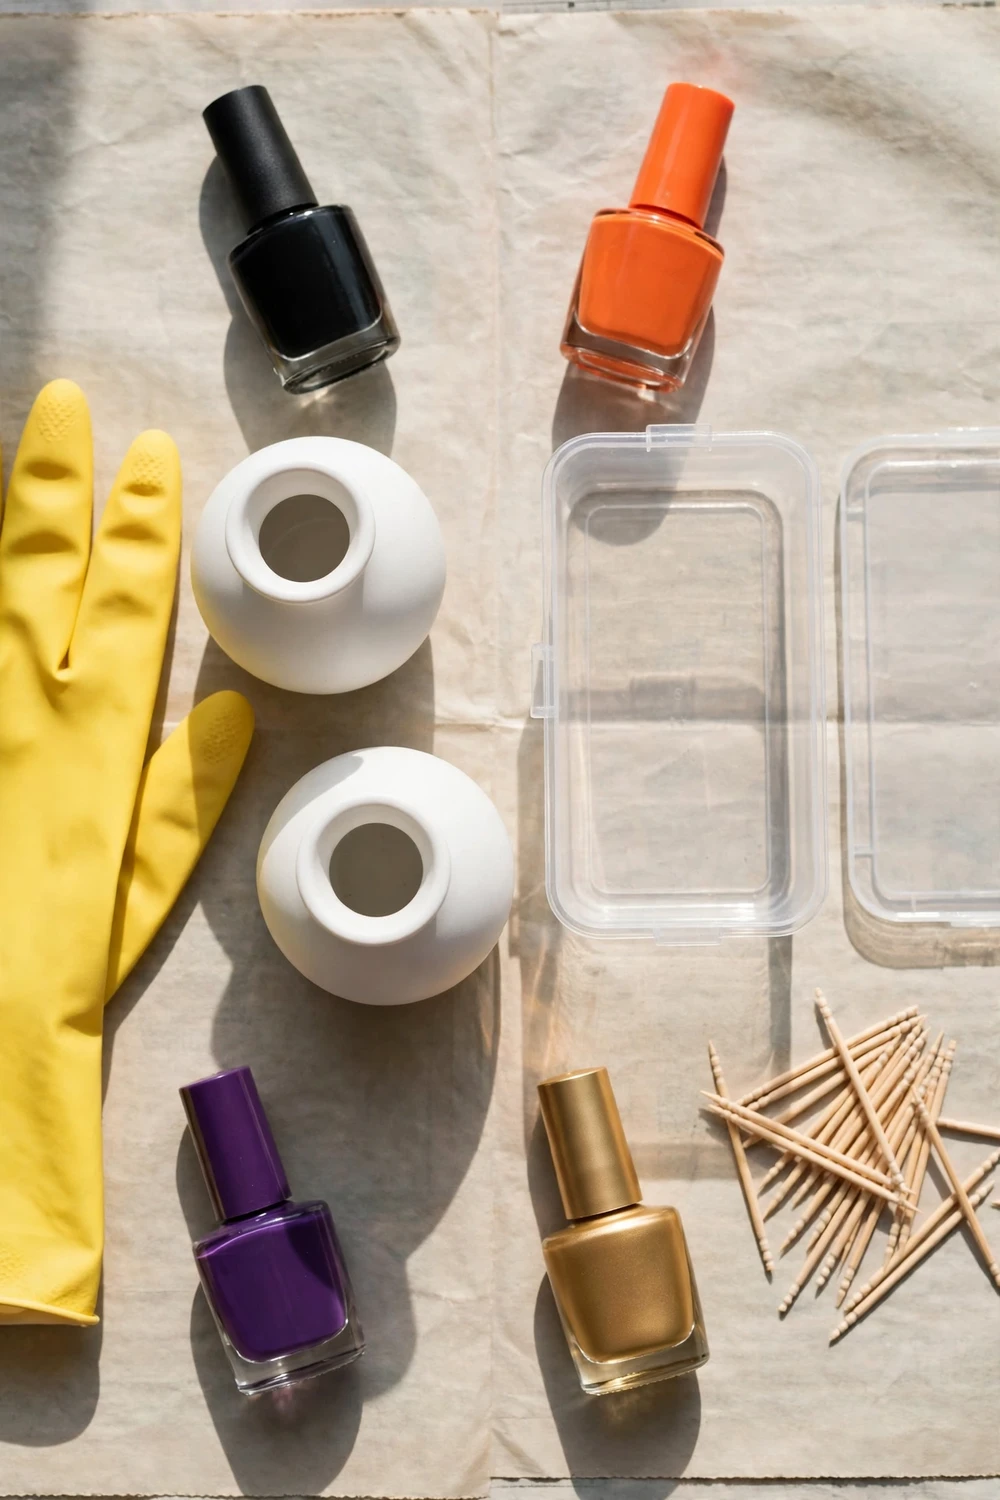
A marbled vase project needs very little, and you may already own half of it. The one thing worth buying properly is the nail polish. Cheap polish works, and the thinner, runnier formulas spread better on water than thick gel style polishes. Old bottles from the back of a drawer are perfect, provided they still pour. Polish that has gone gloopy will sink in blobs instead of spreading into a thin film.
Your shopping list is short. You need two or three plain vases, white spray primer or white spray paint, two to four bottles of nail polish in your chosen colours, a disposable plastic container wider and taller than your vase, warm water, wooden skewers or toothpicks, rubber gloves, newspaper or a plastic dust sheet, paper towels, acetone for clean up, and a clear spray sealer if you want extra protection. White vinegar is useful too, for wiping the vase before you start, since grease stops the polish from sticking evenly.
Vase shape matters more than vase price. A straight sided cylinder is the easiest shape to marble. A vase with a narrow neck and a wide body can work, but the film may tear or wrinkle at the shoulder, so choose gentle curves rather than a sharp bulge. Tall bud vases marble beautifully in a group of three, while a short wide vase suits a low shelf where a tall piece would block the view.
Glass and ceramic both take the marbled film well, provided the surface is smooth. Unglazed terracotta is a poor choice because it drinks the polish and the pattern goes patchy. Glossy ceramic, smooth glass and glazed stoneware are all safe. A dollar store vase makeover is the classic starting point for this project, and honestly it is the smart one. Plain white or clear glass vases from a discount shop cost very little, and if a dip goes wrong you have lost almost nothing. Charity shops are worth checking too, where odd vases turn up for pennies.
Think about how many vases you want before you start pouring. A single marbled vase can look lonely on a wide console table, while three at different heights look intentional. Marble the tallest vase in your boldest combination and keep the smaller ones quieter. If you are unsure about a colour, test it on a cup first.
Prep Work: Priming, Protecting Your Workspace and Picking Colours
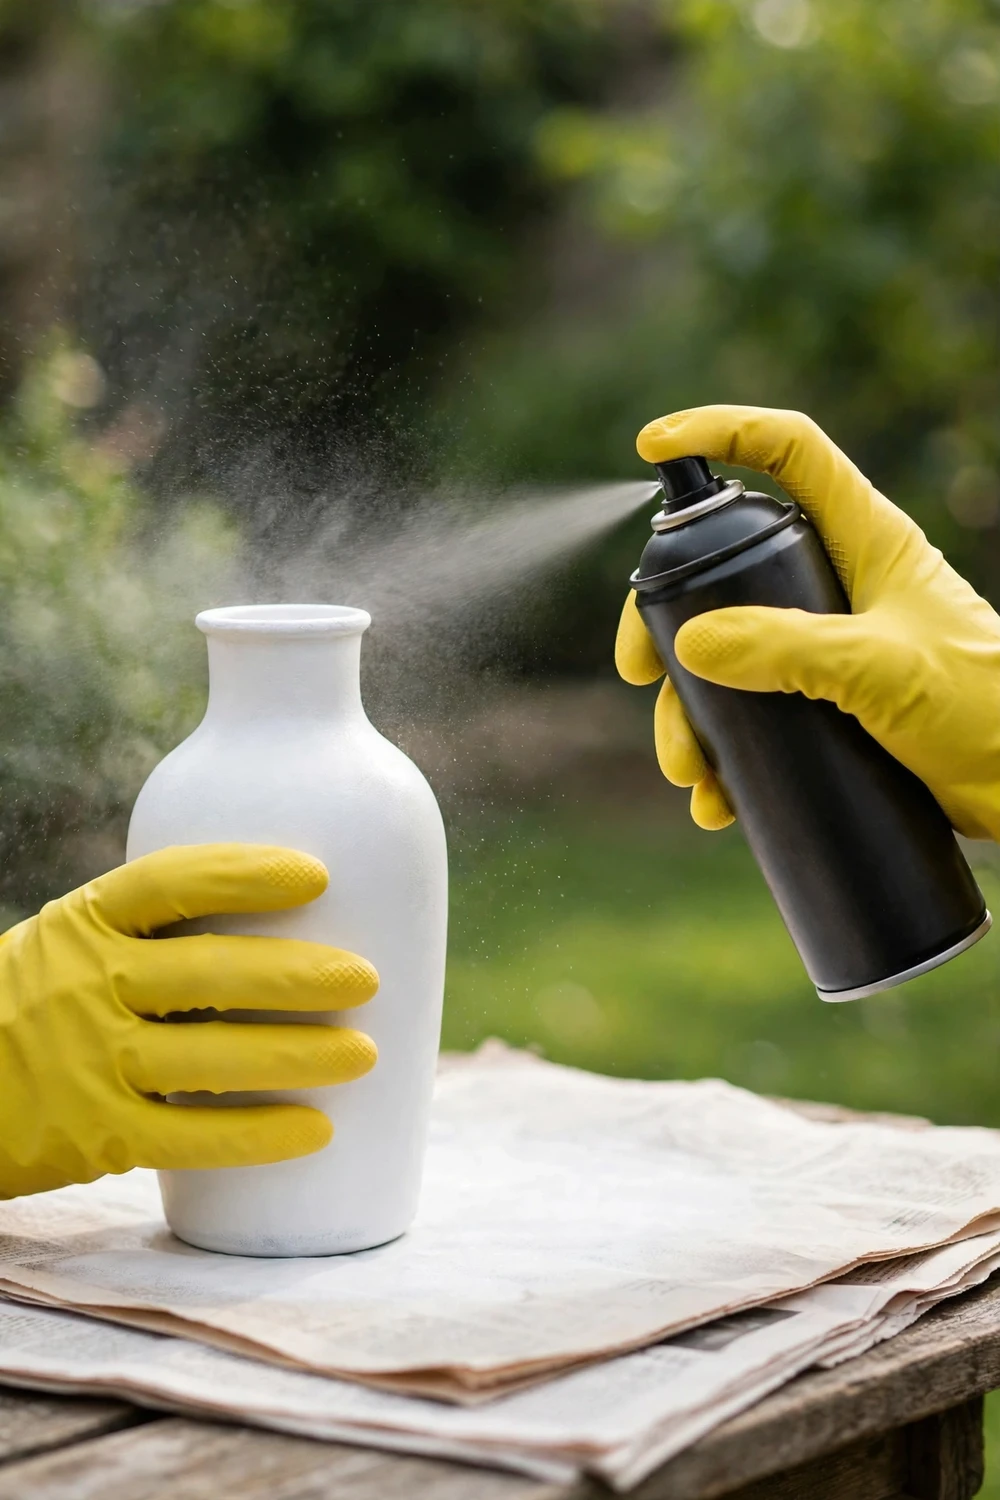
The single most important step is the base coat. Nail polish is translucent, so on clear glass the colours wash out, while on a white base the same polish looks rich and saturated. If your vase is already white, wipe it down and move on. If it is clear, coloured or patterned, spray it white first.
Use a white spray primer or white spray paint made for glass or multi surface use. Work outside or in a well ventilated space, hold the can about 20 to 30 centimetres from the vase, and use light, even passes rather than one heavy coat. Two thin coats beat one thick coat, because thick paint runs and drips, and a drip under a marbled film shows through. Let the first coat dry fully before the second, then leave the vase to cure for a few hours, or overnight if you can. Polish applied over tacky paint will slide and wrinkle.
While the primer dries, set up your workspace. Lay newspaper or a plastic dust sheet over the whole table, and keep paper towels within reach. Nail polish on a wooden table is hard to remove. Use a disposable container wider and taller than the vase, and fill it with warm water, not hot. Warm water keeps the polish fluid for a little longer, which buys you working time. Cold water makes the polish skin over almost immediately, and that is why beginners get a cracked, lumpy finish. Do not use a container you care about, because polish residue does not come off cleanly.
Choose your colours now, while your hands are clean, and open every bottle you plan to use. Loosen the caps and set the bottles in pouring order. Once the first drop of polish hits the water, you have well under a minute before the film starts to set. Put your toothpicks beside the container and your gloves on.
One last prep step is easy to skip and worth doing: wipe the primed vase with a cloth dampened with white vinegar, then let it air dry. This removes dust and fingerprint grease, and the polish film grips a clean surface far better. Wipe a whole group at once so you are not stopping between dips. If you want more ideas for using paint to transform plain pieces, the guide to DIY textured paint techniques covers finishes that pair well with a marbled vase.
How to Water Marble a Vase, Step by Step
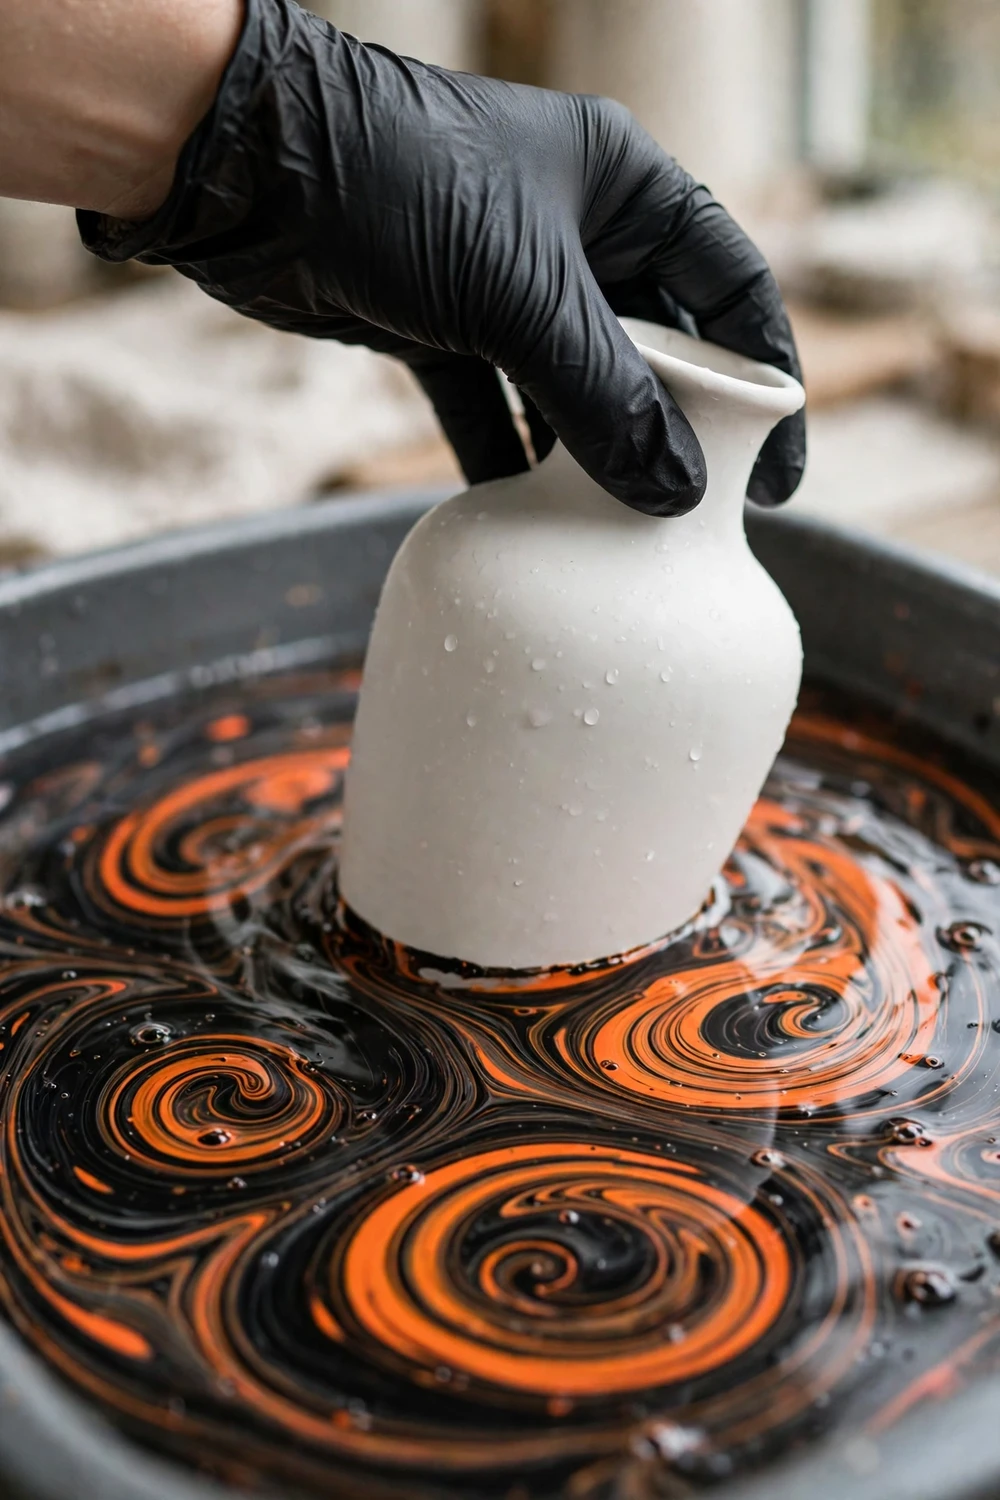
Water marbling nail polish looks like magic the first time you see it, but the steps are simple and the timing is the only part that needs practice. Work with one vase at a time. The dip itself takes less than a minute.
Start by pouring your first colour close to the surface of the water, holding the brush just above it. The polish should spread into a thin, almost transparent film. If a drop sinks, you poured from too high or the polish is too thick, so switch bottles or pour lower. Add your second colour inside the first ring, then your third, until you have a bullseye of rings roughly the size of a saucer. Three to five drops of each colour is usually enough. More polish makes a thicker film that wrinkles instead of wrapping smoothly.
Now take a toothpick and drag it gently through the rings. Slow pulls from the centre outward make a starburst, a spiral motion makes a feathered swirl, and short zigzag strokes make a marbled vein. Keep your strokes deliberate and stop early. Beginners almost always over swirl, and the colours turn muddy. Two or three strokes are enough. If the film looks stringy or pulls away from the toothpick, it has already begun to set, so dip now rather than keep stirring.
Hold the vase by its base or rim with a gloved hand and lower it straight down through the centre of the pattern, in one smooth, steady motion. Do not pause halfway or twist the vase, because twisting drags the film and smears the pattern. Push it down until the water covers the area you want marbled, then hold it still for a few seconds.
Before you lift the vase out, clear the leftover film from the water surface. Use a toothpick to drag the remaining polish to one side, or blow gently across the surface to push it to the edge. If you lift the vase straight through a floating sheet of polish, that sheet sticks on in a messy second layer and ruins the pattern you just made. Once the surface around the vase is clear, lift it out slowly and set it upside down on paper towels to drip.
One honest warning: your first dip will probably not be your best. Mine was not either, and that is normal. The second and third vases are usually the ones that end up on display. That is why a practice run on a disposable cup matters. A marbled vase DIY rewards a relaxed hand, and you cannot relax if every dip feels precious.
Colour Combinations That Work for a Halloween Entryway

Halloween colour has a bad reputation in home decor, mostly because it is used too loudly. A whole room in orange and black feels like a party shop. A marbled vase in the same colours feels like a design choice, because the marbling breaks the colour into veins instead of flat blocks. Pick combinations with a clear hierarchy: one dominant colour, one strong accent, and one metallic or neutral to lift it.
The table below gives five combinations that work in a real entryway, with the mood each one creates and where it sits best. White walls can take the boldest pairing. A dark hallway needs the lighter combinations so the vases do not disappear.
| Base colour | Polish colours | Mood | Best setting |
|---|---|---|---|
| White | Black, metallic gold | Elegant, graphic, almost like stone | Bright hallway, modern home |
| White | Black, orange | Classic Halloween, bold and clear | Family entryway, with pumpkins |
| White | Purple, silver, black | Witchy, cool toned, a little mysterious | Grey walls, dark wood |
| Black | Orange, metallic gold | Dramatic, warm, high contrast | Dark console table, candlelight |
| White | Orange, copper, cream | Soft autumn, seasonal without spooky | Transitional decor, carries into November |
Black and orange vase decor is the combination most people picture first, and it is also the easiest to get wrong. The fix is proportion. Let black dominate, use orange as the vein rather than the flood, and add a thin thread of gold to stop the two colours from clashing. On a white base, pour black first and let it spread wide, then add orange in the middle of the rings, then a single drop of gold. The swirl pulls the orange into fine lines inside the black.
Metallics deserve a special note. Gold, copper and silver polishes contain tiny flakes, so they spread a little more slowly on water. Pour metallics last, and use fewer drops than you think you need. One or two drops of gold in a mostly black pattern is enough to catch the light. Too much metallic turns the whole surface glittery.
If your hallway leans minimalist, try white with black veining and no other colour. It reads as marble stone from a distance, and it is the combination most likely to stay on display after Halloween. For the rest of your styling, the ideas in minimalist Halloween decor ideas show how a few quiet pieces can carry the whole season.
Drying, Sealing and Fixing Smudges

A marbled vase is fragile for the first day. Leave it upside down on clean paper towels for at least three hours, then turn it right way up and leave it overnight. The film hardens from the outside in, so a surface that feels dry may still be soft underneath, and handling it early leaves fingerprints that no buffing will remove.
Once the vase is fully dry, a clear spray sealer adds a useful layer of protection. Choose a clear gloss or satin sealer made for craft or multi surface use, and apply it outdoors or in a ventilated room. Two light coats, with drying time between them, are better than one heavy coat. The sealer evens out the sheen, protects the polish from light scratches, and makes the vase easier to dust. It does not make the vase dishwasher safe. Hand wash only, gently, with lukewarm water and no scrubbing.
Smudges and fingerprints are the most common problem at this stage, and the fix depends on timing. If you spot a smudge while the polish is still slightly tacky, leave it alone. Touching it will only spread the damage. If the smudge is small and the vase is fully dry, a careful wipe with a soft dry cloth sometimes softens the mark. If the damage is obvious, remove the polish with acetone and start again.
Small bare patches are easier to deal with. A patch where the film tore usually sits near the rim or base, and a tiny brush stroke of matching polish blends in well enough at normal viewing distance. Wrinkles near the shoulder of a curvy vase are harder to hide. Do not keep adding layers to rescue a bad dip. Two layers look intentional. Four layers look thick and cloudy.
Check the base before you call it finished. Polish often pools around the bottom edge, so smooth it with fine sandpaper or a nail file, and stick a small felt pad underneath to protect the tabletop.
Three Halloween Entryway Vignettes for Different Spaces
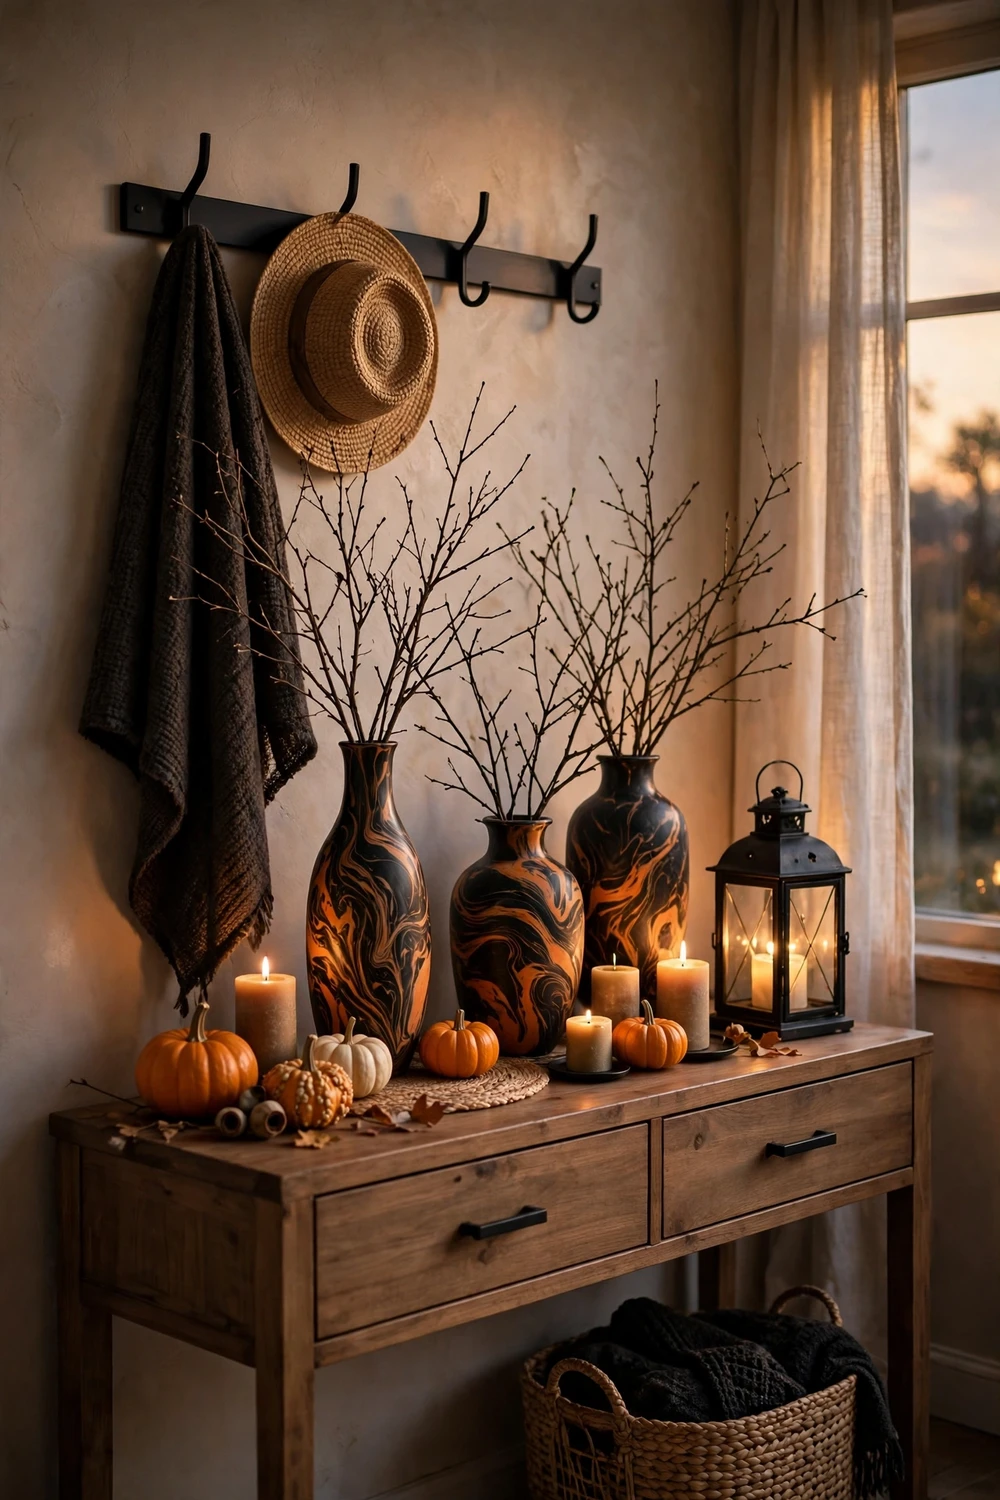
Halloween entryway decor only earns its place when it is styled, and the entryway is the perfect stage because it is the first thing a guest sees. Keep each vignette to three or four elements and leave breathing room around them. A crowded console table reads as clutter. A vase with one companion piece and some empty space reads as confidence.
The classic console table
If you have a proper console table or foyer chest, build the scene around height. Place your tallest marbled vase at one end, filled with bare branches or dried eucalyptus, and a shorter vase at the other end with mini pumpkins in front of it. A low tray or a stack of two books in the middle anchors the arrangement. Black and orange vase decor works best here. After dark, a pair of candlesticks or a single lantern throws warm light across the marbled surface, and the metallic veins catch it. Keep candles away from dried branches, and use battery candles if the arrangement is tight. If you are also painting pumpkins this year, how to paint modern pumpkins gives five methods that coordinate with a marbled vase, especially the black and gold finishes.
The small hallway with no table
Many homes have an entryway that is really just a stretch of wall beside the front door, with no room for a console table. A marbled vase still works here, it just moves up. Place a single bud vase on a narrow floating shelf or a wall mounted ledge. One stem, one vase, one shelf. Choose the white base with black veining for this spot, because it reads clearly from a distance. Add a single dark branch or a stem of dried pampas grass, and leave the shelf otherwise empty. Keep the vase near the door, and use a felt pad underneath so it does not slide when the door closes. The guide to small entryway ideas covers layouts for halls with no foyer at all.
The porch and the threshold
The third vignette sits just outside or just inside the front door, where Halloween decorating is at its most public. A pair of marbled vases flanking the door frames the entrance and signals that the house is dressed for the season. Use your sturdiest vases here, weighted with a few stones at the bottom, because a porch vase faces wind and bumps from visitors. Fill them with tall bare branches, corn stalks or dried grasses, and put a pumpkin or a lantern at the base of each one. The orange, copper and cream combination suits a porch best, because it ties in with natural autumn colours. Bring the vases inside on wet or very cold nights, since the polish film does not like standing water or freezing temperatures. A porch arrangement like this also transitions well into November. The guide to Halloween decor pieces that work for Thanksgiving shows which pieces to keep and which to swap.
Common Mistakes and How to Fix Them
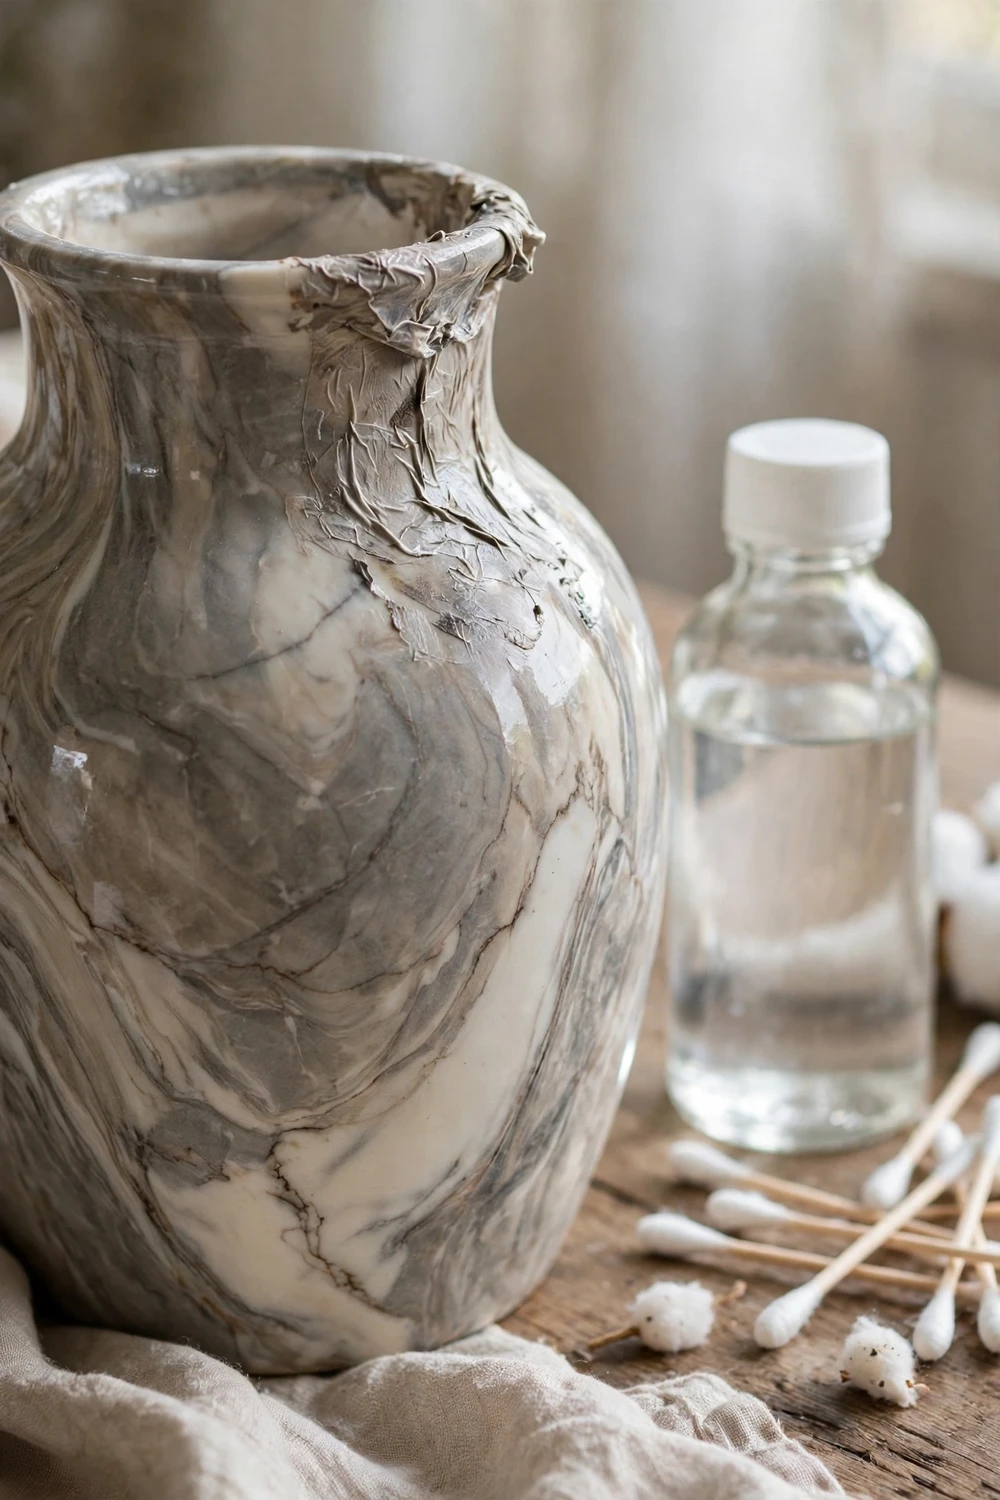
Almost every water marbling failure comes from a small, fixable cause. The first is cold water. Polish skins over fast on cold water, and the film cracks as you dip. Use warm water, and refill the container with fresh warm water between vases rather than letting it cool.
The second is pouring from too high. Polish dropped from a height sinks instead of spreading, and you end up with blobs on the bottom and a patchy film on top. Hold the brush close to the surface, almost touching it, and let each drop fall gently. If a drop sinks anyway, the polish is probably too thick, so try a different bottle.
Over swirling is the third mistake, and the most common. Two or three deliberate strokes make a pattern. Ten strokes make mud. Stop swirling while the pattern still looks a little too bold, because the dip stretches and softens the design. If the colours have turned grey and murky, skim the film off with a piece of card and start fresh.
Dipping too slowly is the fourth. A hesitant dip lets the film set around the vase unevenly, and you get wrinkles and thick patches. Commit to one smooth, steady motion. Rehearse once with the empty vase before you pour any polish, so your hand knows the path. The same goes for lifting the vase out: clear the surface first, then lift steadily.
The last mistake is skipping the white base. People dip clear glass vases hoping the colours will show, and they end up with a pale, washed out finish. If your vase is clear, prime it white. If you forgot, you can still save it: remove the polish with acetone, prime the vase, and dip again.
One more practical note: nail polish fumes are strong, so open a window, take breaks between vases, and keep the project away from children and pets while the polish is open.
Caring for Your DIY Marbled Vases After Halloween
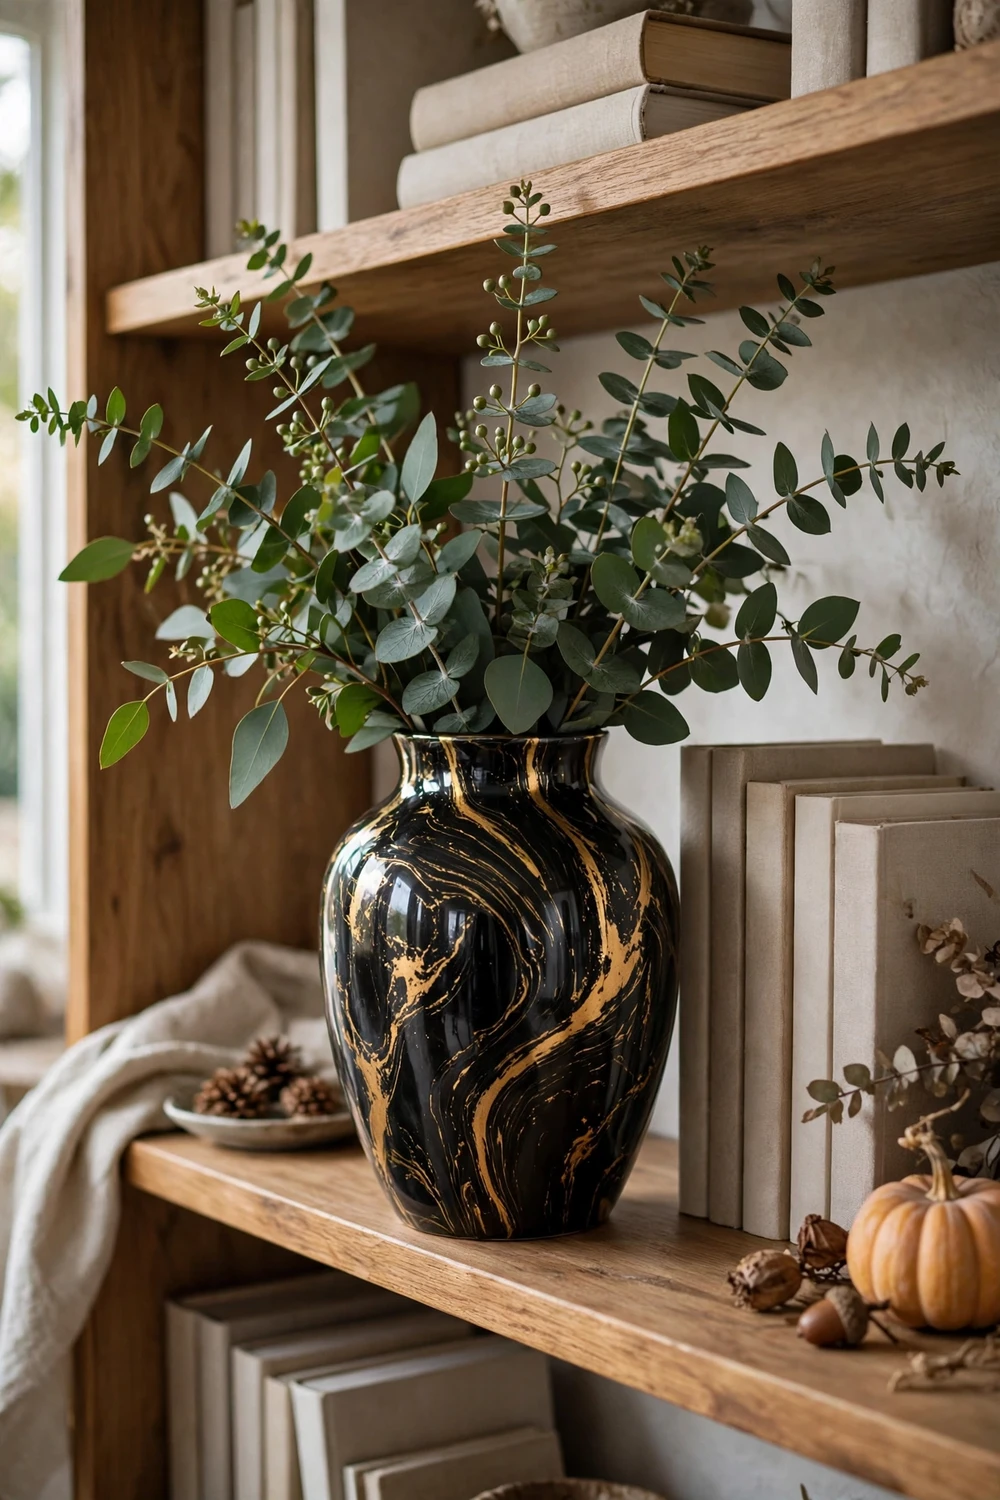
A marbled vase does not have to be a Halloween only piece. The black and gold combination, and the white with black veining, both work year round as everyday decor, and the orange and copper combination carries comfortably through autumn. After Halloween, the simplest refresh is to change what is inside the vase. Swap the bare branches for fresh greenery or eucalyptus, and the vase reads as autumn in seconds.
For the bolder black and orange pieces, consider whether they have a home elsewhere. A black and orange vase can look striking on a bookshelf next to neutral books, or on a bathroom shelf. If it does not fit anywhere else, wrap it in tissue paper and store it with your Halloween decorations, standing upright and separated from other pieces so the surface does not scratch. Do not stack vases inside each other.
Cleaning is simple but needs a light touch. Dust with a soft dry cloth, and wipe smudges with a barely damp cloth, drying immediately. Never soak a marbled vase, never put it in the dishwasher, and never use an abrasive sponge or a harsh cleaner. The polish film is tougher than it looks once sealed, but it is still a craft finish, and it rewards gentle handling.
If a vase does get scratched or chipped over time, a small touch up with matching polish usually hides the mark. For a bigger chip, remove the polish with acetone and re-marble the vase in a fresh combination. That is one of the real advantages of this project: the vase is never finished in the permanent sense. It can be remade for Christmas, for spring, or for a completely different room, and each version costs little more than a few drops of polish. If you like seasonal decor that costs almost nothing, the plan for fall home decor under $40 shows how a handful of small changes can refresh a whole room.
Frequently Asked Questions
Can I use any nail polish for water marbling?
Almost any ordinary nail polish works, and cheaper, thinner formulas usually spread better than thick gel style polishes. Avoid polish that has gone gloopy or dried out, because it sinks instead of spreading into a film. Quick dry formulas set faster, so you have less time to swirl.
Do I have to prime the vase white first?
If the vase is already white, no. If it is clear, coloured or patterned, priming it white makes a real difference, because nail polish is translucent and the colours look washed out on a dark or clear base. Two thin coats of white spray primer, left to dry fully, give a much richer colour.
How long do marbled vases last?
With a clear sealer and gentle handling, a marbled vase lasts for years as a decorative piece. It will not survive the dishwasher or soaking, and it will scratch if knocked against hard objects, so treat it as a display piece. If the surface does get damaged, the polish can be removed with acetone and the vase can be marbled again.
Is water marbling safe to do with children?
Older children can help with the swirling and the styling, but the pouring and dipping are best left to an adult because nail polish and acetone need ventilation and careful handling. Younger children should watch rather than participate. Gloves are essential for everyone.
Can I marble a vase that already has a pattern?
Yes, if you prime over the pattern first. A busy pattern will show through a thin marbled film and muddy the result, so two coats of white primer matter here. Smooth surfaces work best. Textured vases can still be marbled, but the film may not grip evenly in deep grooves.
Your Entryway, Ready Before the First Trick or Treater
A Halloween entryway does not need a big budget or a weekend of work. It needs one good idea, done well, and a marbled vase is exactly that kind of idea. Three vases, a few branches, a pumpkin or two, and the front of your home tells a guest that someone here enjoys the season.
Start with one practice cup, then marble your boldest vase, then the quieter ones to go with it. Style them, step back, and adjust the spacing until the scene looks calm rather than crowded. When the first trick or treater knocks, the vases will be doing their quiet work in the hallway, catching the light. That is a good return for ten minutes and a few drops of polish.