What would change in your mornings if you could reach everything you need in your kitchen without opening three wrong cupboards first?
That was the question that started our kitchen reset. Not a new kitchen. Not a big budget. Just a kitchen that worked the way we actually lived in it.
Before the reset, our counters told the story. Mail piled up next to the toaster. Small appliances crowded the corners. The pantry felt like a game of stacking boxes, and every time I pulled one thing out, two more slid forward. We bought duplicate spices because we could not find the ones we already owned. I knew we had three garlic presses. I did not know where any of them lived.
Sound familiar? Most messy kitchens are not messy because the people who use them are lazy. They are messy because nothing has a clear home, and the things we reach for every day sit too far from where we use them. The fix is not a shopping trip. The fix is a plan that follows your day, from the first cup of coffee to the last wipe of the counter at night.
Quick answer: To organize your kitchen, work by zones matched to your routines. Start with the morning coffee zone, then the cooking zone, then the pantry, then the cleaning zone. Empty one shelf at a time, wipe it, and put back only what you use there. Keep daily items between waist and eye level, about 52 to 60 inches from the floor. Test the layout with real packages for a few days before you label anything, and buy a container only when it solves a clear problem.
This guide walks you through that plan over one weekend. Saturday is for clearing and sorting. Sunday is for placing, testing and labelling. Monday morning is the real test, and it should feel easier, not just tidier.
You do not need to finish every drawer to feel the difference. You need the right things in the right zones, and a short weekly reset that keeps them there.
Your one-weekend timeline
A full kitchen reset sounds huge until you break it into small blocks. We did ours in short sessions with breaks in between, and that made all the difference. No one stayed cheerful through six straight hours of sorting. Short blocks kept our decisions sharp.
Use the timeline below as a starting point, not a strict rule. If you live alone, you may move faster. If you cook for a family, give yourself more time on Saturday. The point is to finish one zone before you start the next, so you never end the day with everything out and nowhere to put it.
| When | What to do | How long it usually takes |
|---|---|---|
| Saturday morning | Clear the counters, empty one shelf at a time, and sort into keep, donate and toss | 2 to 3 hours |
| Saturday afternoon | Wipe every empty shelf, set up the coffee zone and the cooking zone | 2 hours |
| Sunday morning | Sort the pantry by task, decant the staples you use most, and set the prime zone | 2 hours |
| Sunday afternoon | Set up the cleaning zone, test the layout with real cooking, and label only what works | 1 to 2 hours |
| Sunday evening | Put donations by the door, take out the rubbish, and write your short restock list | 30 minutes |
Keep a notebook or a phone note open all weekend. Every time you think of something you need, write it down instead of stopping to shop. You will buy less, and you will buy the right things.
Start by emptying one shelf at a time
The biggest mistake in kitchen organization is trying to pull everything out at once. It looks brave for about ten minutes. Then the dining table disappears under piles of plates, the counters vanish, and dinner has nowhere to happen. Work shelf by shelf instead.
Pick one cabinet. Take everything out of it. Wipe the shelf. Look at what you actually own before you decide where any of it should go. Then move to the next shelf. This slower start saves you from the classic middle-of-the-project mess that makes people give up and shove things back anywhere they fit.
The three-box sort that actually works
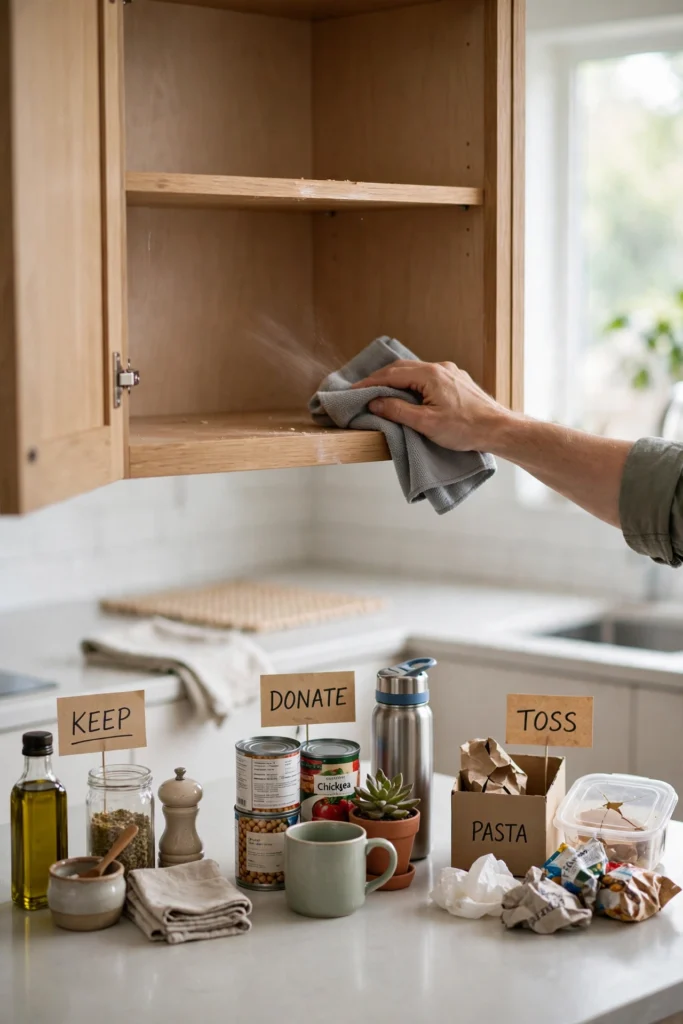
Set out three boxes or bags and label them keep, donate and toss. Pick up each item once and decide. If you have not used a gadget in the past year, it goes in the donate box. If it is broken, cracked, stained beyond use or past its date, it goes in the toss box. If you use it and you know where you use it, it stays.
We found three garlic presses, two nearly identical vegetable peelers and a stack of plastic containers with no lids. We kept the best garlic press and donated the other two. We kept the peeler that felt good in the hand. The lidless containers went straight in the bin, and it felt oddly freeing.
Be honest about the sentimental mug you never drink from and the fancy serving dish you use once a year. A mug you never use still takes up prime shelf space. A serving dish you love can live on a high shelf. It does not need to sit at eye level, blocking the plates you reach for every day.
Ask three quick questions for anything you hesitate over. Do I use this at least once a month? Does it work properly? Do I have another one that does the same job better? If the answer to the first question is no, it probably belongs in donate. If it is broken, toss it. Keeping a spare is fine when the spare is useful, like an extra spatula. Keeping four spares is just storage for things you will never touch.
Wipe the shelf before anything goes back
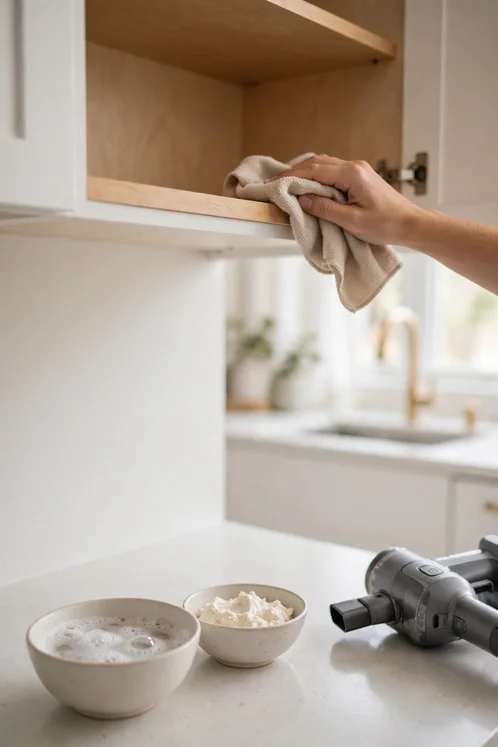
Empty shelves are a rare chance to clean properly. Crumbs, spilled oil and dust collect in corners you never see when the shelf is full. Vacuum the corners first, then wipe with warm water and a little dish soap. For sticky grease near the stove, a paste of baking soda and water, left for a few minutes, lifts most marks without harsh fumes.
Let every shelf dry fully before you put things back. Damp shelves trap smells and can mark the bottoms of containers. While one shelf dries, sort the next one. That rhythm keeps the work moving without wasted waiting.
Check the shelf itself while it is empty. Is it sagging? Is the liner torn? A shelf that dips in the middle will not hold heavy plates safely. A torn liner traps crumbs. Fix the small things now, while you can see them.
A zone map for the way you really cook
Zones sound fancy, but the idea is simple. Group things by the task they belong to, and store each group where that task happens. Coffee things live where you make coffee. Pots live near the stove. Cleaning things live near the sink. When every group has a home near its job, you stop walking back and forth across the kitchen for every meal.
Before you place a single item, walk through a normal day in your head. Where do you stand when you make breakfast? Where do you chop vegetables? Where do you reach when a pot boils over? Your answers tell you where each zone belongs. A zone plan copied from someone else’s kitchen will never fit yours as well as a plan built around your own habits.
| Zone | Where it lives | What belongs there |
|---|---|---|
| Morning coffee and breakfast | One stretch of counter near the kettle or coffee maker, with one cupboard above it | Mugs, coffee or tea, sugar, spoons, breakfast bowls, cereal, toaster |
| Cooking | Cupboards and drawers around the stove and oven | Pots, pans, lids, wooden spoons, spatulas, oils, salt and pepper, oven gloves |
| Prep | The largest clear counter, near the sink and the bin | Knives, chopping boards, mixing bowls, measuring cups, peeler, colander |
| Pantry and food storage | Pantry shelves or one tall cupboard, grouped by task | Grains, baking goods, cans, snacks, meal kits, backstock |
| Cleaning | Under and around the sink | Dish soap, sponges, cloths, dishwasher tablets, bin bags, spray bottles |
| Fridge and freezer | Grouped by use, with daily items at eye level | Leftovers, dairy, fruit, condiments, frozen meals, ice |
Notice what is missing from that table. There is no zone called miscellaneous. If an item does not fit a zone, it is a clue. Either it belongs in another room, or you do not need it in the kitchen at all.
The prime zone rule
Your prime zone is the shelf space between waist and eye level, roughly 52 to 60 inches from the floor. This is the easiest space to reach without stretching or bending, so it should hold the things you touch every day. Plates, bowls, mugs, glasses, your most used pan, your daily cooking oil. Everything else can live higher or lower.
Heavy items go low. A big stock pot, a bag of rice, a slow cooker you use once a week, these belong in a lower cupboard where you can lift them safely with both hands. Light, rarely used items go high. Holiday platters, the turkey roaster, the big punch bowl. You will need a step stool for those, and that is fine, because you only reach for them a few times a year.
This one rule fixes a surprising number of kitchen frustrations. If you have to climb for your everyday plates, your kitchen will always feel hard to use. Move the plates down and the Christmas dishes up, and the whole room feels calmer.

Zone one: the morning coffee and breakfast zone
Start here, because it is the smallest zone and it gives you a quick win. It is also the zone you use first every day, so a good result here changes your whole morning.
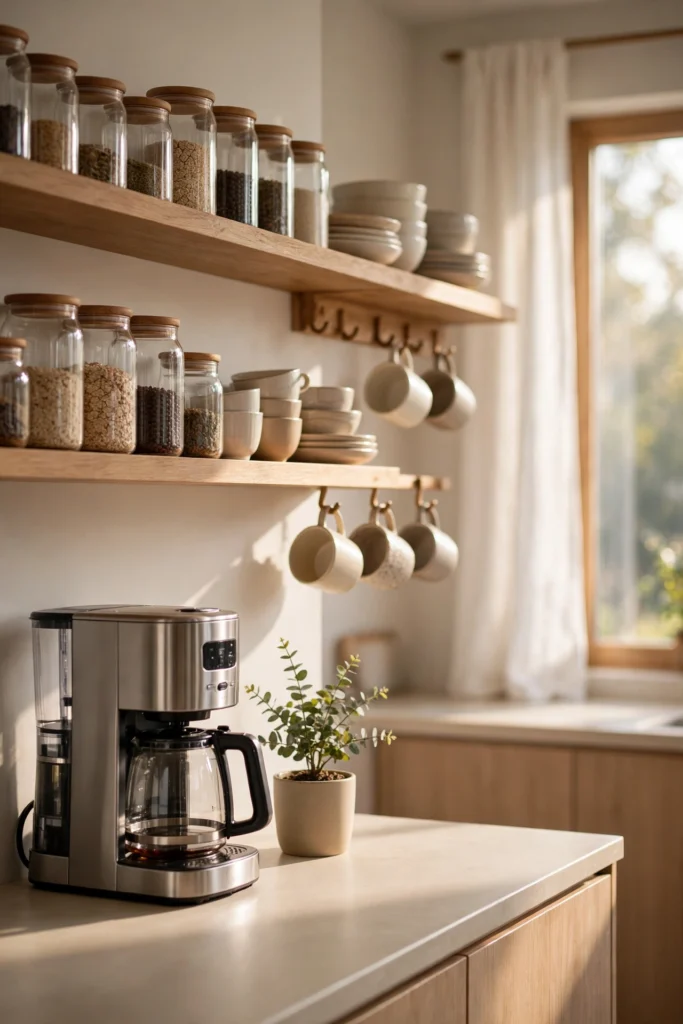
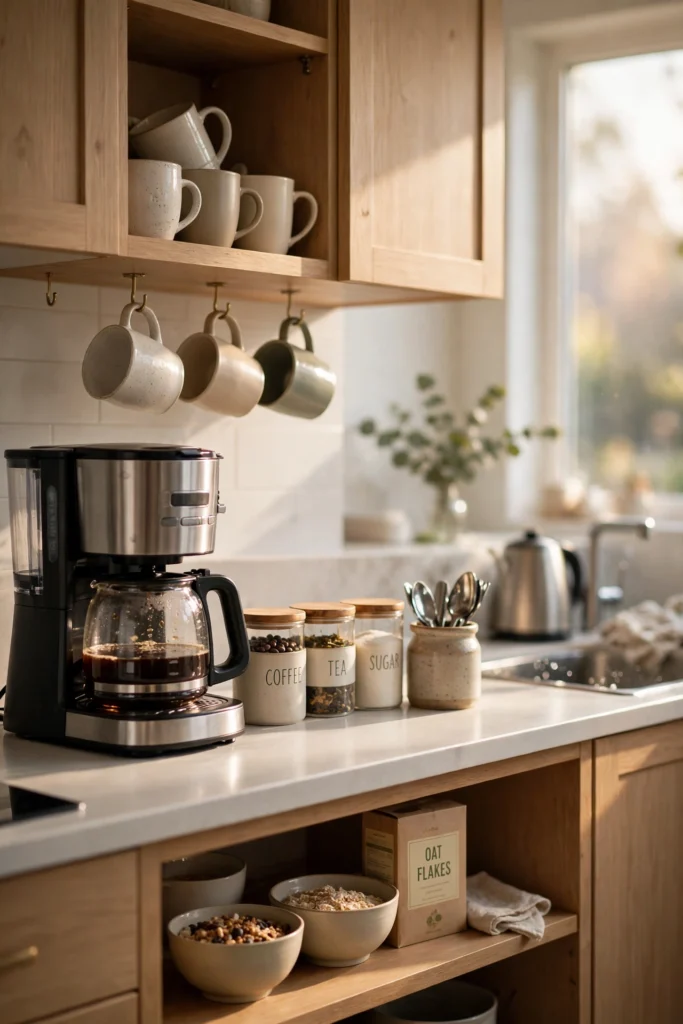
Pick one stretch of counter near your kettle or coffee maker. That is your morning station. Everything you need for the first hour of the day should live within one or two steps of it. Mugs in the cupboard directly above. Coffee or tea, sugar and spoons in the drawer or shelf beside it. Breakfast bowls and cereal on the shelf below the mugs. The toaster stays on the counter only if you use it most mornings. If you use it twice a week, it can live in a cupboard and come out when needed.
Our coffee zone used to be spread across three cupboards. Mugs in one, coffee in another, spoons in a drawer on the far side of the room. Every morning felt like a small treasure hunt. Now the whole routine happens in one corner, and the rest of the kitchen stays clear while breakfast happens.
If your mornings run on coffee, a tidy coffee corner is worth doing properly. For more small-space ideas, look at these coffee station ideas for small apartments and borrow the layout that fits your counter, not the one that looks best in a photo.
What goes in the coffee zone, and what stays out
Keep it tight. A coffee zone works because it holds only morning things. The moment you add lunch boxes, vitamins and random chargers, it stops being a zone and becomes another cluttered corner.
Try this list as a starting point, then adjust it to your household. Mugs for the people who live there, plus two spare mugs for guests. Coffee, tea and sugar. Spoons and a small tray or mat under the machine to catch drips. Breakfast bowls, small plates and cereal. Honey, jam and butter if you eat them at breakfast. That is plenty.
What stays out? Baking trays, lunch containers, cleaning sprays and anything you use after 10 in the morning. They have their own zones. Let them live there.
Think about water, too. If your kettle sits far from the sink, you carry a heavy kettle across the room every morning. Move the kettle closer to the sink if you can, or move the coffee zone to the counter nearest the tap. Small distances matter when you repeat them every day.
Zone two: the cooking zone around the stove
Once the coffee zone works, move to the stove. This is where most of the walking happens during cooking, so getting it right saves you time at every meal.
Stand at the stove and reach out. The cupboard to your left and right should hold the pans you use most. The drawer below or beside the stove should hold wooden spoons, spatulas, tongs and a ladle. Oils, salt and pepper should sit within arm’s reach, not across the room in the pantry. Oven gloves should hang or sit in the nearest drawer, not in a cupboard you have to cross the kitchen to reach.
We moved our most used frying pan from a high cupboard to the cupboard beside the stove, and it changed dinner. No more dragging a step stool out to cook an egg. No more lifting a heavy pan over my head. Small moves like that add up to a kitchen that feels easy instead of awkward.
Pots, pans and lids without the clatter
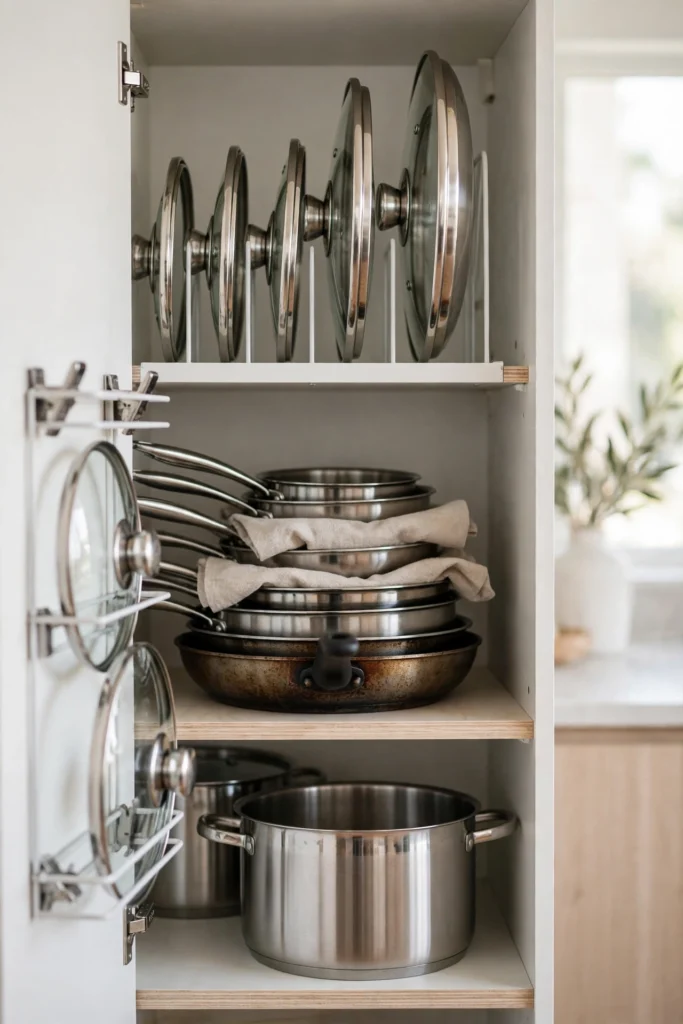
Lids are the usual problem in the cooking zone. They slide, they clatter, they hide at the back. Give them a home of their own. A simple lid rack inside a cupboard door, a file holder turned on its side, or a narrow vertical divider all work. The trick is to store lids upright, not stacked flat on top of each other. You can see each size at a glance, and you can pull one out without the whole pile shifting.
Stack pans by size with the smallest inside the largest, and put a cloth or paper towel between them if they scratch easily. Keep the pan you use most on top or at the front. If you have to move three pans to reach the one you want, that pan is in the wrong place.
Be honest about how many pans you need. Most home cooks use two frying pans, one saucepan and one large pot for most meals. The rest are useful now and then, and they can live higher up or in a lower cupboard. You do not need to throw them away. You just need to stop letting them block the pans you use every day.
Zone three: the pantry, grouped by task
The pantry is where most kitchen organization plans fall apart, because it is easy to group food by type and still never find anything. Pasta with pasta, cans with cans, snacks with snacks. It looks tidy on day one, and it stops working by week two. Group by task instead, and the pantry starts to make sense.
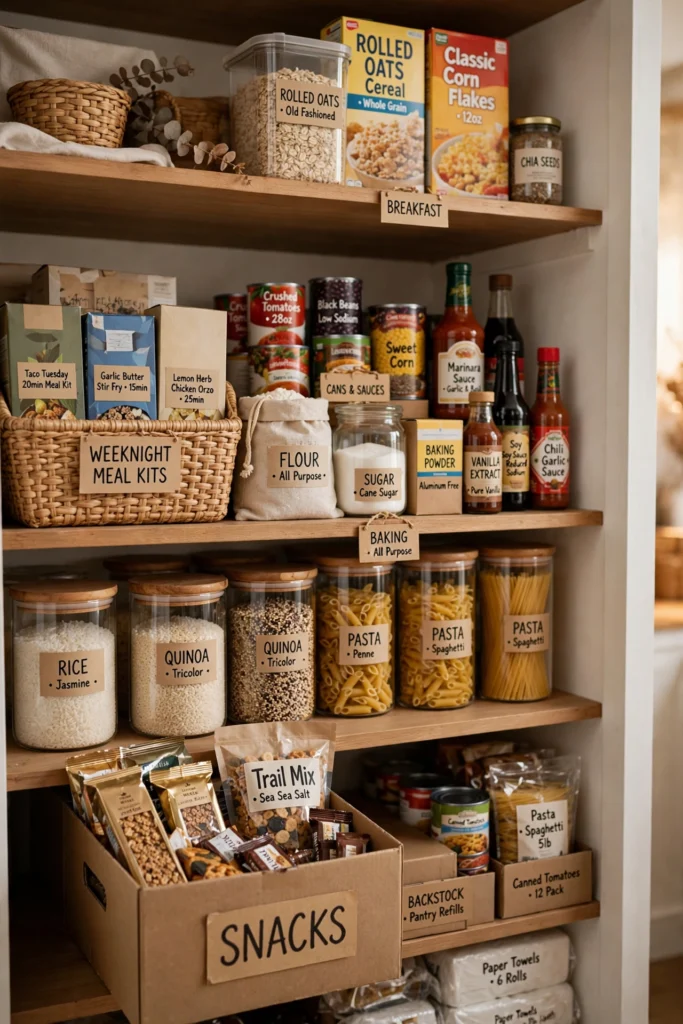
Think about how you actually cook. A weeknight meal kit needs its own spot. Baking needs flour, sugar, baking powder and vanilla together. Breakfast needs oats, cereal and honey in one place. Snacks need a box you can pull out whole. When you group by task, you grab one group and you have everything for that job.
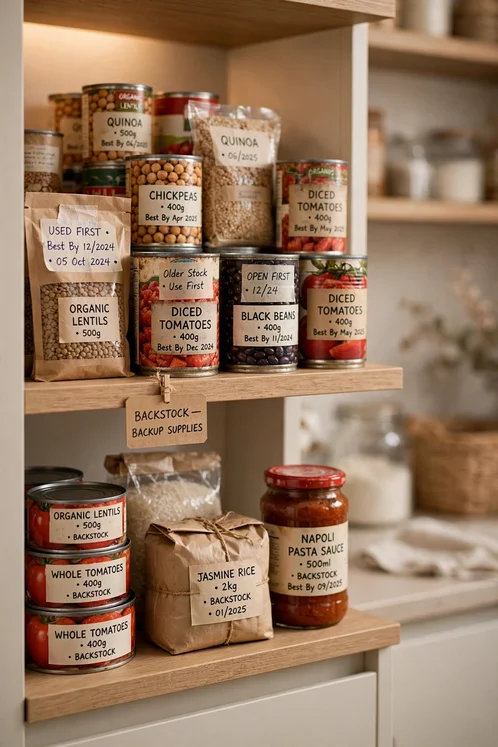
Try these groups as a starting point. Meal kits and quick dinners together. Baking goods together. Grains and pasta together. Cans and sauces together. Breakfast foods together. Snacks in one box or basket. Backstock, the spare cans and packets you bought on offer, on a low or high shelf, clearly separate from the food you are using this week.
If pantry planning feels new, these frugal pantry organization tips for beginners are a good companion read, because they focus on using what you already have before you buy anything new.
Decant the staples you touch every week
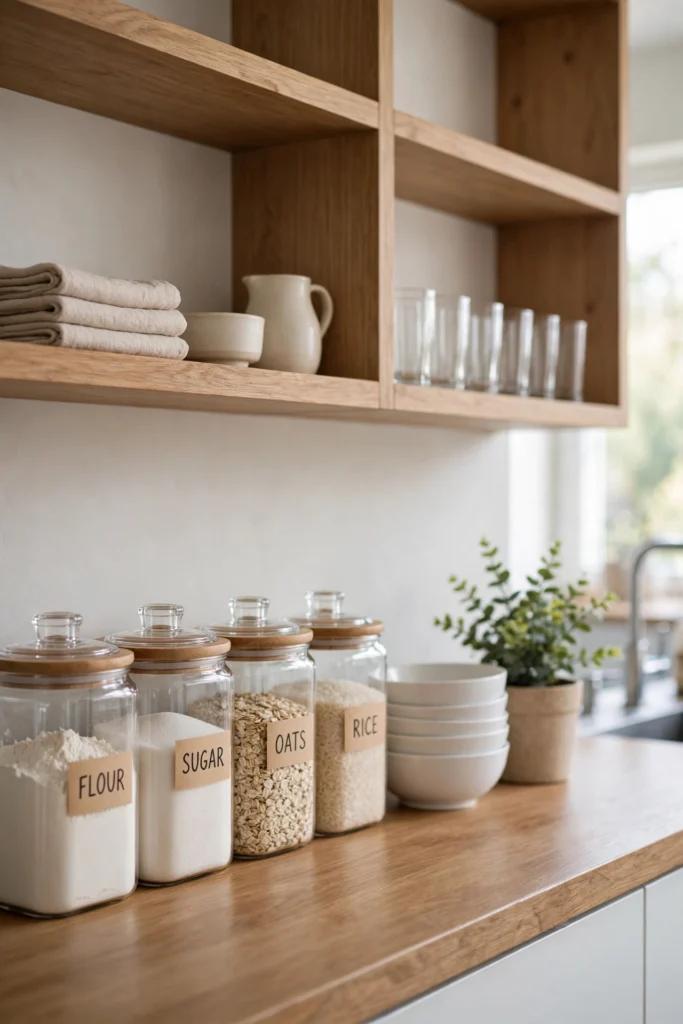
Decanting means moving food out of its shop packaging into a solid container you can see through. It works best for flour, sugar, rice and oats, the staples you pour from again and again. A clear, airtight container shows you at a glance how much is left, and it keeps the food fresh and free from spills.
Do not decant everything. You do not need a matching set of containers for every packet in the pantry. That is a photo, not a plan. Decant the four or five staples you use most, and leave the rest in their packets until you know the system works for you.
Label every decanted container on the front, not the lid. Lids get swapped, and a label on a lid soon labels the wrong food. Write the contents and the date you filled it. A simple piece of tape and a pen work fine. You do not need a label maker to run a good pantry.
Choose containers that fit your shelves, not the other way round. Measure the shelf height before you buy. A container that is half an inch too tall will not fit, and a container that is too wide wastes space at the sides. Square and rectangular containers use shelf space better than round ones, because they sit flush against each other without gaps.
First in, first out, and the backstock rule
First in, first out is a simple habit. When you buy new food, put it behind the older food of the same kind. Use the older packet first. That one habit cuts food waste more than any container ever will.
It helps to keep backstock separate. Backstock is the extra tin of tomatoes, the second bag of rice, the spare jar of sauce. Put it on a low shelf or a high shelf, in one clear spot. When the main shelf runs low, you refill from backstock, and you add backstock to your shopping list. That way you never buy a third bag of rice when you already have two at the back.
Check the pantry every three months for food past its date. Cans dent, packets tear, and jars hide at the back for longer than you think. A short check four times a year keeps the pantry honest, and it stops you cooking with ingredients that went stale months ago.
Deep shelves without the black hole
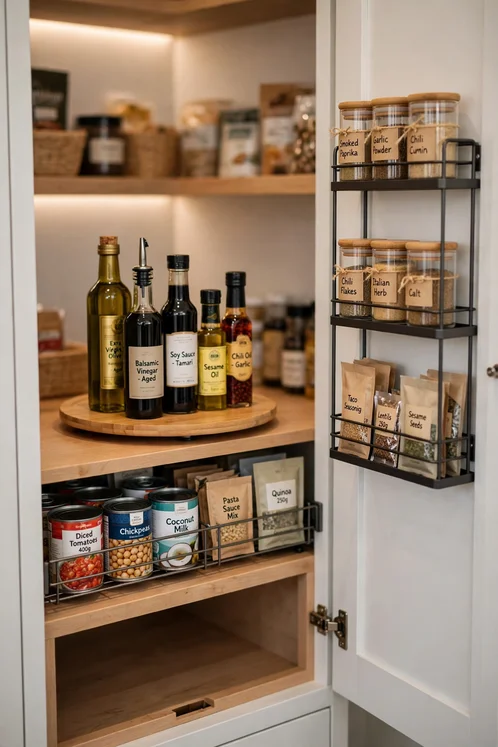
Deep pantry shelves are the hardest space in the kitchen. Things slide to the back and vanish. The fix is to make the back reachable, not to fill the shelf fuller.
A turntable works well for oils, vinegars and sauces. One spin brings the bottle at the back to the front. A long, narrow bin works like a drawer you can pull out. Put cans or packets in the bin, slide it out, and you can see everything without reaching into the dark.
Leave a little empty space on every shelf. A shelf packed edge to edge looks full, but you cannot take anything out without moving three other things. A small gap at the front of each shelf gives you room to pull a container forward and put it back without a shuffle.
If your pantry is a tall cupboard rather than a walk-in space, use the door. Hooks or a narrow rack on the inside of the door can hold small packets, spice jars or measuring cups. Just keep the weight light, so the door still closes easily.
Zone four: the cleaning zone under the sink
The cleaning zone is the least glamorous part of the kitchen, and the one that saves you the most time when it works. Everything you need to clean up should live under or beside the sink, where the mess happens.
Start by taking everything out from under the sink. This cupboard collects half empty bottles, old cloths and cleaning products you bought for one job and never used again. Keep the ones you use every week. Donate or toss the rest, following the rules for safe disposal in your area for anything marked hazardous.
Group what is left into three small sets. Daily cleaning: dish soap, a sponge, a cloth and dishwasher tablets. Weekly cleaning: an all purpose spray, a scrub brush and bin bags. Occasional cleaning: oven cleaner, limescale remover and anything you use once a month or less. Daily things go at the front. Occasional things go at the back.
Fitting storage around pipes
Pipes make the under-sink cupboard awkward, but a few simple tools make it usable. A small shelf or a stackable rack that fits around the pipes creates a second level. Clear bins hold bottles upright so they do not fall over. A tension rod across the top can hold spray bottles by their triggers, freeing the floor of the cupboard below.
Measure the space before you buy anything for this cupboard. Pipes sit in different places in every kitchen, and a shelf that fits one sink will not fit another. Measure the width, the depth and the height from the cupboard floor to the lowest pipe. Write the numbers down. You will use them in the shop, and they will save you a return trip.
Keep a small bin or tray under the sink for leaks. A cheap plastic tray catches drips before they damage the cupboard floor, and it gives you a clear sign if a pipe starts to leak. Check it when you do your weekly reset.

The fridge and freezer: a system that changes every week
The fridge needs a different kind of organization from the pantry, because its contents change every week. You cannot set it once and forget it. You need a layout that makes the weekly shop easy to put away and the weekly clear out easy to do.
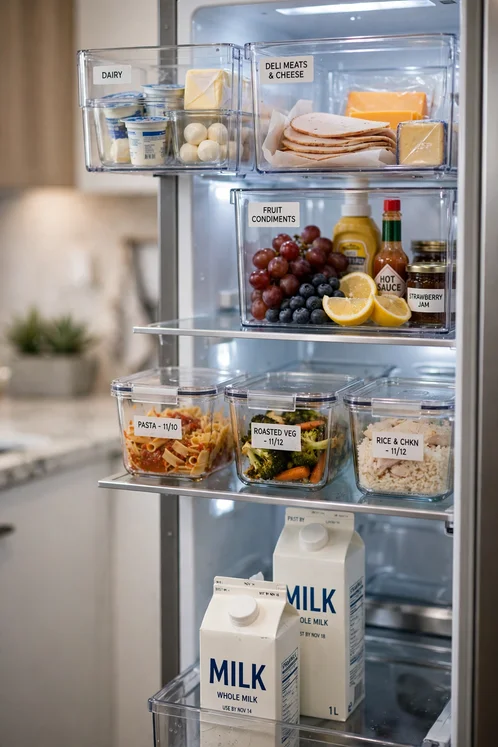
Use clear bins to group similar foods. One bin for dairy, one for deli meats and cheese, one for fruit, one for condiments. When you need something, you pull out the bin, not ten loose items. When a bin is empty, you can see it is empty, and you know what to buy.
Put leftovers where you can see them, at eye level, in clear containers. Leftovers hidden at the back are leftovers thrown away. Label them with the date you cooked them, and plan to eat them within a few days. Square containers stack better than round ones, and they use the shelf space more neatly.
Use the first in, first out rule here too. New milk goes behind the older carton. New leftovers go behind yesterday’s. It takes five seconds when you put the shopping away, and it saves food all week.
Drawers, vertical space and the small gaps
Drawers turn into junk piles without dividers, because small things slide and mix. Give every drawer a job, and give every item in it a slot.
The cutlery drawer should hold cutlery and serving tools only. The cooking utensil drawer should hold cooking tools only. The utility drawer, every kitchen has one, should hold the small extras, and it should be small on purpose. If the utility drawer is the biggest drawer in the kitchen, it will fill with things that belong elsewhere.
Measure each drawer before you buy dividers. Length, width and depth. Adjustable dividers work well when drawers are an odd size. Shallow bins work well for small items like chip clips, rubber bands and twist ties. Line the drawer with a non slip mat if things slide when you open and close it.
Using the walls and the inside of doors
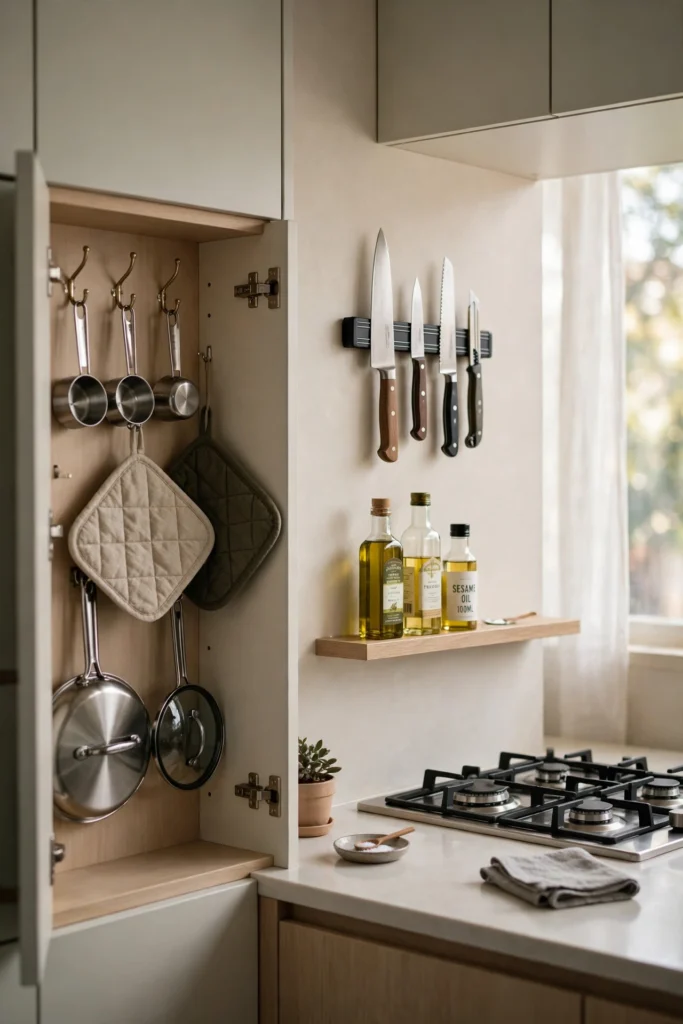
Most kitchens waste the vertical space above the counters and inside cupboard doors. A magnetic knife strip frees a drawer and keeps knives visible and safe. Hooks inside a cupboard door hold measuring cups, pot holders and lightweight lids. A narrow shelf above the stove can hold the oils you use every day, as long as it stays clear of direct heat.
In a small kitchen, these small gains matter more than in a large one. If your kitchen is compact, the layout ideas in these balcony kitchenette ideas for small homes show how much can fit into a tight space when every inch has a job. The same thinking works inside a small flat kitchen, too.
Measure first, buy containers second
This is the rule that saves the most money in a kitchen reset. Do not buy containers before you know what they need to hold and where they need to fit.
Live with your new zone layout for a few days first. Cook real meals. Make real breakfasts. Notice where things pile up, where you reach twice for the same item, and where a container would actually help. Then measure the space, write the numbers down, and buy only what solves a clear problem.
Measure shelf width, depth and height. Measure drawer length, width and depth. Measure the height under the sink from the floor to the lowest pipe. Take a tape measure to the shop, or take a photo of the numbers on your phone. A container that looks right in the shop often looks wrong at home, and the numbers stop you guessing.

Making an organized kitchen look good, too
Organization and style are not enemies. A kitchen that works well can also look calm and welcoming, and a few small style choices help the organization last.
Keep colours calm on open shelves. Matching containers in one or two colours look tidier than a mix of bright packaging. Clear containers show the food, which is useful, and they look neat because the contents are visible and level. If you prefer solid containers, label them clearly so you never have to open five jars to find the rice.
Open shelves need a lighter touch than closed cupboards. If you have open shelves, keep them to a few matching items, a row of glasses, a stack of bowls, a small plant. For ideas on styling those shelves so they look intentional rather than crowded, these shelf decor tips for a designer look are a useful guide, and they work just as well in a kitchen as in a living room.
Small kitchens benefit most from this calm approach, because every object is visible. If you live in a compact home, look at these apartment design ideas for modern living for ways to keep a small space feeling open while every zone still has what it needs.
Frequently asked questions about organizing your kitchen
Where should I start when my kitchen feels overwhelming?
Start with the coffee zone, or with one drawer. Both are small, both give you a quick result, and both teach you the zone method without a whole weekend of work. Once one small area works, the rest feels possible. Do not start by pulling everything out of every cupboard at once.
How long does it take to organize a kitchen properly?
A full reset usually takes one weekend of focused work, with short sessions and breaks. A single drawer takes about 30 minutes. A pantry takes about two hours. The test week after the reset matters just as much as the weekend itself, because that is when you learn what needs to move.
Do I need to buy new containers to organize my kitchen?
No. You can organize a kitchen well with boxes, jars and bins you already own. Buy a container only when it solves a clear problem, like cans falling over or sauces hiding at the back of a deep shelf. Measure first, buy second, and buy in stages.
How do I keep my kitchen organized after the reset?
Use a short daily reset and a ten minute weekly reset. Put things back where they belong each evening, run and empty the dishwasher, and wipe the counters. Once a week, check the fridge, top up the pantry from backstock, and write a short restock list. Small habits keep the zones working.
The Sunday reset that keeps it working
Here is the truth about kitchen organization. The weekend reset is the easy part. Keeping it working is the real work, and it takes far less time than you think.
Give yourself ten minutes every Sunday. Not an hour. Ten minutes, with a timer if it helps. That is enough to keep the whole system alive.
Start at the fridge. Pull out anything past its date and any leftovers no one will eat. Move older food to the front. Wipe one shelf if it needs it. That takes three minutes, and it stops the fridge from turning into a storage box for forgotten food.
Next, check the pantry. Top up the main shelves from backstock. Rice, pasta, cans, cereal. Write down anything that needs buying, and add it to your restock list. Do not guess. Open the containers, look inside, and write what you see.
Then walk the zones. Coffee zone tidy? Cooking zone clear? Cleaning cupboard stocked? Put back anything that drifted. A mug left in the cooking zone goes back to the coffee zone. A sponge left on the counter goes back under the sink. Small moves, done weekly, stop the slow drift that ruins most resets.
Finish by wiping the counters and emptying the bin. Put the donations bag by the door if you filled one. Take the rubbish out. Leave the kitchen the way you want to find it on Monday morning.
That is the whole reset. Ten minutes, once a week, and the kitchen you worked so hard to organize stays organized. Not perfect. Not photo ready every day. Just easy to use, easy to cook in, and easy to come home to.
Start this weekend. Pick the coffee zone on Saturday morning. Make your first cup in a kitchen where everything is within reach, and notice how different the morning feels. Then keep going, zone by zone, until the whole room works the way you do.